How to dial in a new bag of beans in just three shots
You know that sinking feeling when you finally settle in to enjoy your morning espresso, only to be met with a bitter, sour, or flat taste? I’ve been there—a fresh bag of beans, hyped to brew, but somehow, my shot ends up a disappointment. It’s frustrating, right? Especially when you’re eager to unlock that rich, nuanced flavor profile you know your beans can deliver. I used to think I just needed more practice or better equipment, but over time, I realized the real secret lies in dialing in your grinder and extraction with precision, especially when working with new beans.
The Big Lightbulb Moment: Why Fresh Beans Need More Than Just Grinding Harder
When I first started experimenting with new coffee beans, I was eager to taste their true potential. But no matter how fine I adjusted the grinder or how much I tamped, the shots didn’t quite hit the mark. I kept thinking, “Am I doing this wrong?” It turns out I was missing a critical step—properly dialing in for that specific batch. Fresh beans are unpredictable; their moisture content and roast level can significantly influence extraction. This is why relying on the same grind size and extraction time from old beans doesn’t work. I learned that the key is in adjusting systematically over the first few shots—usually just three—to find that sweet spot. And no, it’s not magic; it’s about understanding your beans’ behavior and making small, deliberate tweaks.
So, what exactly will we cover today? I’m going to walk you through my proven method for dialing in your new beans in just three shots—no more guesswork or wasted coffee. By the end of this post, you’ll be able to consistently craft a delicious shot, even when switching varieties or roasts. Plus, I’ll share some common pitfalls to avoid that I wish I’d known from the start. Trust me, once you nail this process, those disappointing first shots will become a thing of the past.
Ever felt skeptical that dialing in in just three shots is even possible?
This way of thinking kept me from trying it for a long time—after all, coffee is complex! But I’ve made plenty of mistakes early on, like rushing the process or making huge adjustments that threw everything off. One mistake I made was thinking I could dial in by just adjusting one parameter—turns out, it’s a balancing act. To learn more about common timing and extraction issues, you might want to look into how to fix salty-tasting espresso by fine-tuning your grind and extraction process here. Understanding these nuances makes all the difference and prevents you from throwing good beans down the drain.
Now that I’ve shared my experience and what you can expect, let’s get ready to demystify this process. The upcoming steps aren’t about overhauling your routine—they’re about making smart, confident adjustments that suit the unique qualities of your new beans. Ready to get started? Let’s dive into the first shot and see how your beans respond.
Start With a Baseline Grind Setting
Begin by setting your grinder to a medium-fine grind, similar to table salt. This universal starting point is familiar and provides a manageable baseline. Recall a time I used this setting; my first shot was slightly under-extracted, tasting sour and thin. I knew I needed to make small adjustments from there.
Pull the First Shot and Assess
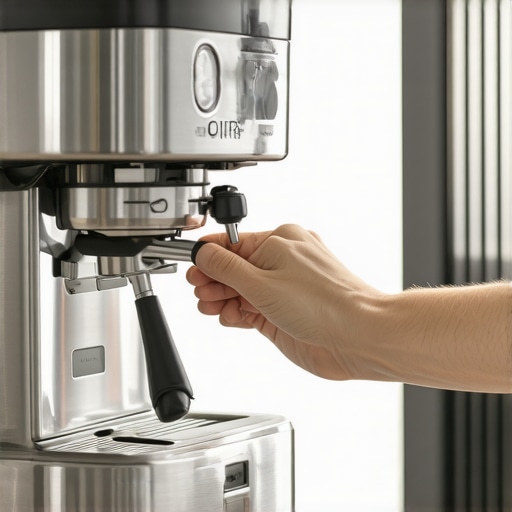
Pull a shot using your initial grind. Watch closely: the pour should take around 25-30 seconds. If it’s significantly faster, your coffee is under-extracted; if slower or stalls, it’s over-extracted. Think of your espresso machine like a delicate water pump—adjusting pressure and flow is essential. Remember, fresh beans can behave unpredictably, so don’t be discouraged by minor deviations.
Adjust Grind Size in Small Steps
Make tiny adjustments—no more than a quarter turn of the grinder knob. For a fast shot, dial coarser; for a slow shot, go finer. I once faced a shot that was flowing in 15 seconds; I turned my grinder just a quarter turn finer, and the next shot improved dramatically. This incremental approach prevents over-correcting, which can turn a good shot into a bad one.
Re-evaluate and Tweak Extraction Time
Run a second shot after each adjustment. Aim for 25-30 seconds extraction time. Measure the shot time precisely—think of it as fine-tuning a musical instrument. If the timing is off, adjust accordingly in small steps. It’s like tightening or loosening guitar strings; small changes make big differences.
Check for Consistency and Puck Quality
Ensure your tamp is even—use the simple cork trick to distribute grounds evenly. A well-distributed puck prevents channeling, which causes inconsistent extraction. Recently, I used this technique and noticed my shots became much more uniform, reducing bitterness caused by over-extraction.
Identify and Correct Channeling
Channeling occurs when water finds a path of least resistance—look for a thin, fast pour or uneven flow. To fix this, try using a paper filter in the basket during tamping. I experienced persistent channeling until I added one, which smoothed out flow and enhanced flavor clarity.
Handle Fresh Beans’ Unique Behavior
Fresh beans often produce more static and sticky grounds, making dosing challenging. Use this method to reduce static: tap your grinder lightly or use a magnet to tame the chutes. Remember, different roasts and freshness levels demand more patience and small adjustments—treat each batch like a new puzzle.
Incorporate Minor Details for Better Results
Pay attention to grind retention—often, small amounts of coffee remain in grinder chambers, impacting dose consistency. Check out this tip to clear residuals. Also, pre-warm your portafilter to avoid temperature swings that affect extraction—simple hot water flushes do the trick.
Refine and Record Your Adjustments
Keep a small log of your settings, shot times, and tasting notes. Over time, you’ll identify patterns and tailor your process to each batch. Think of it as building a personalized recipe book, where each variable is meticulously noted for future success.
Many home baristas believe that investing in high-end espresso machines or fancy grinder brands guarantees perfect shots every time. However, the truth is that most people overlook the nuanced interplay between machine settings, grinder calibration, and technique. For example, a common myth is that a more expensive machine will automatically produce better espresso—yet, even premium machines can underperform if not properly maintained or adjusted, such as lacking the correct temperature calibration for light roasts here. Another frequent error involves milk frothers; many assume that more expensive frothing wands yield superior microfoam, but in reality, mastering proper steaming techniques and pitcher angles matters far more than gear quality. For instance, a simple adjustment in your steaming angle can significantly improve your latte art, which you can learn about in this guide.
Let’s get technical—how many baristas realize that even seemingly small inconsistencies in tamping pressure or distribution can lead to channeling, resulting in uneven extraction and salty-tasting espresso? This subtlety often trips up enthusiasts unaware of the importance of ground distribution, which can be seamlessly addressed with techniques like the cork trick. Moreover, many users underestimate the static buildup generated by flat burr grinders, which can cause uneven dosing and inconsistent grind size—learning how to prevent static can make your grind uniform and your shots more predictable. Check out this article for details.
A crucial but often overlooked misstep is neglecting regular calibration of your grinder after replacing burrs or changing grind settings. Without calibration, you’ll unknowingly produce inconsistent grounds, affecting shot quality. Honest calibration is key, and tools like precision scales help ensure dose consistency. Also, many underestimate the importance of machine maintenance, such as descaling boilers or checking for pressure leaks. Ignoring these can cause subtle but impactful flavor issues, like saltiness or sourness, that are hard to diagnose without knowledge about proper extraction. For advanced troubleshooting, reviewing this guide can save you from costly mistakes.
Have you ever fallen into this trap? Let me know in the comments. The world of home espresso is full of hidden nuances that separate good from truly great results. Paying attention to these details, rather than just gear specs, empowers you to craft professional-quality coffee right in your kitchen.
Keeping It Working: Tools I Recommend for Home Baristas
Maintaining your espresso setup is vital to achieving consistent results and extending the lifespan of your equipment. One tool I personally find indispensable is a high-precision calibration scale. It allows me to accurately measure coffee doses and shot weight, ensuring consistency shot after shot. I use the precision scale to monitor my doses and shot weight, which has dramatically improved my extraction quality.
Another essential tool is a dedicated grinder cleaning kit. Static buildup and coffee oil residue can cause uneven grinding and stale flavors. I routinely use a grinder cleaning kit to ensure my burrs stay free of oils and static, helping me maintain a consistent grind and dose.
For troubleshooting water quality issues, investing in a water test kit is worth considering. Hard water can cause scale buildup and flavor issues. Regular testing helps me decide when to descale, preventing long-term damage. Descaling is crucial—refer to this guide for best practices.
Implementing a routine maintenance schedule with these tools keeps my setup performing at its best and reduces downtime. Moving forward, I predict that smart, IoT-enabled machine monitors will become more popular, alerting us proactively when maintenance is needed, which could take the guesswork out of long-term care.
How do I maintain my equipment over time?
The key is consistency. Set a weekly schedule to clean and inspect your grinders, descale your machine based on water hardness, and calibrate your dosing tools. Regularly checking for wear and tear prevents small issues from turning into costly repairs. Remember, a well-maintained machine not only produces better espresso but also extends its usable life, saving you money in the long run. For example, regularly inspecting the portafilter basket ensures proper fit and prevents leaks or uneven shots.
One advanced tip I suggest trying is calibrating your grinder after replacing the burrs. Even a slight misalignment can cause uneven grinds, leading to channels or sour shots. Use a calibration procedure to fine-tune your grinder for peak performance. A small investment in calibration tools can pay off in shot quality and consistency.
The Hidden Lessons That Changed My Espresso Game
One of the most eye-opening insights I gained was realizing that not all beans are created equal—especially when they’re fresh. I used to believe that if my shot was off, it was my technique that needed work. But I discovered that understanding the *behavior* of fresh beans—how they respond to grind size, tamping, and extraction time—is crucial. Small tweaks, like adjusting your grind in tiny increments or pre-wetting your puck, can make a world of difference. This lesson taught me to approach each batch with curiosity and patience, rather than relying on a fixed routine.
Fine-Tune with Precision, Not Guesswork
One of my go-to strategies became pulling just three shots to dial in new beans. This systematic approach helped me identify the ideal grind and shot time without wasting expensive coffee. I found that relying on a consistent process—assessing pour color, timing, and taste—allowed me to develop a reliable routine. Over time, I built a mental map of how different roasts and freshness levels respond, so I can make confident adjustments on the fly, which elevates my espresso game significantly.
Don’t Overlook the Basics—Even When Things Go Wrong
It’s tempting to chase after complex fixes or invest in high-end gear, but I learned that perfecting small details matters most. For example, using the cork trick to evenly distribute grounds or ensuring your puck is uniformly tamped prevents channeling and over-extraction. These simple practices have saved me countless trouble and inconsistency, proving that mastery often lies in the basics done right.
Experimenting Is the Key to Confidence
Once I embraced a mindset of experimentation—making small adjustments and recording results—I gained confidence in my ability to handle any bean, roast, or machine. I started noticing patterns: light roasts require slightly coarser grinds, fresh beans need more attention to static buildup, and equipment calibration can be a game changer. Trusting this process turned espresso from a mystery into an enjoyable challenge, one that rewards patience and observational skills.
Curated Arsenal to Boost Your Espresso Skills
Over the years, I’ve come to rely on a few tools that make all the difference. A high-precision calibration scale helps me dose accurately and evaluate shot weight, ensuring consistency. A grinder cleaning kit keeps static and oil residues at bay, leading to a stable grind every time. For water quality, I trust my water test kit to prevent scale buildup and flavor issues. These tools have become staples in my routine, and I suggest anything that helps you monitor and maintain your setup should be part of your arsenal.
You Hold the Power to Elevate Your Espresso Practice
The journey from a disappointing shot to barista-level quality is rooted in attention, patience, and a willingness to learn. Every new batch, every tweak, and each practice session is an opportunity to refine your craft. Whether you’re just starting or looking to perfect your technique, remember that mastery isn’t about speed or gear alone—it’s about developing an intuitive understanding of your beans and equipment. So, go ahead—try that third shot, experiment with small adjustments, and enjoy the process of becoming a true espresso artisan.
What’s the biggest challenge you’ve faced when dialing in new beans? Share your story below—I’d love to hear how you’ve overcome it!
.