How to Set Up Your Espresso Corner for the Faster Morning Workflow
It was 6:30 AM when I finally realized I was completely unprepared for today’s rush — my kitchen counter cluttered with half-assembled gadgets, stray coffee beans, and a bittersweet smell of stale espresso from yesterday’s brewing attempt. I had hit the snooze button one too many times, rushing to get my caffeine fix, only to be stopped cold by tangled cords and misplaced tools. That moment of frustration became my awakening: I needed a dedicated, efficient setup for my espresso station to truly enjoy those precious morning minutes.
Why a Well-Organized Espresso Corner Can Change Your Mornings
A properly arranged coffee nook isn’t just about aesthetics; it’s about reclaiming your time, reducing morning stress, and making your espresso ritual genuinely enjoyable. When everything has its place, the seconds saved from hunting for tools or cleaning up clutter add up quickly. According to a study published by the Harvard Business Review, streamlining daily routines allows people to start their days with a sense of control, boosting overall productivity and well-being. If you’ve ever felt that starting your day feels like a frantic scavenger hunt, I can tell you this — the secret lies in a setup designed for speed.
Before you dismiss this as overly meticulous or unnecessary, ask yourself: have I faced mornings where I was *too* rushed to enjoy that first sip of coffee? Or worse, failed to even brew because everything was scattered? If yes, you’re not alone. Many home baristas stumble early on, often making a crucial mistake — trying to fit all their gear into a small space without an efficient workflow. I did the same, and it slowed me down more than I realized. Thankfully, I’ve learned to optimize my setup, and I’ll share how.
Is Setting Up a Dedicated Espresso Corner Really Worth the Effort?
Absolutely. Investing time in a dedicated space prevents the endless search for tools and reduces clutter that hampers your brewing. Plus, it allows you to focus on honing your skills instead of battling your environment. Curious about how to get started? Let’s dive into creating the ideal home espresso station together.
If you’ve faced these frustrations, keep reading. The next steps will guide you through simple, practical changes to turn your mornings from chaos into calm.
Designate Your Workspace for Efficiency
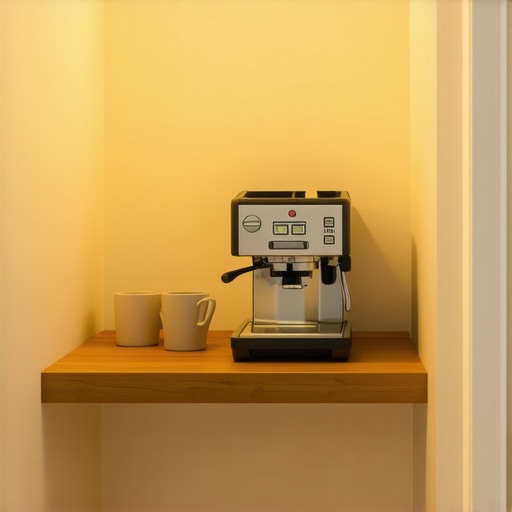
Choose a dedicated corner with stable surface space. Clear away unnecessary items and set up a level platform using a sturdy wooden or acrylic board. This minimizes vibrations and ensures consistent shots. For example, I assigned a small space on my kitchen counter and cleared everything else, which transformed my workflow overnight.
Organize Your Barista Tools Strategically
Arrange your grinder, espresso machine, and milk frother within arm’s reach in a logical sequence. Place frequently used items—like your coffee tamper and portafilter—on small trays or hooks. Use drawer organizers to keep small accessories tidy. Remember, a cluttered space slows you down; an organized one speeds up your morning.
Set Up a Quality Coffee Grinder
Invest in a grinder with consistent grind size, like a conical burr grinder. Position it near your espresso machine. Lock in your grind setting before brewing to save time. I once spent 10 minutes fiddling with grind fineness at the start of my session—learning to preset my grinder saved me minutes each morning. Need help choosing? Check out how to select the perfect coffee grinder.
Secure Your Espresso Machine Properly
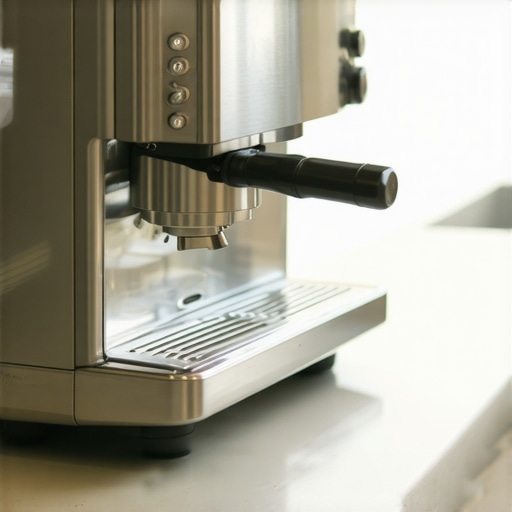
Place your machine on a stable, heat-resistant surface. Connect it to a dedicated power circuit to prevent voltage drops. Use a silicone mat underneath to dampen vibrations, which can affect shot consistency. For a quick fix, I used an anti-vibration mat I found online; it reduced noise and movement, making my espresso shots more predictable.
Optimize Milk Frothing Setup
Position your milk frother close to your espresso station. Keep your milk pitcher clean and cold for better microfoam. For best results, use a small, flat-bottomed pitcher (about 12 oz) to control the pour. Create a dedicated space for milk accessories to streamline your frothing process. Discover how milk frothers can elevate your home barista game.
Implement Maintenance and Cleaning Rituals
Schedule weekly cleaning routines: descale your machine, brush your grinder burrs, and wipe surfaces with non-abrasive cloths. Keep cleaning supplies handy—brushes, descaling solution, cloths. When I neglected this, flavor deterioration was rapid. Regular upkeep ensures top-notch espresso every time, saving you from costly repairs or flavor disasters.
Label and Store Your Supplies
Use small jars or baskets for coffee beans, filters, and accessories. Label them clearly to avoid confusion. Store beans in airtight containers away from light and heat to preserve freshness. When I labeled my beans and organized my tools, I found I wasted less time searching and brewed more enjoyable shots.
Fine-Tune Your Workflow
Practice a consistent routine: grind, dose, tamp, brew, steam, and pour. Use a timer to record shot duration, adjusting grind size as needed. Record your settings and shots in a notebook or app. This methodical approach minimizes guesswork and leads to perfect espresso-styled drinks every morning.
When diving into the world of home espresso, many enthusiasts fall prey to misconceptions that can hinder their progress and enjoyment. One of the most pervasive myths is that pricier equipment automatically guarantees better coffee. While high-quality gear can certainly help, it doesn’t compensate for improper technique or setup. For example, a top-tier espresso machine paired with a poorly calibrated grinder or inconsistent tamping will still produce subpar shots. Remember, mastering the fundamentals is more impactful than investing solely in expensive gear. You can explore detailed tips on choosing the right grinder and perfecting your brewing technique.
Another common mistake revolves around milk frothers. Many users assume all frothers are created equal, but the nuances in design significantly affect foam quality. For instance, handheld frothers may struggle to produce microfoam required for latte art, whereas steam wands, when properly adjusted, can create velvety textures. An often overlooked aspect is the cleanliness of your frothing tools; residual milk fats can spoil future textures. Proper maintenance and understanding of each frother’s capabilities are crucial for elevating your coffee experience. You can find more insights in this guide to milk frothers.
Moving to coffee grinders, a typical error is ignoring static buildup, which causes grounds to cling to the burrs and chute, affecting grind consistency. Conical burr grinders tend to generate more static than flat burrs, especially when grinding small doses. This static leads to uneven extraction and wasted beans. Solutions include adjusting grind size, using anti-static settings, or employing techniques to neutralize static—such as lightly dampening the chute without water to prevent clogs. For more advanced tips, visit this article on static management.
Don’t fall into the trap of oversimplifying tamping as just pressing down harder. The myth that tamping pressure is king persists, but the truth is that consistency and distribution matter more. Over-tamping can cause resistance that suppresses extraction, while under-tamping leads to channeling. The right approach involves even distribution of grounds and moderate tamping pressure, generally around 30 pounds of force, for optimal results.
A critical advanced nuance to consider is the importance of machine calibration. Even top machines need periodic recalibration to ensure consistent pressure and temperature. Neglecting calibration can lead to discrepancies in shot quality despite correct technique. Regularly checking and adjusting your espresso machine’s settings, or consulting with a professional, can dramatically improve outcomes. For a comprehensive guide, see this calibration tutorial.
Engaging with complex nuances like these elevates your home brewing from casual to professional-grade. Are you applying these advanced techniques yet? Don’t let common myths undermine your progress. Dive deeper, experiment thoughtfully, and share your experiences in the comments. Remember, becoming a skilled home barista involves continuous learning and refinement.
How do I maintain my espresso station over time?
Maintenance is the backbone of consistent, high-quality espresso brewing. I personally rely on a combination of professional-grade cleaning supplies and precise calibration tools to keep my equipment performing at its peak. For instance, I use a dedicated espresso cleaning brush set to remove stubborn coffee oils from group heads and a descaling solution approved for copper boilers, like this specialized solution to prevent mineral buildup without damaging sensitive components.
Equipping myself with a high-quality espresso scale, like the accurate, calibrated brewing scale, allows me to track shot times and espresso yield precisely. Regular calibration ensures consistency across shots and prolongs equipment lifespan. Moreover, I’ve invested in a precise grinder calibration kit, which proves invaluable when switching bean types or adjusting for roast levels—this helps optimize grind consistency and prevents common static issues (static management techniques). Keep in mind, a well-maintained grinder not only improves flavor but also reduces wear on your machine.
Another critical aspect involves keeping your milk frother and steam wand spotless. I advocate regular deep cleaning using a descaling and milk system flush, especially if you use your machine daily. This prevents milk residue from spoiling microfoam quality and avoids the growth of bacteria that can cause bad odors or machine malfunctions. Follow detailed procedures outlined in this cleaning guide.
Recommended tools for ongoing maintenance and tuning
For ongoing adjustments, I recommend a calibration kit for scales, a flat-head screwdriver for machine-specific calibration tasks, and a set of precision tamping mats to maintain consistent tamping pressure. These tools help achieve uniform shots, even when your setup evolves with new beans or technique modifications.
Looking ahead, I believe the future will see smarter, AI-driven maintenance tools that can automatically detect machine issues before they influence your brew. Companies are already experimenting with sensors that monitor pressure and temperature deviations in real-time, offering proactive alerts. Integrating such technology could be a game-changer for enthusiasts seeking to sustain their equipment’s longevity effortlessly.
Advanced tips to stretch your tools’ lifespan
One effective tip is to regularly perform a pump priming procedure on your espresso machine, which prevents dry running and extends pump life. Additionally, applying a light coat of food-safe, high-temperature lubricant on moving parts like sealing gaskets can reduce wear and prevent leaks. Don’t forget to keep your water reservoir clean and free of debris—using a gentle, chemical-free cleaning method ensures optimal flow and reduces mineral buildup.
Try implementing a weekly maintenance routine where you check these key components, and see how your espresso quality improves with consistent care. Small, regular efforts can dramatically prolong the life of your gear, saving you money and ensuring every shot tastes as good as the first. If you’re unsure how to get started or need tailored advice, reach out through our expert consultation.
Lessons Only the Bold Home Barista Learns
One of the most enlightening lessons I discovered is that premium equipment alone won’t elevate your espresso craft—technique and setup are king. I once believed a shiny, expensive machine would compensate for my inconsistent tamping, but I was quickly proven wrong. It’s the finesse of your workflow and understanding of your tools that truly matter.
Another profound realization was the importance of discerning myth from fact—like insisting that tamping pressure must be exact for perfect shots. Once I accepted that consistency and distribution outweigh force, my espresso quality improved overnight. It’s these insider truths, often overlooked, that can transform your mornings from hit-and-miss to reliable excellence.
Finally, I learned that regular maintenance isn’t just upkeep; it’s an act of respect for your gear and your coffee. Neglecting routine cleaning led to flavor deterioration and costly repairs. Now, I see maintenance routines as an investment that guarantees every cup is as delightful as the first.
Tools That Keep My Bean Game Strong
For any dedicated home barista, a precision grinder is indispensable. I trust the latest top-rated espresso machines because they balance quality and reliability, ensuring consistency shot after shot. When it comes to cleaning and calibration, I rely on specialized kits that let me fine-tune my setup without hassle.
My milk frother of choice is a premium frother that creates velvety microfoam for those latte art attempts—trust me, it elevates the whole experience. Additionally, I swear by a practical set of tools for daily upkeep, which includes a cleaning brush, descaling solutions, and precision measurement scales—elements that make a real difference in quality and durability.
Your Next Chapter Starts Today
The journey to espresso mastery is ongoing, but every small step counts. Now is the perfect time to refine your setup, challenge common misconceptions, and embrace regular maintenance—all of which will reward you with better coffee experiences. Don’t wait for the perfect moment; it’s here, now, in your hands. Take action, experiment, learn from every shot, and let your passion grow with each brew. Remember, the magic isn’t just in the beans—it’s in your commitment to excellence. Why not start today with a simple calibration or cleaning ritual? Your future self will thank you. If you’re curious about specific tools or techniques, reach out through our contact page, and I’ll gladly guide you further.