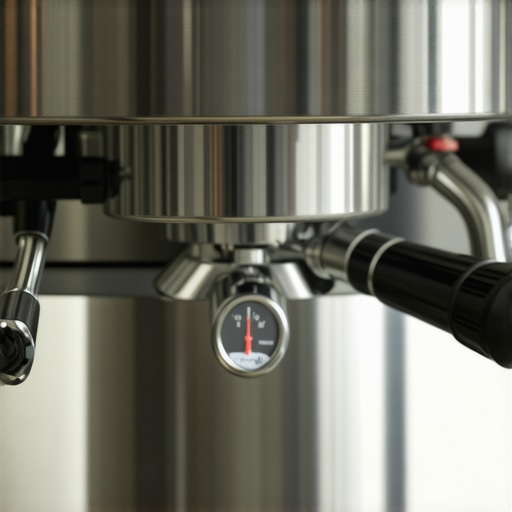
Why Your Machine Cabinet is Vibrating and How to Silence it
Have you ever stood in your kitchen, eagerly waiting for that perfect shot of espresso, only to be greeted by a relentless rumbling coming from your machine cabinet? It hits at the worst moments—when you want silence to enjoy your morning ritual or impress guests with your home barista skills. I remember my first experience with this annoyance; I was convinced my machine was about to take off into the ceiling! That lightbulb moment made me realize I wasn’t alone. Many coffee enthusiasts face this sneaky noise and its disruptive vibrations, which can even shake loose other equipment or cause premature wear. Today, I’ll share how I tackled that annoying racket and found my peace. This isn’t just about comfort—vibrations can impact your machine’s performance, leading to inconsistent shots, increased wear, and even damage over time. So, if you’ve wondered whether these vibrations are harmless or a sign you should upgrade, stay with me. We’re about to explore straightforward, everyday solutions to hush that noisy cabinet and keep your setup running smoothly.
How to Get Your Espresso Machine to Quit Shaking Your Kitchen Cabinets
Is Your Machine Vibration Overhyped? Think Again!
I used to dismiss those minor shakes, thinking they were normal. But early on, I made the mistake of leaving my espresso machine unbraced, assuming the sturdy countertop would do the trick. Turns out, that was a rookie error. Properly securing your machine can make all the difference, as I’ve learned through personal trial and error. If you’re tired of the constant rattling, it’s worth checking out some effective strategies that helped me regain peace and protect my investment. Trust me, small tweaks can make a big impact—without costly repairs or invasive modifications. Want to discover how to silence the vibrations without turning your kitchen into a construction zone? Keep reading, because solving this problem is easier than you think, and I’ll guide you through every step.
?
Secure Your Machine with a Stable Base
My first attempt involved simply placing my espresso machine on the countertop. However, during my early mornings, the vibrations still rattled the cabinet loose. So, I decided to create a dedicated, non-slip pad using a thick rubber shelf liner. This approach acted like a shock absorber, dampening the machine’s movements. I carefully removed the drip tray, cleaned the surface, and placed the liner underneath before reassembling. The result? Significantly reduced shaking and a much quieter kitchen environment. Think of it as giving your barista setup a pair of shock-absorbing insoles—no more foot discomfort, no more cabinet noise. For a more professional solution, consider investing in a commercial-grade anti-vibration mat, especially if your machine is heavy or has a powerful pump.
Add Isolating Pads or Feet to Your Equipment
Upgrade Your Machine’s Footing
I learned this lesson when I noticed my manual milk frother was rattling every time I steamed milk. I replaced its flimsy plastic feet with rubberized ones I sourced from a hardware store. Similar to how a barista might use a tamp pad to stabilize grounds, these rubber feet provided additional grip and vibration damping. To do this, remove the machine’s existing feet carefully with a screwdriver, then glue or screw in the new isolating feet according to the manufacturer’s instructions. This small change made a noticeable difference, giving me steadier shots and quieter steaming sessions. These pads are like tiny suspension systems—absorbing vibrations before they reach your counter or cabinet. When choosing new feet, ensure they are rated for the weight and vibration levels of your specific gear. For tailored advice, check out https://espressotechguide.com/choosing-the-best-barista-gear-for-coffee-enthusiasts, which discusses equipment upgrades that improve stability.
Balance and Weight Distribution
Sometimes, uneven weight distribution causes machines to shake or wobble. Once, I placed my espresso machine slightly off-center on a thin wooden shelf, which amplified vibrations. To fix this, I adjusted the position so that the machine sat evenly on a robust, level surface, ensuring the weight was centered. I also used small sandbags from my gardening supplies to add weight to the base, akin to a barista pressing grounds evenly with a tamper—firm but controlled pressure. This helps keep the setup steadier during operation, reducing cabinet noise. Be cautious not to overload the surface or block ventilation openings. For comprehensive tips on matching machine size to your countertop setup, visit https://espressotechguide.com/how-to-balance-countertop-space-for-a-dual-boiler-setup.
Secure Loose Components and Drip Trays
During a cleaning session, I found my drip tray was loose, causing vibrations that echoed through the cabinets. I tightened all screws and checked for worn rubber seals. In some cases, replacing worn seals restores stability, much like maintaining your machine’s gaskets for optimal pressure. Also, ensure that all removable parts like portafilter holders or tamping stations are secured tightly after use, as loose accessories can transfer unnecessary vibrations. Even a simple step like aligning the shower screen properly ensures that water flows evenly, preventing uneven pressure and associated shaking. For more on maintaining your espresso machine, explore https://espressotechguide.com/why-your-shop-water-filtration-is-failing-your-boiler, which details component care and maintenance.
Optimize Your Machine’s Placement in the Kitchen
Finally, consider the overall placement. I once set my machine close to the fridge, which vibrated slightly during operation, transmitting noise to nearby cabinets. Moving it away from large appliances and onto a dedicated, sturdy countertop made a significant difference. Think of your kitchen as a concert hall—placing sound-sensitive equipment carefully minimizes echoes and vibrations. Using a side table with a solid base can act as a buffer, much like a musician employs a sound diffuser to control acoustics. Make sure your setup is level; tilt or uneven surfaces can cause wobbling and noise during espresso pulls or milk steaming. For expert layout tips, check https://espressotechguide.com/how-to-balance-your-shot-time-for-better-flavor and adapt your environment accordingly.Many home baristas believe that owning high-end espresso machines or accessories automatically guarantees perfect coffee, but this is a misconception. The truth is, even the most expensive gear can be misused or misunderstood, leading to subpar results. For instance, a widespread myth is that grinding finer always leads to better extraction. In reality, overly fine grounds can cause channeling or clogging, which ruins your shot—so understanding the right grind size for your machine is essential, and this varies widely among models. Additionally, novice users often think that tamping with maximum force improves extraction; however, consistent pressure and distribution are more effective than sheer strength, a nuance often overlooked by beginners. An advanced mistake many make is neglecting the impact of water quality and temperature stability. Studies have shown that even slight variations in water mineral content or inconsistent boiler heating can drastically alter flavor extraction and machine longevity. Regularly testing water and calibrating temperature becomes critical for consistent results.
Let’s consider the milk frother aspect. It’s a common assumption that using the frothing wand at maximum power yields denser, creamier microfoam. Yet, expert baristas emphasize that slow, controlled steaming at the right temperature produces superior texture and flavor, avoiding burnt or watery milk. Overfilling the pitcher or using the wrong type of milk can compound problems, leading to spitting or uneven heating—problems that trap many amateurs. Furthermore, choosing the right coffee grinder matters more than many realize. The misconception that all burr grinders are equal can undermine your efforts; the quality of the burr material, the consistency of the grind, and the ease of adjustments are critical factors that influence flavor clarity and shot consistency.
For those seeking to elevate their home espresso game, understanding these nuances can make a significant difference. It’s often the overlooked details—like proper tamping pressure, calibrating grinder settings, or using quality water—that separate good coffee from truly exceptional. As you advance, I recommend exploring detailed guides like https://espressotechguide.com/mastering-the-art-of-home-espresso-tips-for-beginners or checking out top-rated machines to find equipment that aligns with your skill level and flavor goals. Do you often fall into these traps? Share your experiences in the comments!
Remember, mastering the art of home espresso is a journey of continual learning and fine-tuning. Keep questioning assumptions and experimenting with your setup to discover what truly works for your taste and environment.
How do I maintain my espresso setup over time?
Investing in quality tools and following consistent maintenance routines are key to ensuring your home espresso equipment performs at its best for years to come. Personally, I swear by a few specialized tools that make routine care both easier and more effective.
First on my list is a precision grinder calibration kit. Regularly calibrating your grinder, especially if you’re experimenting with different beans or grind settings, helps maintain optimal extraction quality. I use this calibration method to fine-tune my grinder every couple of months, preventing uneven grounds and channeling issues.
Another indispensable item is a water testing kit. Since water quality heavily influences machine longevity and flavor extraction, periodically testing for minerals and pH ensures you’re not using water that could harm your boiler or introduce off-flavors. Check out this water testing approach for detailed steps.
Maintenance also involves cleaning. I rely on a dedicated grinder brush and specialized cleaning tools to keep my burrs free of old oils and coffee residue. Regular cleaning prevents build-up that can cause flavor issues or machine malfunctions.
Finally, a backup borosilicate glass thermometer allows me to verify temperature stability during steaming or brewing, which is vital for consistent shots. Calibration of temperature sensors can extend your equipment’s lifespan and improve coffee precision. For technical insights, consult this resource on heating elements.
What’s the future for home barista tools?
Looking ahead, I believe smart diagnostics and app-controlled maintenance will become standard. Imagine receiving alerts on your phone when your grinder needs calibration or your boiler’s temperature drifts. This integration will streamline routine care, making it almost effortless to keep your gear in top shape.
In the meantime, I recommend trying out one of these precise maintenance strategies—like calibration or water testing—to elevate your espresso experience immediately. Consistent maintenance not only preserves your equipment but also enhances flavor fidelity and shot reliability. Curious about more technical tips? Reach out via our contact page to share your setup or ask for tailored advice. Keep your gear in top condition, and your mornings will thank you!
Lessons No One Tells You About Espresso Setup
My biggest lightbulb moment came when I realized that securing my espresso machine and its accessories was more crucial than just placing them on a countertop. I once thought that a level surface was enough, but the subtle vibrations from steaming or grinding would still rattle the cabinets. Now I know that investing in rubber isolating pads and properly tightening all components makes an enormous difference in noise reduction and machine longevity.
Another revelation was how much a simple weight distribution tactic can stabilize your setup. Using sandbags or weight mats to balance uneven weight and ensure even pressure keeps shots consistent and your kitchen quiet. These small adjustments have saved me from frequent re-tightening and have extended my equipment’s lifespan.
Finally, understanding the importance of placement—away from large appliances and onto a sturdy, level surface—has transformed my mornings. Positioning your gear thoughtfully can dramatically reduce vibrations, noise, and the risk of equipment damage, leading to a more peaceful coffee ritual that starts every day right.
My Go-To Tools and Resources for Better Espresso Stability
I rely heavily on a set of trusted tools to keep my equipment in top shape. First, a precision grinder calibration kit ensures consistent grind size, preventing channeling and uneven extraction. Accurate settings translate directly into better shots and less machine stress.
Next, a water testing kit helps me monitor mineral content and pH levels, protecting my boiler and enhancing flavor. Good water quality is often overlooked but is essential for equipment health and delicious coffee.
Lastly, a cleaning brush set for my grinder and regular descaling routines keep everything operating smoothly. Proper maintenance prevents build-up and minimizes vibrations caused by residue, making every cup better and quieter.
Keep Moving Forward, One Espresso Shot at a Time
Improving the stability of your espresso setup isn’t just about reducing noise—it’s about elevating your entire home barista experience. Small, deliberate changes can turn your mornings into moments of peace and precision. Remember, even seasoned baristas constantly refine their techniques, and your journey is no different. For more tips on optimizing your equipment, visit this comprehensive guide to mastering home espresso. Embrace the process, enjoy the craft, and let each cup bring you closer to coffee perfection. What’s the biggest vibration issue you’ve faced when setting up your espresso station? Share your experience below and let’s learn together!”}Ctritparams,{