Why Your Bottomless Portafilter Shows Channels Every Time
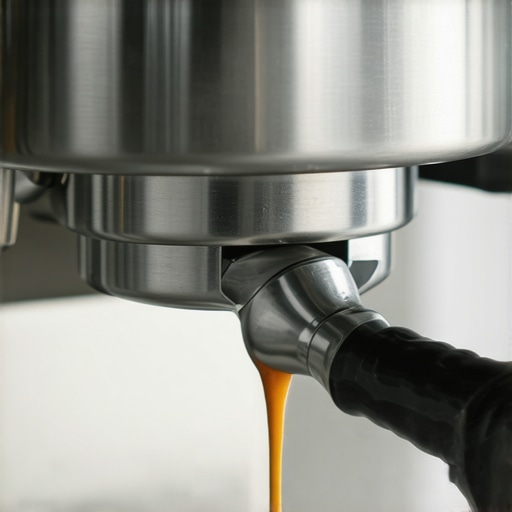
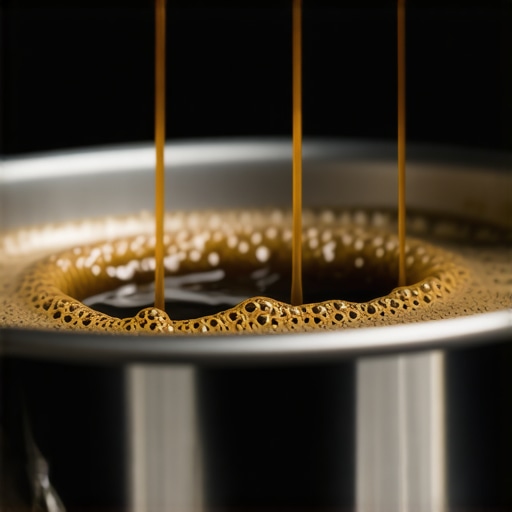
I still remember the Sunday morning I decided to ‘upgrade’ my workflow with a naked portafilter. I had my shiny new espresso machine warmed up, my beans weighed to the gram, and a smug sense of confidence. Then, I flipped the lever. Within three seconds, a jet-stream of boiling coffee shot sideways, missing my cup entirely and painting a brown stripe across my white kitchen backsplash. It wasn’t the beautiful, syrupy ‘tiger stripes’ I’d seen on Instagram. It was a disaster. If you’ve ever felt like your portafilter is actively trying to humiliate you, trust me, I’ve been there. My first mistake? Assuming a more expensive tool would automatically fix my technique.
Stop Blaming Your Gear for Those Messy Spurts
When you first see your espresso shot spraying the back of your cup, it is incredibly tempting to think you bought a lemon. I spent weeks convinced my pump was faulty or my basket was warped. The truth is much harder to swallow: the bottomless portafilter isn’t creating the channels; it’s just finally showing you the mistakes you’ve been making all along. Early in my journey, I made the classic blunder of tamping with enough force to bend the counter, thinking more pressure would hide my uneven distribution. It didn’t. In fact, research into puck physics suggests that once you reach a certain tamping density, the water will find the path of least resistance regardless of how hard you push. Your coffee grinder might be capable of a fine setting, but if those grounds aren’t settled correctly, your portafilter will tell on you every single time.
Is chasing the ‘perfect’ flow actually worth the frustration?
You might be wondering if you should just go back to the spouted portafilter and live in blissful ignorance. I get it. Cleaning up coffee spray before your first caffeine hit of the day is a special kind of torture. But here is the promise: once we fix the underlying issues in your puck prep, your espresso will taste significantly more balanced, sweet, and complex. We aren’t just doing this for the aesthetics; we’re doing it because a channeled shot is an unevenly extracted shot, leaving you with a cup that is simultaneously sour and bitter. Whether you are using the most expensive barista gear or a modest budget setup, the physics of water under pressure remains the same. Have you ever felt like throwing your portafilter out the window after a particularly messy morning? Drop a comment below—I need to know I’m not the only one who has considered it. Today, we are going to dive into exactly why your espresso puck has a hole in the center and how to refine your technique so those streams finally merge into that elusive, single golden flow.
Master the Pre-Shot Ritual for Clean Extractions
Think of your coffee puck like a city’s drainage system. Water is lazy; it will always take the easiest route to the bottom. If your grounds have a tiny gap or a cluster of boulders, the water rushes there, creating a high-pressure jet that results in that dreaded spray. Achieving a syrupy, unified flow requires more than a heavy hand—it requires surgical precision in your distribution before the tamper ever touches the coffee.
Break Up the Clumps Before You Start
If you notice why your coffee grounds are clumping together, you are already fighting a losing battle. These clumps act like solid rocks in a stream, forcing water to divert around them and carve out channels. I used to think I could just shake the portafilter and call it a day, but that only settles the surface. Now, I use the Weiss Distribution Technique (WDT). By stirring the grounds with thin needles, you homogenize the density of the entire basket. Be careful with your choice of gear, though; understanding why your WDT tool pins are too thick for light roasts can save you from accidentally creating more channels than you fix. Stir in deep, concentric circles from the bottom up to ensure the bed is truly uniform.
Stop Squashing Your Coffee Into an Uneven Mess
Most beginners think tamping is about strength, but it is actually about levelness. If your tamper enters the basket at even a half-degree angle, you’ve created a thin spot on one side. This is often the culprit behind why your espresso shot is channeling on the left side only. I remember a Tuesday morning when I was rushing for a meeting and smashed the tamper down haphazardly. The resulting shot didn’t just spray; it actually hissed as the water found a massive ‘soft spot’ I’d created. To prevent this, consider the truth about using spring-loaded tampers for even shots. These tools sit on the rim of the basket to ensure a perfectly flat surface every single time, removing the human error of a crooked wrist.
Check Your Basket Math for a Better Seal
Sometimes the issue isn’t your hands; it’s the ratio of coffee to steel. If you put 15 grams of coffee into a 22-gram basket, the water has too much room to gain momentum before hitting the puck, which can shatter the top layer of your coffee bed. Learning how to tell if your basket is too large for your dose is a fundamental part of mastering the art of home espresso. You want just enough ‘headspace’ between the coffee and the shower screen so the puck can expand slightly without being crushed before the pump even starts.
The Night I Used a Flashlight to Find the Truth
I once spent an entire evening frustrated by a beautiful-looking puck that kept channeling internally. I finally grabbed a high-lumen torch from the garage. By employing the flashlight move for finding hidden channeling paths, I saw that my grinder was throwing grounds more heavily to the rear of the basket. Even though I was ‘leveling’ the top, the density at the back was significantly higher. I had to change my dosing technique to catch the grounds in a circular motion. The moment I corrected that weight distribution, the spraying stopped instantly. It was a humbling reminder that what we see on the surface is rarely the whole story of what’s happening under nine bars of pressure.
Once you’ve mastered the basic distribution, you might think you’re in the clear. I certainly did. I thought that if I bought the most expensive beans and the best espresso machine, the physics would simply work in my favor. But here is the nuance that many enthusiasts miss: freshness is actually a double-edged sword. We are always told to buy fresh, but how to tell if your coffee beans are too fresh for espresso is a skill in itself. If you use beans roasted yesterday, the trapped CO2 acts like a literal wall, preventing water from saturating the grounds evenly. This leads to high-pressure blowouts that look like channeling but are actually caused by the gas escaping. Have you ever fallen into the trap of using beans that were ‘too fresh’ only to get a cup full of foam and sourness? Let me know in the comments.

Is your water chemistry secretly sabotaging your extraction?
Even if your puck prep is perfect, your water could be the silent killer. I spent months chasing a ‘sweeter’ profile before realizing my filtration was actually too effective. Learning how to tell if your water is too soft for brewing is vital because water needs minerals to ‘grab’ the coffee flavors. As highlighted by the experts at the Specialty Coffee Association, water without the right mineral balance isn’t just flat in flavor; it’s chemically aggressive toward your boiler’s metal internals. If you aren’t careful, your high-end machine will start to leach metals, which is the real reason your espresso tastes like burnt rubber or metallic long before you notice any scale buildup.
The hidden trap of thermal expansion in your grinder
Many people assume a grinder’s setting is static, but why your grinder burrs are getting hot during a single dose matters more than you think. In a personal experiment, I found that back-to-back shots on a small home grinder can shift the grind size enough to turn a 30-second pull into a 20-second mess simply because the metal burrs expanded with the friction heat. This is why choosing the best barista gear isn’t just about looks; it’s about thermal stability.
Why a clean-looking steam wand might be lying to you
If you’ve noticed your milk texture degrading, don’t just blame the milk brand. A common ‘oops’ factor is the invisible milk stone inside the tip. You might wipe the outside, but the 2-minute habit that prevents clogged steam wands—actually purging and deep cleaning the internals—is what keeps those micro-holes clear. Finally, never fall for the old wives’ tale about cleaning. I’ve seen people destroy expensive equipment because they didn’t know why you should never use rice to clean your high-end grinder. The starch can gum up the mechanism and even burn out the motor. Instead, stick to the best way to clean a grinder without losing your settings by using dedicated cleaning tablets or a manual brush-down. It’s these small, unsexy maintenance details that separate the hobbyist from the home barista expert.
I used to think that once I had the right grinder and machine, I was set for life. I was wrong. The reality of high-end coffee is that you aren’t just a barista; you’re a part-time technician. One of the simplest additions to my workflow that saved my sanity was the puck screen. It’s a tiny disc of stainless steel mesh that sits on top of your coffee. If you’ve ever wondered why your puck screen keeps falling into the knock box, it is a small price to pay for a group head that stays pristine. It prevents grounds from being sucked back into the solenoid, which is the leading cause of internal clogs and that annoying drip after the shot is done.
Stop the Gunk Before it Hits Your Shower Screen
Maintenance is often the part of the hobby people skip until something breaks. I learned this the hard way when my brew pressure started fluctuating wildly. I discovered that a tiny bit of scale had lodged itself in the gicleur. Now, I swear by the best way to descale a boiler without using harsh vinegar to keep the flow paths clear without eating away at the copper components. If you aren’t checking your seals regularly, you’ll eventually find why your group head gasket is leaking after just one month—usually, it is because of high heat and dried coffee oils acting like sandpaper on the rubber. Switch to silicone gaskets if you want a seal that lasts years instead of months.
How do I keep my machine running like day one for the next decade?
The secret is a combination of clean water and routine pressure checks. According to the technical service manuals for the E61 group head—a design that has remained largely unchanged since 1961—the internal cam and ‘mushroom’ are prone to calcification even with filtered water. I recommend checking your brew pressure at least once a quarter. If you don’t have a built-in meter, you can learn the simple way to measure your pump pressure without a gauge by using a portafilter-mounted manometer. If you notice why your espresso machine takes longer to heat up lately, it is a flashing red light that your heating element is struggling against scale buildup or a failing pressurestat.
Your Scale Might Be Lying During the Shot
Precision tools are only as good as their environment. I once spent an hour trying to diagnose a ‘heavy’ shot only to realize my scale was malfunctioning. Understanding why your digital scale jumps when the pump starts is a game changer; the vibrations from a rotary or vibration pump can interfere with the load cell, leading to inaccurate yields. I now use a small rubber mat to decouple the scale from the machine’s drip tray. In the next few years, I expect we’ll see more ‘smart’ integration where our coffee grinder communicates directly with the machine to adjust grind size in real-time based on flow rate sensors. For now, we still have to be the brains of the operation. This weekend, take ten minutes to perform the chalk trick for checking grinder burr alignment. It is the single most effective way to see if your hardware is actually capable of the precision you’re demanding from it.
Hard Truths I Learned After Spilling Gallons of Coffee
Looking back at my journey, the biggest breakthrough wasn’t a specific piece of gear; it was realizing that espresso is a game of variables. First, don’t chase the clock at the expense of taste. If a shot runs for 35 seconds but tastes like honey, you’ve won. Second, small adjustments beat big ones. I used to move my coffee grinder three whole notches when a tiny nudge was all it needed. Finally, remember that your espresso machine is just a tool—your technique is the actual craft.
My Personal Toolkit for Espresso Mastery
If you want to move beyond the frustration of messy shots, I highly recommend starting with a few core essentials. First, study my guide on mastering the art of home espresso to get the fundamentals down. For equipment, invest in a precision scale to stop the guesswork and a high-quality distribution tool to fix why your coffee grounds are clumping together. When it comes to choosing the best barista gear, focus on items that provide consistency over flashiness.
Start Your Journey Toward the Perfect Pour
There is no feeling quite like watching those first few drops of syrupy espresso merge into a single, beautiful stream from your bottomless portafilter. It takes practice, and yes, you will probably have to clean coffee off your backsplash a few more times. But every ‘failed’ shot is just data helping you refine your craft. Embrace the process, keep your gear clean, and you’ll be pulling cafe-quality home espresso that puts your local shop to shame. Have you ever had a shot spray so bad it actually hit the ceiling? Let me know your messiest coffee disaster stories in the comments below!