The Trick to Removing a Stuck Shower Screen Without Stripping the Screw
I remember standing in my kitchen at dawn, clutching a stubby flathead screwdriver like a surgeon’s scalpel. My machine was hot, my beans were weighed, but the water was channeling like a garden hose. I knew I needed to clean the screen. I gave the center screw one firm twist, and then it happened—that sickening scrape. The metal yielded, the screwdriver slipped, and I felt my stomach drop. I was seconds away from turning my pride and joy into a very expensive paperweight. We’ve all been there, staring at a screw head that’s starting to look more like a shallow bowl than a crisp slot, wondering if we should just call a professional and admit defeat. Dealing with a seized component is the ultimate test of a home barista’s patience.
The Morning My Espresso Machine Won the Argument
Maintenance is supposed to be the zen part of the hobby, but a seized shower screen screw is enough to ruin your entire weekend. I spent years making the classic mistake of using the first screwdriver I found in the kitchen junk drawer, not realizing that dried coffee oils act like a high-strength thread-locker. These oils essentially glue that screw into the group head over months of heat cycles. If you’ve noticed that your coffee puck keeps sticking to the shower screen, you know the urge to get in there and scrub is real. But before you go in with brute force, you need a strategy that doesn’t involve a drill bit or a prayer. I’m going to share the exact technique that saves these screws every time, even when they seem hopelessly stuck.
Is this actually worth the risk of doing yourself?
I get the hesitation. One wrong move and you’re looking at a massive repair bill for a new group head block. But here is the neighborly truth: you don’t need more muscle; you need better physics. Early in my journey of mastering the art of home espresso, I actually snapped a screw head clean off because I thought “righty-tighty, lefty-loosey” just required more weight. It didn’t. Have you ever felt that cold sweat when the tool starts to slip? Drop a comment and tell me your horror stories, because I’ve lived through them all. According to the mechanical principles at The Engineering Toolbox, metals like brass and stainless steel have different coefficients of thermal expansion, which explains why a hot machine often grips a screw much tighter than a cold one. We’re going to use that thermal knowledge to our advantage. If you’re frustrated by why your group head shower screen is getting clogged so fast, the first step is getting it off without a disaster. Let’s walk through the prep work together.
Ditch the Junk Drawer Screwdriver
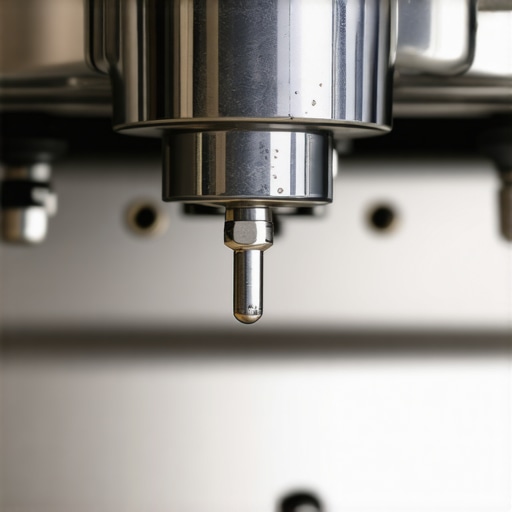
The biggest reason these screws strip isn’t because they’re too tight; it’s because the tool doesn’t fit the space. I once spent forty minutes trying to force a standard-length driver into my Gaggia Classic. Because the handle was so long, I had to tilt it at a five-degree angle just to clear the drip tray. That tiny tilt is a death sentence for a brass screw. It creates uneven pressure, and the moment you twist, the tool jumps out of the slot and carves a chunk of metal with it. To do this right, you need a stubby flathead screwdriver—the kind that fits entirely in the palm of your hand. When I finally switched to a dedicated stubby as part of my kit for choosing the best barista gear, the difference was night and day. You can align the bit perfectly vertical and use your shoulder to push upward while you turn. If the bit isn’t fully seated, don’t even think about turning.
Why a Cold Machine is Your Worst Enemy
Remember that engineering principle about heat expansion? It works both ways. When the group head is cold, the dried coffee oils that have baked into the threads act like concrete. I’ve found that the best time to attempt a removal is while the machine is ‘warm-to-the-touch’ but not ‘scalding-hot.’ If it’s too hot, the metal has expanded and tightened its grip on the screw. If it’s too cold, the oils are solid. I usually pull a ‘blank shot’ first to soften the gunk. If you’ve been noticing that your espresso shot is extracting from only the edges of the basket, it’s a sign that the screen is already heavily clogged and the oils are likely thick in the screw threads too. A warm machine makes those oils pliable, significantly reducing the torque required to break the seal.
The Paper Towel Trick for Maximum Grip
Sometimes the screwdriver just won’t bite because the slot is already slightly worn. This happened to me with a secondhand machine I bought last year; the previous owner had clearly had a few ‘slips.’ I thought I’d have to drill it out until I tried the rubber band trick’s cousin: the damp paper towel. I folded a single layer of paper towel over the tip of the screwdriver and jammed it into the slot. The paper fills those microscopic gaps between the metal of the tool and the screw, giving you a friction-based ‘bite’ that’s incredibly effective. It’s a similar logic to fixing a stuck grinder adjustment ring—you need to increase the surface area of the contact point. Once that paper is in place, apply 80% upward pressure and only 20% turning force. You want to feel the screw ‘crack’—that’s the sound of the oil seal breaking, not the metal snapping.
Chemical Warfare Against Coffee Glue
If the screw still won’t budge after the ‘warm and paper towel’ method, it’s time to dissolve the glue. Standard descalers won’t help here because we aren’t fighting lime scale; we’re fighting organic lipids. I once took a small syringe filled with concentrated backflush detergent and squirted it directly into the screw head. I let it sit for ten minutes. The detergent ate through the polymerized oils that were locking the threads in place. After the soak, I checked my group head flow rate just to see if the detergent had already loosened some of the blockages behind the screen. It had. When I went back in with the stubby driver, the screw turned as if it were brand new. Don’t underestimate the power of a good soak before you resort to heavy tools.
We often treat our machines like indestructible tanks, but the reality is they are delicate thermal systems held together by friction and physics. The biggest mistake I see enthusiasts make is assuming that more torque is the solution to a stubborn component. In fact, applying raw force to a seized screw is the fastest way to turn a five-minute job into a weekend-long nightmare. Have you ever fallen into this trap? Let me know in the comments. When you are mastering the art of home espresso, you quickly learn that finesse beats muscle every time. One nuanced trick most people miss is the ‘tighten-to-loosen’ maneuver. By applying a microscopic amount of pressure in the clockwise direction first, you can often break the stiction of the dried oils without rounding out the screw head. It sounds counter-intuitive, but it works because you are disrupting the bond of the polymerized coffee oils without immediately stressing the weakening metal in the direction of the exit.
Stop Fighting Your Machine and Start Using Physics
The ‘oops’ factor usually kicks in when we ignore the material science of our gear. Most shower screen screws are made of brass, which is significantly softer than the stainless steel of your screwdriver. This mismatch is a recipe for disaster. According to a study published in the Journal of Food Engineering, coffee lipids undergo a process of thermal polymerization when exposed to repeated 9bar pressure cycles, essentially creating a ‘varnish’ that behaves like a high-grade industrial adhesive. This is why why your group head shower screen is getting clogged so fast and why the screw feels welded in place. If you’ve been wondering why your group head gasket is leaking after just one month, it might be because you’re over-tightening the screen to compensate for the uneven seal caused by this very varnish build-up.
Why does your screen get stuck even if you clean it weekly?
Frequency isn’t the same as efficacy. You can backflush every morning, but if you aren’t removing the screw to clean the threads, those oils are still baking into a hard shell. This hidden buildup is often the secret reason why your espresso shot volume varies even with the same dose; as the oils constrict the water dispersion path, the back-pressure in the group head fluctuates. However, there is a trap here: the ‘over-cleaner’s penalty.’ If you use aggressive caustic cleaners too often to keep things pristine, you risk stripping the vital lubricants from the internal mechanics. For those with a lever machine, this is when you’ll need to learn how to properly lubricricate your E61 group head cam to prevent that ‘crunchy’ metal-on-metal feeling that eventually leads to a total mechanical failure.
The Danger of Misdiagnosing Mechanical Resistance
Sometimes, we think a part is stuck or ‘seized’ when the machine is actually trying to tell us something else. I once spent an hour trying to ‘loosen’ a boiler fitting that I thought was scale-locked, only to realize the resistance was due to a warped bracket from a previous overheat. It’s easy to panic and think you need to how to fix a broken boiler temperature sensor when the real issue is just a physical blockage in the flow path. If your machine is fighting you, step back. Is the resistance ‘springy’ or ‘solid’? Springy resistance is usually a sign of a trapped gasket or air, whereas solid resistance is the sign of a seized thread. Learning to feel the difference is what separates a backyard tinkerer from a true home technician. When the machine finally gives way and that screw turns smoothly, the reward isn’t just a clean screen—it’s the knowledge that you didn’t break your best friend in the process.
Once you have successfully wrestled that screw out, the last thing you want is to do it again in six months. The secret to a lifetime of easy maintenance isn’t cleaning more often—it is cleaning smarter. I swear by a tiny dab of Molykote 111 on the screw threads before I put everything back together. This is a high-performance, food-safe silicone lubricant that won’t wash away under high pressure. When you are properly lubricating your E61 group head cam or just putting a shower screen back on, that thin barrier prevents coffee oils and minerals from ever forming a permanent bond with the metal threads. It turns a potential nightmare into a thirty-second task the next time you need to deep clean.
The Industrial Tools That Belong in Your Coffee Bar
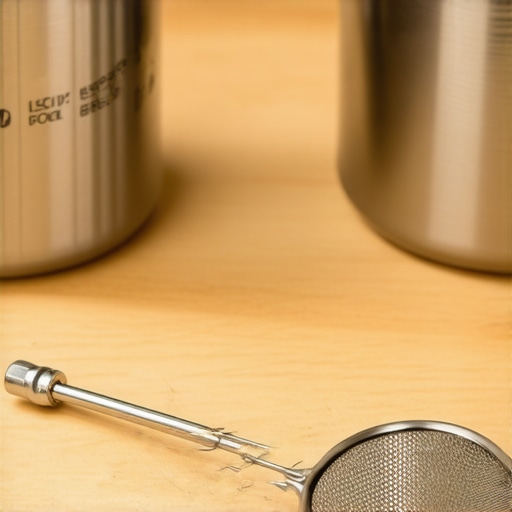
I eventually stopped relying on the cheap tools provided in the box and moved to a set of Wera Stainless bits. According to the technical specifications from Wera Tools, using stainless steel drivers on stainless or brass fasteners prevents ‘extraneous rust’—microscopic iron particles that rub off carbon-steel tools and cause corrosion later. This level of detail is what separates a frustrating hobby from a professional experience. If you are currently choosing the best barista gear, do not skimp on your maintenance kit. A high-quality bit set is just as important as the perfect coffee grinder for the longevity of your setup. I have seen too many people buy top-rated espresso machines for coffee lovers in 2025 only to strip the fasteners within the first year because they used a soft, generic screwdriver.
How do I maintain my espresso setup over years of use?
Consistency is the only way to avoid the ‘big break.’ I keep a digital log of every backflush and screw removal, but the real trick is listening to the machine. If the pump sounds slightly more strained or if you notice your group head shower screen is getting clogged so fast even after a cleaning, something is building up internally. Don’t wait for a total failure where you have to learn how to fix a broken boiler temperature sensor. Instead, perform a ‘thermal reset’ once a month by letting the machine cool completely, checking all external seals, and lightly lubricating moving parts. As for the future, I predict we are moving toward tool-less group head designs. We are already seeing manufacturers experiment with bayonet-style shower screens that click into place without a center screw, which would eliminate the ‘seized screw’ drama entirely. For now, we work with what we have. My challenge to you: the next time you pull your screen for a scrub, apply a microscopic layer of food-grade silicone grease to those threads. You will be amazed at how much easier your life becomes during the next maintenance cycle.
Hard-Won Truths from a Decade of Group Head Battles
Maintenance is more about psychology than mechanics. After years of tinkering, I’ve realized that the ‘seized’ feeling is often just a barrier of polymerized oils acting as an unintentional thread-locker. One thing experts rarely mention is the ‘tactile feedback’ of brass; if you feel the metal beginning to stretch or ‘give’ before the screw actually turns, stop immediately. It’s better to soak the group head in detergent for another hour than to deal with the fallout of a snapped stud. Another lightbulb moment for me was realizing that properly lubricating your E61 group head cam or any threaded part isn’t just about movement—it’s about creating a chemical barrier against future corrosion. Patience is truly your most expensive tool.
My Go-To Kit for Stress-Free Servicing
If you want to move beyond the frustration of stripped screws, you need to upgrade your toolbox with a few items that professional technicians keep hidden. I personally swear by the Wera Stainless Steel bit set because it prevents cross-contamination of metals, which is a vital consideration when you’re choosing the best barista gear for long-term machine health. I also keep a tub of Molykote 111 handy; it’s the gold standard for food-safe lubrication and keeps threads from ever locking up again. For those deeper dives into machine health, I always refer back to the community forums and my own digital log on mastering the art of home espresso. These specific tools turn a panicked repair into a satisfying, low-stress Saturday ritual.
#IMAGE_PLACEHOLDER_E#
Give Your Machine the Care It Deserves
Don’t let a stubborn piece of hardware discourage you from the joy of a perfectly pulled shot. Every enthusiast faces a mechanical hurdle eventually, but with the right application of physics and a bit of finesse, you can overcome almost any seized component. Taking care of your equipment is an integral part of the craft, just like finding the perfect coffee grinder or meticulously timing your extraction. Once that screen is back in place and the water is flowing evenly again, you’ll find that the coffee tastes just a little bit sweeter knowing you did the work yourself. Have you ever felt that heart-stopping ‘snap’ or a tool slip while working on your home espresso setup? Let me know in the comments below—I’d love to hear how you handled it.