Why Some Steam Wands Have Two Holes and Others Have Four
I vividly remember the morning I almost threw my milk pitcher across the kitchen. I had just upgraded to a pro-level machine, convinced that more expensive gear meant better lattes. But every time I turned on that steam wand, my milk looked like a bubble bath gone wrong. My previous machine had a simple two-hole tip that I’d mastered, yet this new four-hole monster felt like trying to tame a fire hose. I was making every mistake in the book, including why your milk pitcher position is ruining your texture, but the real culprit was hiding in plain sight: the geometry of those tiny little holes. Today, I’m going to show you why your steam tip choice is the invisible hand behind your latte art success and how to pick the right one for your skill level. [image_placeholder_1]
The Great Steam Tip Divide
The difference between a two-hole and a four-hole steam tip isn’t just about aesthetics; it’s about the physics of how steam enters your milk. When I first started, I assumed that milk frothers that transform your coffee experience all worked the same way. I was wrong. A two-hole tip concentrates the pressure into two distinct streams, which is often slower and much easier for a beginner to control. A four-hole tip, however, creates a massive vortex that can texturize milk in seconds—if you have the hand-eye coordination of a fighter pilot. Early in my journey, I made the classic blunder of thinking more was always better. I bought a high-flow four-hole tip for a low-power boiler, and the reason your steam wand only makes thin hot milk became my daily reality. I didn’t realize that my machine’s boiler simply couldn’t keep up with the demand. According to research on steam injection dynamics, the number of orifices significantly impacts the entrainment of air, meaning those extra holes aren’t just for show; they fundamentally change the turbulence in your pitcher. Have you ever swapped your tip only to find your latte art skills suddenly vanished?
Is This Really Just Gear Obsession?
You might be thinking that worrying about the number of holes in a piece of stainless steel is the peak of coffee snobbery. I get it. But the truth is, this is the most practical adjustment you can make to your barista gear. It’s the difference between a silky flat white and a dry, chunky cappuccino. If you are struggling with how to stop your milk foam from turning into a big bubble, the solution might be as simple as unscrewing that little tip and rethinking your approach.
Match Your Tip to Your Machine’s Muscle
Before you start shopping for a shiny new 4-hole tip, you need to understand the horsepower of your boiler. Imagine trying to power a professional fire hose with a kitchen faucet; the result is a sad, weak dribble. That’s exactly what happens when you put a high-flow tip on a small, single-boiler machine. If your machine lacks the thermal mass to sustain high pressure, you’ll end up wondering how to fix a steam wand that only blows out weak air because the pressure drops off halfway through your stretching phase. I once tried to ‘upgrade’ a small home machine with a massive 4-hole tip, thinking I was being clever. Instead of a silky latte, I got a pitcher of luke-warm milk and a machine that hissed at me in frustration.
The Two-Second Purge That Saves Your Texture
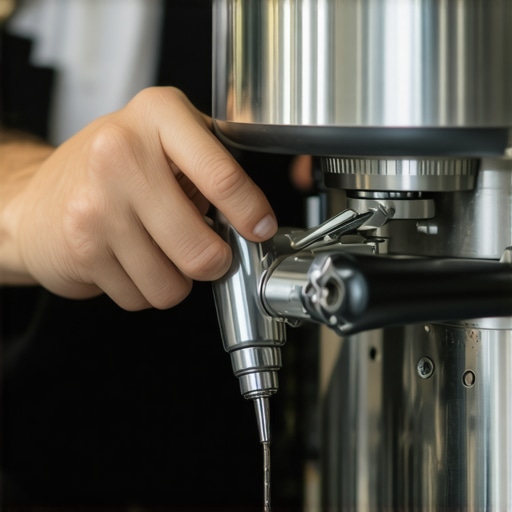
One of the most overlooked steps is clearing out the ‘dead water.’ Every time your wand sits idle, steam condenses back into water inside the pipe. If you don’t clear this out, that water goes straight into your milk, creating thin, bubbly foam. Understanding the best way to purge your steam wand without getting burned is non-negotiable. If you skip this, you’ll find why your espresso machine steam is wet and spluttery the hard way, which ruins the protein bonds required for that elusive wet-paint texture.
Where to Aim Those Tiny Jets
The geometry of your tip dictates your pitcher’s ‘sweet spot.’ With a 1-hole or 2-hole tip, you generally need to keep the wand closer to the side of the pitcher to kickstart a vortex. However, a 4-hole tip is a different beast entirely. Because the jets exit at divergent angles, they are designed to create a central turbulence. 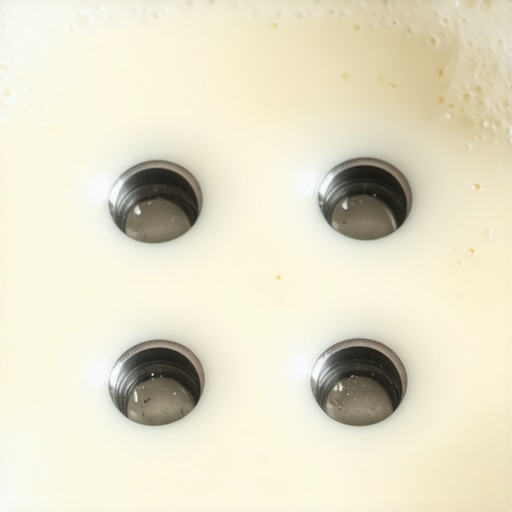
Find the Center for Multi-Hole Vortexes
When I first moved to a 4-hole setup, I kept the wand tip against the edge of the pitcher like I always had. The result? Milk splashed everywhere, and I had massive bubbles that wouldn’t integrate. I discovered that by placing a 4-hole tip closer to the center of the liquid, the intersecting streams naturally roll the milk into a whirlpool. This is the trick to getting the perfect swirl in your milk pitcher without having to fight the physics of the steam. You want the milk to spin like a carousel, not splash like a washing machine.
Keep the Orifices Clear or Pay the Price
A single blocked hole on a 4-hole tip will throw the entire balance off, causing the steam to exit lopsidedly. This uneven pressure makes it impossible to control your aeration. If you aren’t wiping and purging immediately after every use, you’ll eventually need to investigate why your steam wand tips keep getting blocked by milk residue. I spent an hour once with a safety pin trying to poke out dried milk from a 4-hole tip because I got lazy after a Sunday brunch session—never again. Consistency in barista gear maintenance is what separates the pros from the people making soapy lattes.The most persistent myth in the home barista community is that more steam pressure is always better. We see those commercial machines blasting out clouds like a steam locomotive and assume that’s the gold standard. But here is the contrarian truth: high-velocity steam is often the enemy of high-quality microfoam, especially in small home pitchers. When you use a high-flow tip, the window of time you have to ‘stretch’ the milk—injecting air—shrinks to almost nothing. If you aren’t careful, you hit your target temperature before you’ve properly integrated the bubbles, leading to that frustrating separation where you have hot milk at the bottom and a dry ‘cap’ of foam on top. It’s the same principle as why your grinder burrs are getting hot during a single dose; when you introduce too much energy too fast, you lose control over the delicate chemistry of the medium. 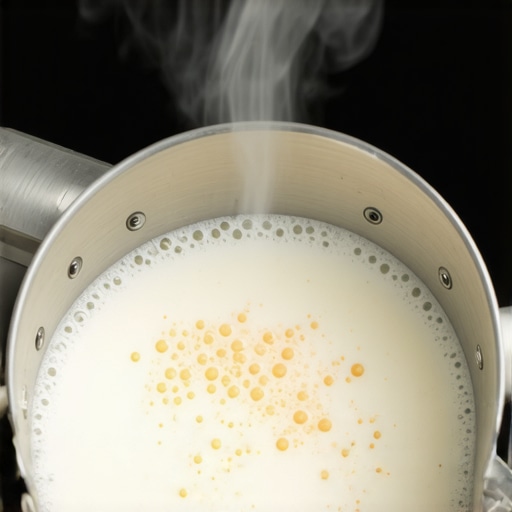
Does Your Machine Really Need That 4-Hole Upgrade?
Many enthusiasts rushing to buy top-rated espresso machines for coffee lovers in 2025 immediately look for a 4-hole steam tip upgrade, but they often fall into the ‘heat jump’ trap. According to research published in the International Dairy Journal, the stability of milk foam is highly dependent on the steady denaturation of whey proteins, which occurs optimally between 40°C and 60°C. If your 4-hole tip is so powerful that it blasts through this range in seconds, you aren’t giving the proteins enough time to ‘wrap’ around the air bubbles. This is the reason your steam wand only makes thin hot milk despite having plenty of power. You have the heat, but you lack the dwell time.
The Dangerous Trap of the ‘Secondary Stretch’
One specific mistake I see advanced home baristas make is trying to add more air once the milk is already warm to the touch. Once the milk passes about 100°F (37°C), the fats begin to melt and interfere with the protein’s ability to stabilize new bubbles. If you haven’t finished your aeration by then, any further ‘stretching’ just creates large, unstable bubbles that won’t integrate into a silky texture. This leads to the common complaint of why your latte art foam always slumps to one side; the foam is structurally unsound and too heavy. Just like mastering the art of home espresso tips for beginners, the secret to the pro level is knowing when to stop. If you find your wand is too aggressive, try a 1-hole or 2-hole tip to slow the process down. While you’re refining your setup, remember that how to select the perfect coffee grinder for your brew is equally important for that final flavor. Have you ever fallen into this trap of over-powering your milk? Let me know in the comments.
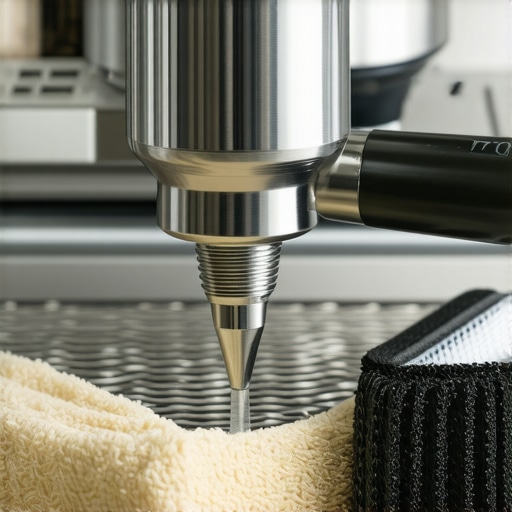
It’s one thing to understand the physics of a four-hole tip, but it’s quite another to ensure that hardware continues to perform six months down the line. I’ve seen too many home baristas invest in barista gear only to let it degrade because they didn’t realize the ‘steam’ coming out was actually a mixture of vapor and mineral deposits. If your texture has suddenly become ‘crunchy’ or inconsistent, your first stop shouldn’t be the settings—it should be a deep dive into the pipe itself. Learning how to clean the inside of your steam wand pipe is a task I perform religiously every month. Milk proteins are incredibly resilient, and they love to bake onto the inner walls of the wand, slowly narrowing the diameter and ruining your flow rate. It’s like trying to play a trumpet with a sock stuffed inside.
How do I maintain my steam assembly over time?
Maintenance isn’t just about a quick wipe with a damp cloth. To keep your steam pressure at its peak, you have to look at the source. According to the Coffee Technicians Guild, scale is the leading cause of steam-related failures in home environments. Even a microscopic layer of calcium carbonate can act as an insulator, forcing your boiler to work harder for less pressure. You should regularly check how to tell if your machine boiler is accumulating lime scale before you start losing that precious dry steam. I personally use a dedicated milk-frother cleaner twice a month, soaking the tip (and only the tip) to dissolve the hidden fats that a simple purge misses. If you’re using a hybrid machine, don’t forget how to clean the screen on your automatic milk frother as well, as those small mesh filters are the first things to clog.
Switch to Levers for Ultimate Control
If you are still twisting a knob to start your steam, you are fighting an uphill battle. I spent years cranking a dial, which meant I had to take one hand off the pitcher to turn it off, often losing my perfect whirlpool in the process. This is why you should switch to a lever handle for your steam wand if your machine allows the mod. A lever gives you an instant on/off ‘blast’ of pressure, which is vital when you’re trying to stop the heating process at exactly 140°F. In my experience, this single ergonomic change did more for my latte art than any new pitcher ever could. Looking ahead, I predict we will see more ‘smart’ steam wands in the home market—systems that use infrared sensors to measure milk temperature in real-time and auto-stop the flow. But until that tech becomes affordable, your mechanical maintenance is your best friend. My challenge to you: tonight, unscrew your steam tip and look inside with a flashlight. If it isn’t pristine, you’ve found your first major improvement. Next, we will look at how to pull everything together for that final, perfect pour.
Lessons from a Thousand Liters of Spilled Milk
Reflecting on my transition from a frustrated novice to a seasoned home barista, I have realized that the steam tip is often the most underestimated component of the entire setup. One vital lesson I learned is that steam pressure is a finite resource; if you spend all your energy on a high-flow tip without the technique to match, you will end up with a mess. Second, silence is actually the sound of success during the vortex phase; if your wand is screaming, your angle is working against you. [image_placeholder_final] Third, the best barista gear in the world cannot compensate for a lack of patience in the stretching phase. Taking the time to learn the specific rhythm of your wand is what finally allowed me to pour consistent hearts and rosettas.
My Essential Kit for Silky Microfoam
To consistently achieve that coveted ‘wet paint’ texture, I rely on a few specific tools that elevate the entire process beyond just the machine itself. I always recommend a precision-aligned pitcher with a narrow spout for detail work. For those investing in top-rated espresso machines for coffee lovers in 2025, ensure your wand is fully articulated to allow for better ergonomics. While you are focusing on milk, never forget that how to select the perfect coffee grinder for your brew remains the foundation for the espresso base. For enthusiasts who prefer a more automated approach, exploring milk frothers that transform your coffee experience can provide a reliable shortcut to consistent texture without the steep learning curve of a manual steam wand.
Your Path to the Perfect Pour
The journey to mastering your home cafe is rarely a straight line, but every small adjustment to your steam tip or pitcher angle brings you closer to that professional-tier cup. Don’t be discouraged by a few bad batches of foam; even the most skilled baristas started by making ‘bubble baths’ before they mastered mastering the art of home espresso tips for beginners. As you refine your technique and maintain your equipment, you will find that the craft becomes just as rewarding as the caffeine itself. Which steam tip are you currently using on your machine, and do you feel it is helping or hindering your progress? Let me know in the comments below!