The Secret to Making Latte Art with Almond Milk
I stood there, staring at my expensive steam wand, feeling like a total failure. My first dozen attempts at almond milk latte art resulted in something that looked more like a soap-bubble bath than a swan. I had just invested in one of the top-rated espresso machines for coffee lovers in 2025, thinking the gear would do the heavy lifting for me. It did not. The almond milk curdled, separated, and laughed at me. If you have ever poured what you thought was silk only to see it clump into a grainy mess, I have been there. Today, we are going to fix that. I am going to show you exactly how to manipulate the chemistry of plant-based milk to get that elusive, glossy microfoam that stays stable long enough to actually pour a heart.
Why Your Almond Milk Refuses to Behave
My biggest mistake early on was treating almond milk like dairy. I cranked the heat, thinking it needed more power. It did not. In fact, almond milk proteins are far more fragile than those in cow’s milk. When I was mastering the art of home espresso, I realized that why your milk pitcher position is ruining your texture is often the primary culprit for separation. You cannot just shove the wand in and hope for the best. You need a surgical approach to air injection. Research from the Specialty Coffee Association (SCA) confirms that plant-based milks require a lower temperature threshold—usually peaking around 55-60°C—to maintain structural integrity. Anything higher, and the emulsion breaks instantly, leaving you with watery coffee and a layer of dry foam on top.
Is Plant-Based Latte Art Actually Worth the Effort?
I will be honest: it is objectively harder than using whole milk. But the payoff of a creamy, nut-forward latte that actually looks professional is incredible. You do not need a commercial setup, but you do need to understand the trick to getting the perfect swirl in your milk pitcher. Without that vortex, those tiny bubbles will never integrate. Have you found yourself constantly battling those giant, stiff bubbles that just will not pour? If so, you are not alone. It usually comes down to the stretching phase being too long. I once spent a whole morning trying to figure out how to stop your milk foam from turning into a big bubble, only to realize I was introducing air for five seconds too long. We are going to trim that timing down and get your texture right where it needs to be for a clean pour.
[image_placeholder]
First, stop thinking about the steam wand as a simple heater; think of it as a sculptor’s tool. With almond milk, the window of opportunity to incorporate air is incredibly tiny—usually about three to four seconds. I used to let the wand ‘paper tear’ for far too long, expecting a thick dairy-like froth, but that is exactly how to stop your milk foam from turning into a big bubble: you must cut the air injection early. Once your pitcher feels slightly warm to the touch (around 30°C), you are done adding air. If you keep stretching past that point, you are just creating a dry, stiff meringue that will sit on top of your coffee like a heavy, unpourable cloud.
Keep the Stretching Phase Short and Sharp
The sound you are looking for isn’t a loud hiss; it is a delicate chirp. When I first started, I was so aggressive with the air that I ended up with what looked like soap suds. Now, I position the tip just a hair’s breadth below the surface. After those initial few chirps, move the wand tip just a fraction of an inch deeper into the liquid. This transition is where the trick to getting the perfect swirl in your milk pitcher becomes your best friend. You need a vortex that is aggressive enough to pull those surface bubbles down into the depths for total integration.
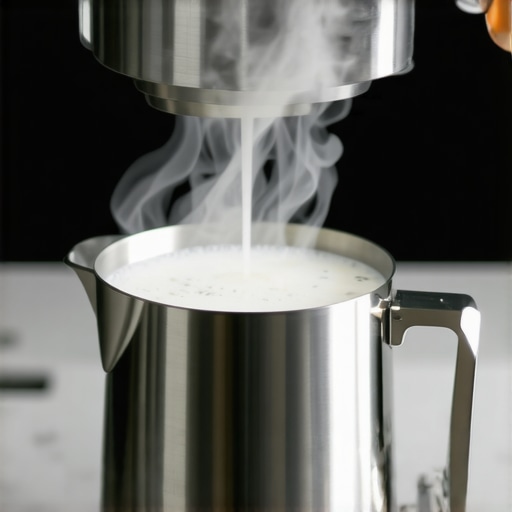
Get the Milk Moving Like a Whirlpool
If you are using the best barista gear for coffee enthusiasts, your machine likely has enough steam pressure to create a violent whirlpool. You have to find the sweet spot: tilt the pitcher toward you and slightly to the left, resting the wand against the spout. If the milk is just bubbling and not spinning, you won’t get microfoam. I remember a Tuesday morning where I was so focused on the ‘chirping’ sound that I completely ignored the roll. The result was a ‘top-heavy’ latte where the first sip was pure foam and the rest was watery almond water. You want the milk to look like spinning wet paint.
Why 55°C is Your Absolute Red Line
The chemistry of almond milk is unforgiving. Unlike cow’s milk, which can handle 65-70°C before the flavor turns, almond milk proteins are like brittle glass—they shatter at high heat. I once got distracted while checking my shot time and let the pitcher hit 70°C; the milk didn’t just smell burnt, it curdled instantly upon touching the espresso. Stop at 55°C (130°F). If you have a steam wand that only blows out weak air, you might be tempted to leave it in longer to reach a higher temp, but resist that urge. The moment the pitcher feels ‘uncomfortably hot’ for a split second, kill the steam. If you wait until it’s painful to hold, you’ve already ruined the emulsion.
Polish and Pour Before It Separates
Almond milk separates faster than a bad relationship. As soon as the wand is off, wipe it down and purge, but keep that pitcher moving. Give it a vigorous swirl on the counter and a few sharp taps to pop any stray ‘ghost’ bubbles. If the milk doesn’t look like glossy, liquid silk, you weren’t aggressive enough with your vortex. This is often why your milk pitcher position is ruining your texture—if the wand was too centered during the rolling phase, you never got that true integration. When the milk flows as a single, reflective unit, you have about ten seconds to pour your heart before the foam and liquid start their divorce.
Let’s dig deeper into the equipment side of the equation, because even the most perfectly textured almond milk can’t save a shot that was doomed before you hit the start button. A common industry myth is that the shiny machine sitting on your counter is the most important variable. In reality, I’ve found that many enthusiasts over-invest in top-rated espresso machines for coffee lovers in 2025 while neglecting the component that actually determines flavor: the grinder. You can have a five-thousand-dollar boiler, but if your burrs are misaligned or dull, your espresso will always taste like a shadow of its potential. In my years of testing, a superior grinder paired with a mid-range machine will outperform a flagship machine with a budget grinder every single time.
The False Promise of the Shiny Stainless Steel Box
We often fall into the trap of thinking more buttons or a digital display will solve our extraction woes. This is the ‘oops’ factor of high-end consumerism. The machine’s primary job is simply to provide stable water temperature and consistent pressure. The real technical hurdle is how to select the perfect coffee grinder for your brew and then maintaining it. For instance, have you checked why your group head shower screen is getting clogged so fast lately? A tiny bit of oil buildup can completely disrupt the water dispersion, leading to channeling that no amount of fancy gear can fix. Research from the Specialty Coffee Association (SCA) suggests that even a minor lack of thermal stability in the group head can drastically shift the extraction profile of light roasts, making them taste sour despite a long pull time.
How much of your shot quality is being lost to invisible clumping?
If you have ever wondered why your coffee grounds are clumping together, you have identified the secret enemy of a balanced shot. When grounds clump, they create a ‘path of least resistance’ for the water. You might think you have a perfect tamp, but internally, the water is rushing through those gaps. This is why choosing the best barista gear for coffee enthusiasts must include tools for distribution, not just pressure. I spent months chasing my tail with temperature settings before realizing that a simple distribution tool and the simple paper filter trick for better bottomless shots were the actual solutions to my watery extractions.

Don’t let humidity ruin your morning extraction
The biggest nuance that separates a home hobbyist from a seasoned pro is the realization that your equipment is part of a changing environment. This is often why your grinder settings feel like they changed overnight. A rainstorm or even just turning on your kitchen heater can change how the beans react to the burrs. When mastering the art of home espresso tips for beginners, you have to learn to ‘dial in’ every single morning, regardless of where the dial was yesterday. It is a constant dance of micro-adjustments. Have you ever fallen into the trap of thinking your gear was broken just because a shot ran fast on a humid Tuesday? Let me know in the comments, because I’ve certainly been there, staring at my machine in frustration when all I needed to do was click the grinder two steps finer.
I have learned the hard way that the most expensive repair isn’t a broken pump—it’s the slow, silent calcification of your internals. If you aren’t filtering your water or testing its hardness, you are playing a dangerous game with your investment. According to technical guidelines from the experts at La Marzocco, maintaining water hardness between 3-5 grains is the ‘sweet spot’ for both flavor and machine longevity. This is exactly how to tell if your machine boiler is accumulating lime scale before it reaches a point of no return. I remember opening my first dual-boiler after two years of using ‘okay’ tap water and seeing what looked like a coral reef inside. Don’t be like me. Use a proper filtration system and learn the best way to descale a boiler without using harsh vinegar, which can often strip the protective layers of your copper pipes and leave a nasty aftertaste.
Stop the Scale Before it Clogs Your Boiler
Beyond the internal chemistry, there is the mechanical wear that most people ignore until something squeaks. If you own a prosumer machine, you absolutely need to know how to properly lubricate your e61 group head cam. That ‘crunchy’ feeling when you pull the lever? That is metal grinding on metal because your backflushing detergent stripped away the food-grade grease. It is a five-minute fix that extends the life of your seals by years. I personally keep a small tube of Molykote 111 in my drawer; it is the single best investment for keeping the lever action smooth as butter. If you ignore this, you’ll eventually find why your manual lever feels harder to pull than usual and risk snapping internal components.
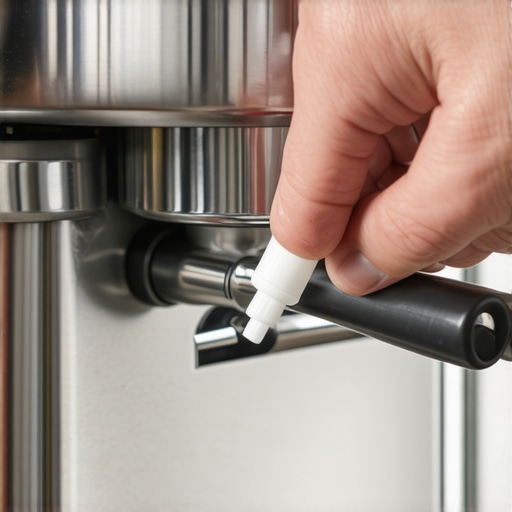
Tiny Tools for Big Grinder Problems
Then there is the grinder. We talk about burrs, but we rarely talk about the chute. Static and oil create a ‘glue’ that traps old coffee. This is why your coffee grinder retains more grounds than it should, leading to a stale first shot every morning. I started using a simple pipe cleaner—yes, the kind from a craft store—to sweep the exit path. It sounds low-tech, but how to clean your grinders discharge chute with a pipe cleaner is the most effective way to ensure zero-retention without taking the whole thing apart. I predict that in the next few years, we will see ‘self-purging’ grinders with built-in ionizers becoming the standard for home enthusiasts, effectively ending the static war that plagues our counters.
How do I maintain my espresso setup for the long haul?
Consistency isn’t just about your tamping pressure; it’s about the hygiene of the machine. If you find your shots are getting progressively worse despite using the same beans, check why your group head shower screen is getting clogged so fast. A dirty screen causes uneven water flow, which leads to channeling that ruins your extraction. This is the move for better espresso without buying a new machine: keep it clean. My personal challenge to you: tomorrow morning, before you pull your first shot, take a pipe cleaner to your grinder chute and backflush your group head with plain water. You might be shocked at the flavor clarity you’ve been missing because of old, rancid oils hiding in the crevices of your best barista gear for coffee enthusiasts.
What I Wish I Knew Before Ruining My First Hundred Lattes
The journey from a messy kitchen to a professional-grade pour isn’t paved with expensive machines, but with small, technical adjustments. First, stop chasing the ‘dairy feel’ with almond milk; it will never happen. Instead, embrace the unique, lighter viscosity and stop the steam much earlier than you think. I learned the hard way that temperature is a hard ceiling, not a suggestion. Also, your gear is only as good as its last cleaning. I spent weeks frustrated by sour shots, only to realize why your group head shower screen is getting clogged so fast was the silent culprit behind my uneven extraction. Finally, remember that the ‘chirp’ of air injection should be a whisper, not a scream—if it sounds like a jet engine, you’ve already lost the microfoam battle.
My Daily Toolkit for Better Coffee
If you want to move beyond basic brewing, you need more than just a steam wand. I always suggest looking into milk frothers that transform your coffee experience if you want a low-stakes way to practice temperature thresholds. For those ready to commit to the craft, choosing the best barista gear for coffee enthusiasts means investing in a high-quality distribution tool and a reliable scale. I also highly recommend keeping a dedicated maintenance kit—a simple pipe cleaner and food-grade grease are more valuable than a shiny new tamper. These small additions transformed my workflow from guesswork to a repeatable science.
Start Your Morning with a Better Pour
At the end of the day, home espresso is a practice of patience. Every time you find why your coffee grounds are clumping like little rocks and fix it, you are one step closer to that god-shot. Don’t be discouraged by a few separated lattes or a noisy pump; it’s all part of mastering the art of home espresso tips for beginners. The ritual of the brew is just as satisfying as the first sip, provided you treat your equipment with the respect it deserves. Have you ever struggled with getting that almond milk to actually swirl in the pitcher, or does it just sit there like a rock? Let me know your biggest hurdle in the comments below!