How to Fix a Leaking Steam Wand Valve Pin
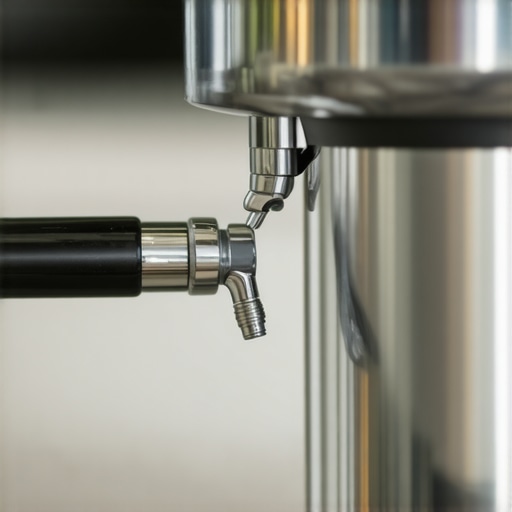
It’s 5:45 AM, the house is dead quiet, and I’m standing in my kitchen waiting for the boiler to hit temp. Instead of the usual comforting hum, I hear it. Hiss… drip… hiss. A tiny, stubborn plume of steam is escaping the tip of my wand, and there’s a growing puddle on the tray that definitely wasn’t there yesterday. It’s infuriating. If you’ve spent any time mastering the art of home espresso, you know that sound is the death knell of a peaceful morning. It’s not just the noise; it’s the loss of pressure, the potential for scale buildup, and the sheer annoyance of a machine that won’t just stay shut. I’ve been through this dance more times than I’d like to admit with various top-rated espresso machines, and today, I’m going to show you how to swap that valve pin and reclaim your sanity. [image_placeholder_1]
Your Morning Silence Deserves More Than a Hissing Wand
The first time I encountered a leak, I did the most “neighborly” thing possible: I ignored it. I figured, “Hey, it’s just a drop of water, no big deal.” Six months later, my drip tray was overflowing daily, and searching for why your espresso machine is leaking steam from the top became my nightly ritual. My biggest mistake back then was trying to “crank” the knob tighter. I thought brute force would solve a mechanical seal issue. Spoiler alert: it didn’t. All I did was deform the brass valve seat, turning a simple ten-dollar pin replacement into a massive headache involving a full valve assembly replacement. Don’t be like early-me. If you suspect the reason your steam wand valve feels gritty is keeping you from that perfect microfoam, it’s time to act before the damage spreads. According to experts at the Coffee Technicians Guild, most steam valves are actually designed to be serviced every 12-24 months because constant heat cycles eventually harden the rubber seals, a technical failure known as a “compression set.”
Will I end up breaking my expensive machine?
I get the fear, truly. You likely spent a month’s rent on this shiny piece of stainless steel, and the idea of taking a wrench to it feels like performing open-heart surgery on a family member. But here’s the reality: the steam wand valve pin is one of the most straightforward DIY fixes you can perform. It’s a basic mechanical assembly. You aren’t messing with the sensitive electronics or the delicate PID sensors. Have you ever felt that sinking feeling when you see a mystery puddle under your machine? Let me know in the comments if you’ve ever tried a “quick fix” that ended up making things worse—I promise I won’t judge because I’ve been there myself! We are going to walk through the exact steps of opening the case, backing out that valve, and replacing the pin so your wand seals tighter than a drum, saving your machine and your coffee experience.
Kill the Power and Clear Your Workspace
Safety isn’t just a buzzword here; it’s a requirement. Before you even look at a screwdriver, unplug the machine. I once thought I could “quickly” adjust a probe while the machine was live, and the resulting spark didn’t just scare me—it nearly fried a very expensive control board. While you’re at it, let the machine cool down completely. Working on a hot boiler is a recipe for burned knuckles and dropped screws. You’ll need an adjustable wrench, a set of screwdrivers, and some Molykote 111 (food-grade silicone grease). Having the right barista gear on hand makes this a twenty-minute job instead of a two-hour ordeal.
Peel Back the Stainless Steel Skin
Most prosumer machines have a few screws hidden under the cup warmer or near the group head. Take them out and keep them in a magnetic bowl. I learned this the hard way when a tiny case screw rolled into the internals of my coffee grinder sitting nearby. Once the top plate is off, you’ll see the steam valve assembly. It’s usually a brass body connected to the wand and the boiler via copper tubing. Take a photo of the internal layout before you disconnect anything; it’s a lifesaver when you’re trying to remember which wire went to the vacuum breaker later.
Locate the Valve Stem and Pin
The part we’re after is inside the valve body. Use your wrench to loosen the nut behind the steam knob. Be careful not to round the edges of the brass; brass is soft and unforgiving. If you find the reason your steam wand valve feels gritty is due to old, dried-up lubricant or calcified minerals, you’re on the right track. Slide the stem out, and you’ll see the rubber-tipped pin at the end. This tiny piece of rubber is what actually stops the steam and prevents that annoying hiss.
The Secret is in the Silicone Grease
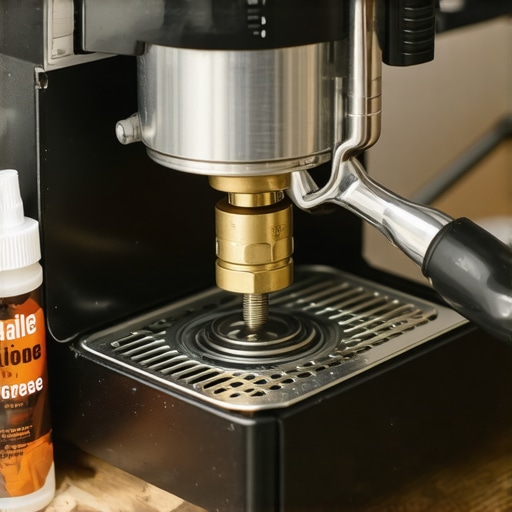
Pop the old pin out—it might be stuck or brittle—and press the new one in. But here is the step most people skip: you must lubricate the threads and the O-rings on the stem. Without grease, the metal-on-metal friction will eventually cause leaking steam from the top of the valve again within months. When I did this on my first dual-boiler, I went “dry” because I was impatient. The knob was so hard to turn that I actually snapped the plastic handle. Now, I use a liberal coating of silicone grease, and the action is like butter. It makes the daily ritual of frothing milk feel like you’re operating a high-end luxury instrument.
Reassemble and Test the Seal
Thread the stem back into the valve body by hand first to ensure you aren’t cross-threading it. Tighten it with the wrench just until it’s snug. You don’t need to over-tighten; the rubber pin does the sealing, not the force of the threads. Once everything is back together, it’s time to check if you’ve managed to fix a steam wand that only blows out weak air or leaks. Turn the machine on, let it reach full pressure, and listen. That silence is the sound of success. While the hood is still off, this is also a great time to check if your portafilter gasket is actually sealed properly by running a blind shot and looking for leaks around the group head.
Now that the valve is seated and the hiss has vanished, we need to address the ‘why’ behind the wear. Most people think their hardware is failing because it is cheap or old, but often, the hardware is just reacting to the environment we create inside the boiler. There is a common belief that more holes in a steam tip lead to faster, better microfoam. In my experience, this is the biggest trap for home baristas using single-boiler or smaller heat-exchange machines. If you have been wondering why some steam wands have two holes and others have four, it is not just about speed; it is about the machine’s ability to maintain ‘dry’ steam. When you use a four-hole tip on a small boiler, you are venting pressure faster than the heating element can keep up. This results in why your espresso machine steam is wet and spluttery, which is the absolute enemy of silky latte art. It leads to the reason your steam wand only makes thin hot milk instead of that thick, paint-like texture we all crave for our hearts and rosettas.
The Myth of More Holes in Your Steam Tip
Professional machines with multi-gallon boilers can handle a high-volume flow, but home units often struggle to reach thermal equilibrium. When you open the valve, you aren’t just letting out steam; you’re releasing energy. Advanced machines compensate for this, but your standard home setup needs time to breathe. Pushing it too hard doesn’t just result in bad milk; it cooks the seals faster. If you have replaced your pin and it fails again in three months, check your boiler temperature settings. Precision is everything when you are mastering the art of home espresso and that includes managing your thermal resources.
Why your steam pressure drops when you need it most?
The answer usually isn’t the pump; it’s the internal scale. A technical study by the Coffee Science Foundation highlights that even a microscopic layer of calcium carbonate on your heating element acts as an insulator, slowing down the recovery time between frothing milk and pulling shots. This inefficiency puts extra strain on your steam valve. When the temperature fluctuates wildly, the rubber on that new valve pin expands and contracts more than it was designed to, leading to another premature failure. This is why even top-rated espresso machines require strict water filtration habits.
Scale Flakes are the Silent Killers of New Valves
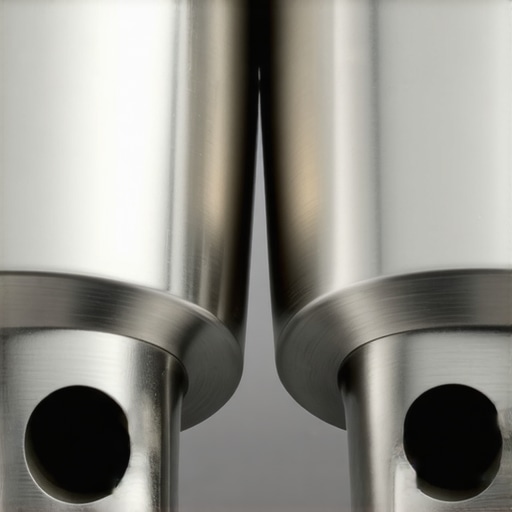
The ‘Oops’ factor you have to watch out for is the ‘Post-Fix Clog.’ After you’ve replaced your valve pin, you might be tempted to run a heavy descaling cycle to clean everything out. Be warned: if you haven’t descaled in a year, a heavy chemical flush can break loose large flakes of scale. These flakes act like shrapnel, flying through your copper lines and getting lodged right in the seat of your brand-new valve. Instead of a smooth seal, you’ll find the reason your steam wand valve feels gritty is actually mineral debris you just stirred up. I always recommend the best way to descale a boiler without using harsh vinegar—use a citric-acid-based solution that dissolves minerals slowly rather than breaking them off in chunks. If you do mess it up, you will need to know how to recover from a failed descaling process before your group head stops flowing entirely. Have you ever fallen into this trap of over-cleaning or upgrading a part only to have it cause a new problem? Let me know in the comments—I have definitely caused more than one technical difficulty by being a bit too enthusiastic with the descaler!
Stop Grinder Clogs Before They Kill Your Motor
It’s easy to focus entirely on the shiny top-rated espresso machines on our counters, but your grinder is the unsung hero that takes the most abuse. If you have noticed why your coffee grounds are clumping like little rocks, you are likely dealing with a build-up of oils and static in the exit path. I personally keep a pack of flexible pipe cleaners next to my setup. It might look like a craft project, but knowing how to clean your grinders discharge chute with a pipe cleaner is the single best way to ensure every shot is made from fresh grounds rather than yesterday’s stale leftovers. When you neglect this, the motor has to work twice as hard to push coffee through the blockage, eventually leading to a burnt-out capacitor or a seized adjustment ring. 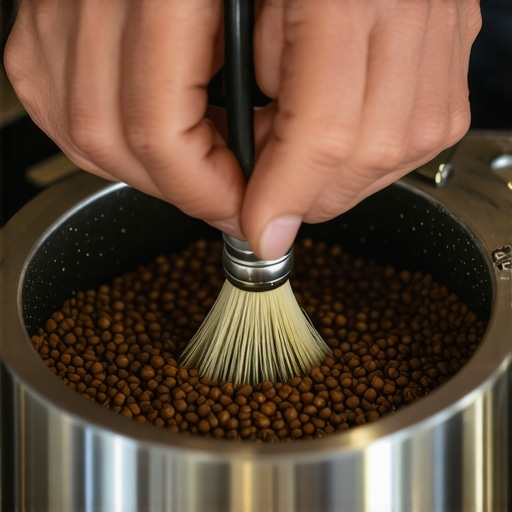
How do I maintain my home espresso gear for the long haul?
The secret is a tiered schedule. Daily, you purge the wand. Weekly, you backwash. Monthly, you deep clean the grinder and check your water quality. La Marzocco’s official Home Preventive Maintenance guide specifically notes that vacuum breakers and steam valves are high-wear items that should be inspected every six months to prevent catastrophic boiler leaks. I’ve made it a ritual to pull the top off my machine on the first Sunday of every quarter. I’m looking for white crystalline powder around fittings—that’s the first sign of a slow leak that hasn’t started hissing yet. If you are serious about choosing the best barista gear, you have to be just as serious about the tools required to keep it running.
Why Your Water Chemistry Is More Important Than Your Machine
You can buy a five-thousand-dollar machine, but if you feed it hard tap water, you are essentially pouring liquid concrete into your copper pipes. I cannot stress this enough: use the easy way to test your machines water hardness at home before you even pull your first shot. I use a simple GH/KH drop test kit from an aquarium shop—it’s more accurate than those paper strips that come in the box. Once you know your numbers, you can decide if you need a specialized soft-water pouch for your reservoir or if you need to switch to a custom-mineralized bottled water. This prevents the nightmare scenario where why your steam wand tips keep getting blocked by milk residue is actually the least of your problems compared to a calcified heating element. Also, don’t forget the hygiene of the intake; knowing how to clean the inside of your steam wand pipe prevents the growth of bio-films that can ruin the flavor of your milk.
Smart Sensors are Coming for Your Boiler
Looking ahead, I predict we are going to see a massive shift toward IoT-integrated maintenance. We are already seeing high-end grinders with load sensors, but the next step is internal conductivity probes that alert your phone the second scale begins to form on a probe. We will move away from ‘guessing’ when to descale to a data-driven approach that saves our gaskets and valves from unnecessary chemical exposure. Until then, you are the sensor. I want you to try one thing today: grab a pipe cleaner and clear out your grinder’s discharge chute. You will be amazed—and probably a little grossed out—by the amount of old coffee that’s been hiding there. It’s the easiest way to instantly improve your morning cup.
The Hardest Lesson My Overflowing Drip Tray Taught Me
Over the years, I’ve realized that the most expensive repairs usually start as a five-minute fix that was ignored. If you are mastering the art of home espresso, the first thing to accept is that rubber and heat don’t play well together indefinitely. I once thought my machine was ‘broken’ because it wouldn’t build pressure, only to realize I was accumulating lime scale so thick it choked the boiler probes. Maintenance isn’t about fixing things when they break; it’s about preventing the break before it happens. Most importantly, I learned that a gentle touch wins every time—tightening a valve harder doesn’t stop a leak, it only ruins the brass. Respect the seals, and they will respect your morning routine.
My Go-To Maintenance Kit for a Forever Machine
I don’t keep much in my ‘espresso drawer,’ but what I do have is non-negotiable for anyone who values their top-rated espresso machines. First, Molykote 111 is the gold standard for food-safe lubrication and keeps your valve pins moving like silk. Second, a dedicated magnetic screw tray is essential; losing a chassis screw inside a boiler is a mistake you only make once. Finally, I never skip a weekly test to test your machines water hardness. This simple habit has saved me from the dreaded full-boiler descaling process more times than I can count. These tools aren’t just accessories; they are the insurance policy for your coffee hobby.
#IMAGE_PLACEHOLDER_E#
Stop Fearing the Case Screws and Reclaim Your Ritual
Opening up your machine for the first time is intimidating, but it is the bridge between being a coffee consumer and a true barista craftsman. When you understand the components under the hood, you stop being at the mercy of a service technician’s schedule. You gain the confidence to clean your grinders discharge chute or swap a valve pin without breaking a sweat. Your morning coffee should be a moment of zen, not a source of stress. So, grab your tools, take it slow, and turn that annoying hiss back into the beautiful silence of a perfectly tuned machine. Have you ever felt that initial surge of panic when you first saw a leak on your counter, or did you dive straight into the repair? Let me know in the comments below—I’d love to hear your DIY success stories!