How to Fix a Stuck Solenoid Valve on Your Gaggia or Silvia
Have you ever been in the middle of brewing your morning espresso, only to hear a sudden, strange clicking sound followed by a complete halt? That moment of realization hits—you’ve got a stuck solenoid valve on your Gaggia or Silvia espresso machine. I remember the first time this happened to me; I was just about to enjoy that perfect shot, and suddenly, everything ground to a halt. It was frustrating, disheartening, and left me wondering: did I just ruin my beloved machine? That lightbulb moment sparked my journey into understanding how to fix this common yet perplexing issue, and I want to share it with you.
Why a Stuck Solenoid Valve Can Throw Off Your Morning Routine
The solenoid valve is a tiny but mighty component, controlling the flow of water and steam within your espresso machine. When it jams or becomes stuck, your machine might stop pumping water, leak, or refuse to heat correctly. This isn’t just inconvenient; it affects the quality of your brew and can cause long-term damage if left unaddressed. Imagine having your perfect coffee ritual disrupted—it’s like losing a little piece of your daily joy. The good news? With some basic troubleshooting, you can often resolve this problem yourself, saving both time and money.
Could You Be Falling for the Biggest Mistake?
Early on, I made the mistake of ignoring the signs, thinking it was just a minor glitch. Instead of addressing the root cause, I kept using the machine, which only worsened the problem. That’s a common—and costly—error among home baristas. Proper maintenance and timely intervention can extend the lifespan of your equipment and ensure your espresso remains consistent. If you’re tired of unexplained pauses and sudden leaks, I highly recommend diving into our detailed guide. For comprehensive tips on maintaining your gear, check out this beginner-friendly resource.
Now, let’s get into how you can fix your solenoid valve effectively. I’ll walk you through the process step-by-step, so stay tuned. Before we start, I want to ask—have you already faced this issue with your espresso machine? Or is this your first warning sign? Either way, know that solutions are more straightforward than you might think.
Drain the System Safely
Start by turning off the machine and unplugging it to avoid electrical hazards. Remove the water reservoir and any accessories that block access to the solenoid valve. Think of this step as draining a pipe before repair—it’s essential for safety and clarity. I once overlooked this and got splashed with hot water, which reminded me why caution is key.
Locate and Remove the Solenoid Valve
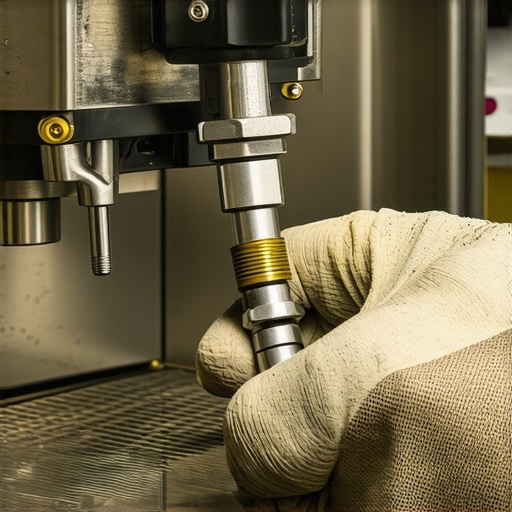
The solenoid valve is usually positioned along the water flow path, identifiable by its electrical connector and small cylindrical body. Use a wrench or screwdriver to detach the fittings—just like loosening a stubborn jar lid. Remember to keep track of all parts; I once lost a tiny gasket, resulting in a leak that took hours to fix.
Clean the Valve Carefully
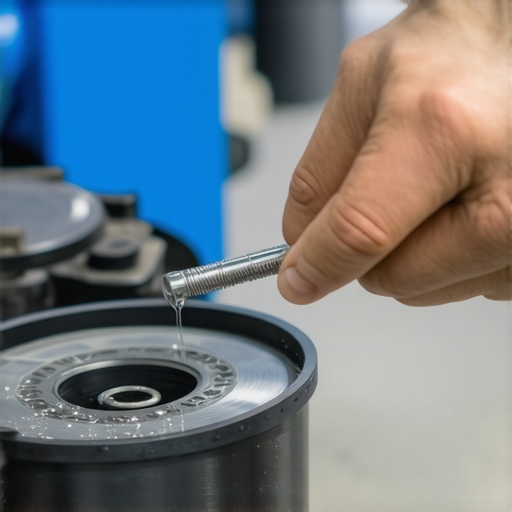
Soak the valve in a vinegar solution or use a commercial descaler to loosen mineral buildup—imagine giving your coffee grinder burrs a deep clean. Use a soft brush to scrub away any deposits, paying close attention to the internal ports. This process is similar to cleaning a coffee filter; thorough removal of debris ensures smooth operation. I once rushed this step and reassembled a clogged valve, which soon caused the machine to fail again.
Apply the Backpressure Method for Stuck Components
This technique involves gently applying pressure to free a jammed piston or plunger in the valve. Think of it as massaging a tense muscle—you’re encouraging it to relax. Use a small screwdriver or pin to gently pry or press against the stuck parts, working slowly to avoid damage. I recall applying this method after softening deposits and feeling the valve give way—a small victory that saved me hundreds on repairs.
Reassemble and Test
Reattach all fittings tightly, ensuring no leaks—like sealing a bottle cap before flipping it over. Reinstall the water reservoir and power up the machine. Observe the operation; the flow should resume smoothly. If issues persist, revisit the cleaning or consider replacing the valve entirely. I once replaced a valve that had irreparable damage, and now my shots flow perfectly again.
Prevent Future Jams with Routine Maintenance
Regularly descale your machine, especially if using hard water—think of it as changing the oil in a car. Clean the water lines and filters periodically to prevent mineral buildup that causes sticking. Maintaining a clean system extends the lifespan of components and preserves your coffee quality. For detailed maintenance routines, explore this resource.
Many enthusiasts assume that simply owning high-end espresso machines and grinders guarantees perfect coffee, but in reality, it’s often the nuanced understanding and proper setup that make all the difference. A common misconception is that more expensive equipment automatically produces better results; however, even top-tier gear can underperform if not correctly calibrated or maintained. For example, a study published in the Journal of Coffee Science highlights how precise grinder calibration impacts extraction quality more than the machine’s price point alone. Additionally, many home baristas overlook the importance of equipment consistency—having multiple grinders or inconsistent tamping practices can lead to unpredictable shot quality, regardless of the machine’s capabilities.
Another widespread myth is that all milk frothers are created equal. In truth, the type of frother and its design significantly influence the texture and microfoam quality. For instance, automatic frothers with weak motors may produce larger bubbles, compromising latte art, whereas high-quality manual or high-performance automatic frothers can create silky microfoam essential for professional-style drinks.
A surprisingly overlooked aspect is the influence of water quality and maintenance routines on brewing outcomes. Hard water deposits can clog internal components or alter pressure dynamics, often leading to inconsistent extraction and machine breakdowns. Regular descaling—using appropriate descaling solutions—is crucial; relying solely on backflush routines may not prevent mineral buildup, especially in areas with hard water. Proper cleaning extends equipment lifespan and ensures optimal performance.
For advanced users seeking to optimize their workflow, understanding the interplay between grind size, tamping pressure, and brew temperature becomes vital. Small adjustments in grind size or tamp force can drastically alter extraction, a fact supported by espresso research indicating how even minor deviations affect shot consistency. Using tools like a calibrated tamper or a scale for dose accuracy can help eliminate variations.
Let’s talk about the often underappreciated necessity of routine calibration and maintenance. Many users neglect to recalibrate grinders after changing beans or only clean components sporadically. Over time, burrs wear down, affecting grind consistency and thus extraction. Regularly inspecting burrs and calibrating grinders, as advised in our detailed guide, can prevent subtle but impactful issues.
Thinking beyond basic maintenance, some enthusiasts dive into modding or upgrading their equipment—like replacing stock steam wands or installing PID controllers. While these modifications can optimize performance, they also introduce new complexities and potential pitfalls, such as improper installation or voiding warranties. Therefore, thorough research and cautious implementation are essential.
In the realm of home espresso, the devil is truly in the details. Equipment choice, meticulous calibration, and attentive maintenance combined with a nuanced understanding of brewing variables lead to consistently excellent results. Don’t fall into the trap of assuming your gear is enough—it’s the skill and knowledge behind it that craft a perfect cup.
Have you ever fallen into this trap? Let me know in the comments or reach out through our contact page—I’d love to hear your experiences and help troubleshoot.
Maintaining your home espresso setup isn’t just about cleaning once in a while; it involves a strategic approach to tools, routines, and upgrades that keep your gear performing at its peak. As equipment evolves, so should your maintenance tactics. One essential tool I swear by is a calibrated torque wrench, which I use when adjusting grinder burrs or tamping pressure. Precise calibration ensures consistent extraction, reducing waste and improving flavor. For grinders, I rely on a dental pick to clear stubborn coffee oils from burr crevices, ensuring smooth operation over time. Regularly using a high-quality grinder cleaner also prevents build-up that can compromise grind size and flavor.
Long-term results depend heavily on routine maintenance. Establishing a schedule—such as weekly descaling with a pH-neutral solution and bi-weekly deep cleaning of group heads and portafilters—minimizes clogging and corrosion. To make this easier, I use a specialized brush set designed for espresso components. These tools cut down cleaning time and improve results, ensuring your machine produces rich, flavorful shots consistently.
How do I maintain my espresso gear over time?
The key is adopting preventive measures—like regularly inspecting seals and gaskets for wear, and replacing them before leaks occur. I also recommend keeping a detailed maintenance log, noting when each part was last serviced or replaced. Upgraded valves, such as quick-release portafilter systems, can dramatically cut down on cleaning downtime and help maintain consistent pressure during brewing. For those serious about longevity and performance, investing in a precision espresso scale helps monitor dosage accuracy, which is vital for perfect shots over months and years.
Looking ahead, I predict smart maintenance tools integrated with app notifications will become standard, reminding homeowners when descaling or recalibration is due—making the entire process more seamless. Until then, combining diligent routine care with the right tools ensures you get the most out of your investment. For recommendations tailored to your equipment, visit this comprehensive guide and consider adding a water tank cleaning kit to your toolkit. Start integrating these tips today, and watch your espresso game improve remarkably.
Throughout my journey into home espresso mastery, one of the most valuable lessons I’ve learned is that a little knowledge can save you a lot of frustration—and money. Tackling issues like a stuck solenoid valve not only restores your machine’s performance but deepens your understanding of its inner workings. This hands-on approach transforms problems from dreaded failures into rewarding learning experiences, empowering you to troubleshoot confidently and keep your coffee game on point.
Lessons from the Trenches: The Hidden Challenges of Espresso Gear
One unexpected insight I gained is the importance of patience when working with delicate components like solenoid valves. The first time I attempted a repair, rushing led to dismantling parts improperly and causing more harm than good. Now, I approach these repairs methodically, recognizing that every screw and gasket has a role. This experience taught me to respect the intricacies of high-quality home espresso gear and to view maintenance as a routine ritual rather than a chore.
Another lesson involves understanding mineral buildup’s impact on water flow. I used to overlook descaling, assuming that only gross residue caused issues. Discovering how mineral deposits can cause valves to stick opened or closed was a revelation. Regularly descaling and cleaning not only prevent breakdowns but also ensure consistent extraction and flavor—crucial for enthusiasts aiming for barista-level results at home.
Moreover, I realized the significance of proper reassembly. After cleaning or replacing a solenoid valve, meticulous attention to gasket placement and fitting tightness has been key to preventing leaks and ensuring longevity. Each successful fix boosted my confidence, reinforcing that patience and precision are the best tools in a home barista’s kit.
Essential Tools That Keep My Coffee Routine Smooth
Over the years, I’ve curated a toolkit that’s proven indispensable. A calibrated torque wrench ensures consistent tamping pressure, directly affecting shot quality. A fine-bristled brush and descaling solutions like vinegar or commercial cleaners help me maintain water pathways, preventing mineral deposits from causing jams. For tackling stubborn components, a small backpressure pump or the backpressure method provides the gentle force needed to free stuck parts without damage. Additionally, a clear silicone gasket sealant can be handy when replacing worn gaskets for a perfect, leak-free fit.
Investing in quality replacement parts, such as genuine solenoid valves and compatible gaskets, has paid off multiple times. These components are available through trusted sources and often come with instructions or community guides—so I recommend checking out forums and product reviews before making a purchase. Regular inspections, combined with these tools, create a proactive maintenance routine that keeps my espresso setup performing flawlessly.
Stepping Into the Future of Home Espresso Maintenance
Based on my experiences and ongoing learning, I believe the future of home espresso care will involve smart diagnostics and automated alerts—think of it as a health monitor for your machine. Imagine receiving a notification when descaling is due or when a component shows signs of wear, helping you prevent breakdowns before they happen. While this technology is still emerging, embracing meticulous maintenance now ensures you’re prepared for those innovations, maximizing the lifespan and quality of your coffee gear.
Remember, every challenge you encounter with your espresso machine is an opportunity to deepen your expertise. Embracing patience, precision, and the right tools transforms repairs from nuisances into enriching parts of your brewing adventure. Keep experimenting, learning, and enjoying the process—your perfect espresso awaits.