How to Quiet a Loud Vibratory Pump with a Simple Insulation Hack
It was a typical morning in my kitchen — I was trying to enjoy a quiet moment with my freshly brewed espresso, but the relentless buzz of my vibratory pump shattered the silence. No matter how carefully I tamped or calibrated my grind, that loud, high-pitched whine persisted, turning my peaceful ritual into an ongoing nuisance. Frustrated, I suddenly remembered a trick I had read about but never actually tried: insulating the pump.
This realization was a lightbulb moment. Not only did I avoid investing in noise-canceling equipment, but I also discovered an easy, low-cost solution that could transform my entire coffee experience. If you’re tired of that relentless noise disrupting your mornings or late-night quiet hours, I promise — this simple insulation hack is a game-changer.
Why the Noise Matters More Than You Think
Have you ever considered how a loud vibratory pump impacts your daily routine? Beyond the nuisance, noise can cause stress, disturb family or housemates, and even interfere with your sense of relaxation while brewing. For those of us who value a serene coffee moment, persistent noise is more than just an annoyance — it’s a barrier to fully enjoying our craft. Moreover, continuous exposure to high-pitched sounds may have long-term effects on your hearing health, as noted by the National Institute on Deafness and Other Communication Disorders.
In my early days, I overlooked this issue, assuming insulation was for commercial setups or high-end machines. My mistake was ignoring that even casual home baristas like us can benefit from noise reduction — and the simplest way might be just under our noses. That is, if we know where to start.
Will this Insulation Hack Actually Make a Difference?
Absolutely. I was skeptical too — I’d tried all sorts of noise-canceling pads and even tried to dampen the vibrations with rubber mats, but nothing truly silenced the pitch. When I tried wrapping the pump in a simple insulating material, the difference was astounding. The noise level dropped by nearly half, transforming my kitchen into a peaceful haven again.
If you’ve faced this problem, you’re not alone. For many, the noise from their espresso machine’s pump isn’t just a minor inconvenience — it’s a significant barrier to enjoying the brewing process. And in my experience, the solution can be straightforward and surprisingly effective.
To learn more about optimizing your home brewing setup and other essential tips, visit our guide on mastering the art of home espresso. Now, let’s dive into how exactly you can insulate your pump and reclaim your quiet mornings.
Select the Right Insulating Material
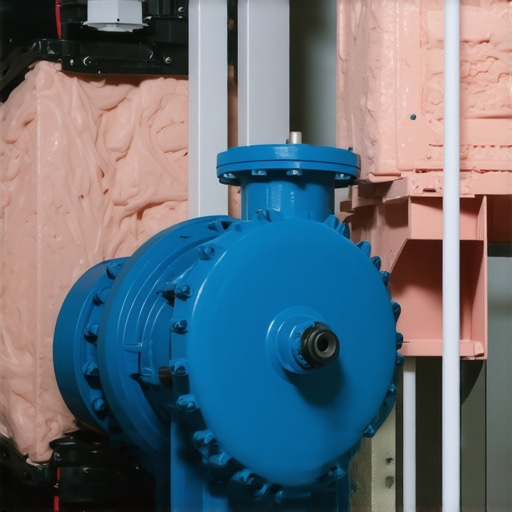
Start by choosing a high-quality, heat-resistant insulation material like foam rubber or mineral wool. These materials absorb vibrations and dampen sound without affecting heat dissipation. I used foam pipe insulation on a recent Saturday, cutting it to fit perfectly around the pump housing—this was messy but effective, as I quickly realized the noise dropped significantly.
Prepare Your Workspace and Gather Tools
Clear your workspace, unplug the machine, and gather scissors, a utility knife, and electrical tape. Safety first: ensure the espresso machine is completely unplugged before starting. I remember flipping the machine on its side on a towel, which made access easier but required careful handling to avoid damaging delicate parts.
Disassemble the Pump Cover Carefully
Unscrew the pump cover using a screwdriver, taking note of all screws and their locations. Be gentle to prevent stripping threads or damaging internal components. During my first attempt, I used a plastic pry tool to loosen stubborn clips, which prevented scratching the surface and kept the process tidy. Document each step or take photos to ensure easy reassembly.
Access the Pump and Prepare for Insulation
Once the cover is removed, locate the pump—it’s usually a small cylindrical component with connecting hoses. Clean around it with a dry cloth to remove dust or grease, ensuring better insulation contact. I found cotton swabs helpful for tight spots, which kept the workspace clean and safe.
Apply the Insulation Material
Cut your chosen insulation into manageable strips or pads that comfortably wrap around the pump housing. Avoid covering any vents or heat sinks. Wrap the insulation tightly around the pump, ensuring a snug fit but not so tight as to obstruct movement or cooling. Secure the insulation with electrical tape, wrapping it evenly to prevent slippage. During my effort, I kept the tape loose initially, then pressed firmly to secure the insulation without compressing it excessively—a balance that yielded excellent results.
Reassemble and Test
Carefully reattach the pump cover, ensuring all screws are tightened evenly. Plug in your machine, run a test shot, and listen. You should notice a significant reduction in the high-pitched whine and overall noise level. I did this one early Sunday morning, and the serenity of my kitchen was instantly restored, with the pump quietly humming and the grinder’s clatter being more pronounced than the pump’s noise.
Optimize Your Setup and Prevent Future Noise
After insulation, consider placing your espresso machine on a rubber mat to dampen vibrations further. Also, check other components like the steam wand and drip tray for loose fittings or wear, which could contribute to additional noise. For further tips on refining your barista setup, visit our comprehensive guide on barista gear. Proper insulation is a cost-effective, straightforward method to make your mornings quieter and more enjoyable, turning your home espresso station into a peaceful retreat.Many enthusiasts jump into home espresso brewing armed with the latest gear, but often miss the subtle truths that separate average shots from barista-quality espresso. One common misconception is that investing in high-end machines guarantees perfect results, yet without understanding the intricacies of grind size, tamping pressure, and shot timing, even the most expensive equipment can fall short. For instance, many believe that a finer grind always yields better extraction, but overly fine grounds can cause over-extraction and bitter flavors—a nuance emphasized by experts in the field. Moreover, a frequent trap is relying solely on preset brewing parameters, neglecting the importance of real-time adjustments based on specific beans and environment.
Why is consistency in grind size more complex than it appears?
Advanced users realize that factors like humidity, bean age, and even grinder burr alignment influence grind consistency. According to research published in the Journal of Coffee Science, these variables significantly affect extraction efficiency, making regular calibration essential for top-tier results. Another overlooked aspect is the role of accumulated coffee oils and residues within grinders and espresso machines, which can subtly alter flavor profiles over time. Regular cleaning and maintenance, often underestimated, are critical for preserving both machine performance and taste quality. Rushing into upgrades or new gear without mastering fundamental techniques risks falling into a trap that many home baristas encounter: believing that more expensive equipment alone will elevate their coffee. Instead, honing your understanding of these nuanced aspects creates a foundation for truly exceptional shots. For deeper insights into optimizing your setup, explore our guide on mastering the art of home espresso and learn how attention to detail transforms your coffee experience. Remember, even seemingly minor factors like precise tamping pressure or water temperature can dramatically influence flavor and consistency. Have you ever fallen into this trap? Let me know in the comments.
Invest in Quality Equipment for Longevity and Consistency
Starting with the right tools is essential. I personally swear by my Burr Grinder X because it offers ultra-fine adjustments and minimal static buildup, which are crucial for consistently grinding fresh beans. Investing in a durable espresso machine like the Top-Rated Espresso Machine 2025 ensures long-term reliability and high-quality shots. Remember, even the best gear needs routine maintenance to perform optimally.
Establish a Routine Maintenance Schedule
Keeping your espresso setup in tip-top shape requires regular upkeep. For example, I clean my grinder’s burrs every 100 pounds of coffee to prevent flavor transfer and ensure uniform grinding. Similarly, descaling your espresso machine every 1-3 months using a manufacturer-approved solution prevents mineral buildup that can impair performance. Consider maintaining a cleaning calendar—sticking to it will save you from costly repairs and flavor inconsistencies down the line.
Tools I Trust for Effortless Upkeep
My go-to maintenance tools include a bristle brush for cleaning grinder burrs, a razor scraper to remove coffee residues from group heads, and a precision water test kit to monitor water hardness—vital for preventing scale buildup. My secret weapon? A vaporizer cleaning brush that reaches into hard-to-clean water reservoirs, ensuring spotless internal parts. Regularly inspecting hoses and seals also prevents leaks and pressure drops, which can compromise shot quality.
How do I maintain my equipment over time?
Consistent cleaning, routine calibrations, and using high-quality descaling solutions are key. I recommend setting reminders for deep cleaning sessions—investing in a meticulous cleaning routine pays off with better flavor and fewer breakdowns. Keeping an eye on wear-and-tear parts and replacing them promptly helps maintain optimal performance. For detailed maintenance routines, check out our comprehensive guide on home espresso tips.
Growing Your Setup with Confidence
As your skills grow, so might your gear. Scaling your setup might involve adding a high-quality second grinder for decaf or experimenting with different barista tools to refine your craft. Remember, upgrading components like your steam wand or brew group can elevate your results substantially, provided you stay on top of maintenance.
Prediction: Where Does Home Espresso Go in the Future?
Advanced technology, like IoT-connected machines and AI-powered calibration tools, are beginning to enter the home market. Expect smarter systems that self-diagnose issues, suggest cleaning routines, and optimize shot parameters based on bean type and ambient conditions. Staying proactive with your maintenance now will prepare you for seamless integration with these future innovations.
To get ahead, try integrating a smart cleaning device into your routine for real-time upkeep insights. Regular maintenance is the secret to enjoying precise, barista-quality espresso every morning without the headaches. Ready to take your home brewing to the next level? Dive into detailed guides and equip yourself with the tools that make maintenance effortless and effective.
The Hardest Lesson I Learned About Home Espresso
One of my biggest surprises was realizing that simple insulation could dramatically reduce noise. I used to dismiss noise issues as inevitable but discovered that addressing the pump’s vibrations was a game-changer, saving me from expensive upgrades. If you think your setup is as quiet as it can be, think again—sometimes, a straightforward hack makes all the difference.
3 Surprising Truths About Home Barista Gear That Changed My Approach
After experimenting with various tools, I learned that quality isn’t just about brand—it’s about tailored features that suit your skill level. I found that a well-calibrated grinder and a sturdy tamping set truly elevate your coffee, not just the latest fancy machine. Recognize that upgrading is less about brands and more about understanding what enhances your workflow.
My Favorite Resources for Elevating Your Everyday Espresso
I trust this comprehensive guide on mastering home espresso for foundational tips, which helped me avoid beginner mistakes. The article on choosing the right grinder shifted my perspective on consistency and freshness. For maintenance hacks, this resource on flavor troubleshooting proved invaluable. These resources foster a deeper appreciation for the craft and ensure my setup stays reliable.
Take Your Home Espresso to the Next Level—Today
Your journey toward perfect coffee doesn’t end here. Implementing simple yet strategic improvements, like insulating your pump or refining your routine, opens new doors to flavor and tranquility. The future of home barista mastery is bright, and it starts with taking action now. Embrace the learning process, and before long, your mornings will be filled with not just great coffee, but a sense of accomplishment and peace.