Why your coffee puck keeps sticking to the shower screen
Ever had that frustrating moment in your home espresso session when you try to remove the portafilter, only to find your coffee puck stubbornly stuck to the shower screen? It’s like battling a mini brick wall every single time. I remember once, after meticulously tamping my shot, I couldn’t shake the puck loose without risking a disaster in my kitchen. The frustration hit me hard. I knew I wasn’t alone in this struggle, and I vowed to figure out what was causing it and, more importantly, how to fix it.
Why Sticking Pucks Are More Than Just Annoying
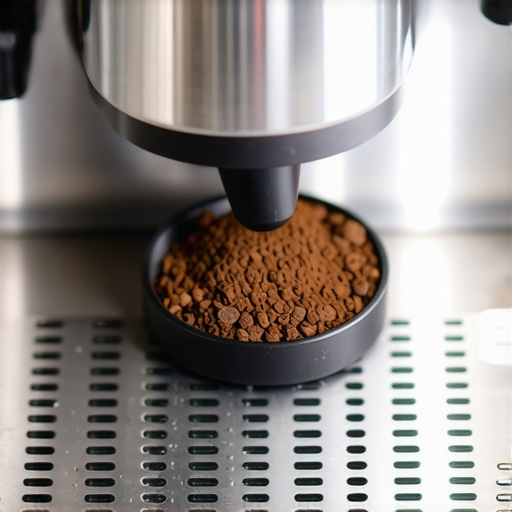
When your coffee puck refuses to drop easily, it’s more than just a minor inconvenience. It can affect the quality of your espresso, cause wear and tear on your equipment, and steal the joy from your brewing ritual. The root of the problem often lies in the interaction between the coffee grounds and the shower screen, which is typically part of the espresso machine’s portafilter assembly.
Did you know that improper grind size, excessive tamping pressure, or even certain cleaning routines can increase the likelihood of sticking pucks? According to some baristas and home enthusiasts, a puck that adheres too tightly could be a sign that your machine isn’t operating at peak efficiency. This might sound like a minor detail, but it can be a symptom of deeper issues—like grind distribution problems or build-up in the group head—that you might want to address sooner rather than later.
One early mistake I made was ignoring the importance of properly cleaning the shower screen. I naively thought that as long as I rinsed it quickly, it would stay fresh. Turns out, that’s a recipe for buildup and sticky pucks. Regular maintenance, including thorough cleaning sessions, can be a game-changer. If you’re curious about keeping your gear in shape, check out my guide on [the best ways to clean a grinder without losing your settings](https://espressotechguide.com/the-best-way-to-clean-a-grinder-without-losing-your-settings).
So, what’s the solution? Well, that’s what we’ll dive into next. Stay tuned as I walk you through practical, proven steps to banish stubborn pucks and restore harmony to your espresso routine. Have you faced this problem before? If so, you’re in good company, and I promise, relief is within reach.
Clean the Shower Screen Regularly to Prevent Buildup
Start by removing the portafilter and inspecting the shower screen for coffee residue or mineral deposits. Use a soft brush or a pin to gently scrub away any stubborn particles. For a thorough cleaning, soak the screen in a mixture of hot water and a descaling solution, like vinegar or a commercial cleaner. I once soaked mine overnight, and the next day, the puck came out smoothly with minimal effort. Regular cleaning prevents buildup that causes adhesion.
Adjust Grind Size and Dose for Optimal Extraction
Use a consistent grind size—aim for a grind that’s slightly finer than your normal setting for espresso. Too fine and the coffee can pack tightly, making the puck stick; too coarse and it can cause channeling. Measure your dose accurately; too much coffee can increase pressure and make removal harder. I experimented with dialing in my grinder, which significantly reduced puck sticking. Check out this guide to learn more about choosing the right grinder.
Ensure Proper Tamping Technique to Avoid Excessive Pressure
Apply even pressure when tamping—using a calibrated tamper helps control force. Too hard tamping compacts the coffee excessively, leading to sticky pucks. I once pressed too hard and struggled to remove the puck afterward; switching to a calibrated tamper made all the difference. Practice consistent pressure, aiming for about 30 pounds of force, which you can gauge using a scale if needed.
Implement Adequate Pre-Brew and Distribution Steps
Before brewing, pre-wet the coffee grounds with a small amount of hot water to promote even extraction. Use a distribitor or your finger to evenly level the coffee bed, avoiding channels that increase residual pressure and adhesion. I found that taking an extra 10 seconds to distribute the grounds helps prevent puck adhesion and improves shot consistency. For mastering distribution techniques, visit this resource.
Optimize Machine Maintenance and Group Head Care
Regularly descale your espresso machine, especially if you have hard water, to prevent mineral buildup that can cause the puck to stick. Also, clean the group head gasket and gasket seat to ensure smooth movement. I schedule a deep cleaning every two weeks, which keeps the steam and pressure consistent. Check out this article for detailed maintenance tips.
Use Proper Tools and Accessories for Easy Removal
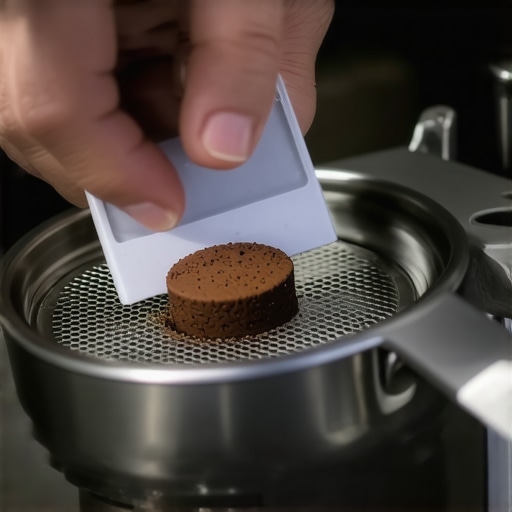
Employ a puck disengaging tool or a plastic scraper to gently release stuck pucks without damaging components. When I first struggled, I used a small screwdriver, but risking damage was high. Now, with a dedicated tool, I can loosen even the most stubborn pucks with minimal effort. Upgrading your gear can streamline your routine and prevent damage.
 When it comes to homemade espresso and coffee accessories, many enthusiasts fall prey to misconceptions that hinder their progress. One pervasive myth is that expensive equipment guarantees perfect results—while high-quality gear is beneficial, misuse or misunderstanding often cause more issues than the machines themselves. For instance, many believe that a top-tier milk frother can compensate for poor technique, but in reality, mastering your milk steaming process requires understanding factors like milk temperature and foam stability. Relying solely on fancy gadgets without foundational knowledge can lead to disappointment.
Another misconception surrounds coffee grinders. It’s often assumed that bigger motors and burrs automatically produce better grounds, but literature from experts indicates that grind consistency and proper calibration are more impactful. In fact, even the most powerful grinder will underperform if the burrs aren’t aligned properly or if the grind setting isn’t dialed in correctly; you can learn more about this in this detailed guide.
A trap many home baristas fall into involves espresso machines with overly sophisticated features. They may overestimate the importance of dozens of programmable settings, assuming they’ll automatically improve quality. However, data suggests that understanding and controlling basic variables like tamping pressure, water temperature, and shot timing have a far more significant effect than complex features. In fact, a famous study highlighted how inexperienced users often rely on presets, neglecting the fundamentals, ultimately resulting in inconsistent espresso.
Let’s be real: the true edge comes from understanding the nuances—like adjusting dose parameters for different beans or recognizing the signs of partial clogging in the group head—that many overlook. For example, routine cleaning and calibration often yield better results than simply investing in new gear. To avoid falling into these common mistakes, ensure you’re not being swayed into gadgets that promise instant perfection but focus on honing your technique and knowledge.
Have you ever fallen into this trap? Let me know in the comments.Maintaining your home espresso setup and accessories is crucial for sustaining consistent quality and extending the lifespan of your investment. Regular upkeep isn’t just about keeping things clean; it involves strategic routines and using the right tools to troubleshoot issues before they escalate. For example, I rely heavily on a dedicated group head cleaning brush and a descaling kit to prevent mineral build-up, which can impair pressure and lead to stuck pucks. Incorporating these tools into your routine can save you time and money in the long run.
One essential piece of equipment I personally swear by is a calibrated scale, which allows me to precisely measure coffee doses and extraction times. Accurate dosing directly impacts shot consistency and prevents problems like channeling or puck sticking. To fine-tune your setup, I recommend regularly verifying your grinder’s burr alignment using a simple chalk line test—this ensures your grind size remains consistent, reducing the risk of adhesion issues.
Looking ahead, I predict that automation and IoT integration will become standard in high-end home barista gear, providing real-time feedback on pressure, temperature, and flow rate. This technological evolution will empower enthusiasts to maintain optimal conditions with minimal effort, much like professional settings.
Curious about how to keep your espresso machine running flawlessly over years? Key steps include scheduling descaling every 1-3 months, depending on water hardness, and inspecting gaskets for wear. For detailed maintenance routines, check out this article.
Make it a habit to clean your group’s shower screen weekly using a soft brush or a pin to dislodge coffee residues—amply illustrated in this guide. For tools, I recommend investing in a precision tamper and a portable pressure tester; they have transformed my ability to maintain consistent tamping pressure and detect pressure drops.
Finally, integrating advanced diagnostics like pressure profiling or using a quality calibration tool can significantly enhance your troubleshooting capabilities. For instance, mastering how to interpret your pressure gauge effectively can help you identify clogging or other flow issues early, preventing puck sticking. Visit this resource for expert insights.
Pro tip: Try calibrating your grinder with a chalk line and then test puck release resistance—this simple step is often overlooked but can dramatically improve your shot consistency. Regularly investing in proper tools and routines ensures your gear remains a reliable partner in your brewing journey, making every cup a pleasure rather than a frustration.
Lessons That Changed My Approach to Home Espresso
One of the most profound lessons I learned was that meticulous cleaning and routine maintenance outweigh expensive equipment in achieving consistent shots. I used to think that upgrading to premium gear would eliminate puck sticking, but I realized that neglecting my cleaning schedule and improper technique were the real culprits. This lightbulb moment taught me that mastering simple routines can drastically improve performance without costly upgrades.
Another insight I gained was about grind calibration. Focusing on grind consistency and proper dosing proved more effective than obsessing over fine-tuning machine settings. Regularly checking the grinder’s alignment and making small adjustments kept my puck release smooth and my espresso tasting balanced, validating that precision in preparation is paramount.
The third lesson I wish I had embraced earlier was the importance of even distribution before tamping. Spending just a few seconds to level and pre-wet the grounds prevented channeling and reduced puck adhesion, resulting in cleaner removal and better extraction. These personal discoveries underscored that attention to detail in every step surpasses reliance on top-tier equipment alone.
Tools and Reads That Elevated My Home Barista Skills
My go-to resource for maintaining grinder precision and proper calibration has been this chalk line method. It’s surprisingly simple yet incredibly effective for ensuring your burrs stay aligned, which directly impacts puck consistency. A calibrated scale has also become invaluable for precise dosing—small differences here can make big improvements in puck behavior and shot quality.
For in-depth technique and troubleshooting, this comprehensive guide has been instrumental in shaping my understanding of espresso extraction fundamentals. Coupled with dedicated tools like a puck scraper and pressure gauge, these resources empower me to quickly identify and fix issues like puck sticking or uneven extraction, fostering confidence every morning.
Time to Embark on Your Espresso Adventure
Remember, the journey to excellent home espresso is paved with ongoing learning, routine care, and a love for the craft. Whether you’re just starting or looking to refine your skills, embracing these lessons and tools will turn frustrating puck removal into a thing of the past. Keep experimenting, stay patient, and enjoy the beautiful complexity of perfecting your espresso ritual.
What simple technique has made the biggest difference in your puck release? Share your experiences below—I’d love to hear what’s worked for you.