The Best Way to Descale a Boiler Without Using Harsh Vinegar
I’ll never forget the morning I thought I was being a genius by saving a few bucks with a giant jug of white vinegar to clean my dual boiler. I followed some old-school advice from a forum, flushed it through, and felt pretty smug about my DIY skills. Then I pulled a shot of an expensive, light-roast Ethiopian Yirgacheffe I’d been saving for the weekend. One sip and I nearly spit it across the kitchen. It didn’t taste like delicate blueberries and jasmine; it tasted like a salt-and-vinegar potato chip. No matter how many gallons of fresh water I ran through that machine afterward, the reason your espresso tastes like vinegar lingered in my cup for over a week. It was a rookie mistake that taught me a valuable lesson: your machine is a precision instrument, not a pickle jar.
Stop Smelling Pickles in Your Morning Latte
Scale is the invisible enemy of every great home espresso setup. If you’re lucky enough to live somewhere with “character” in the water (and by character, I mean enough minerals to build a small cave system), those deposits are slowly turning into a rock-hard crust inside your heating elements. At first, it’s subtle. You might notice that your espresso machine takes longer to heat up lately or that your steam pressure feels just a little bit wheezy. When that happens, the instinct is to grab the strongest acid in the pantry. But here’s the thing: vinegar isn’t just pungent; it’s actually quite aggressive on certain rubber seals and can be a nightmare to rinse out of a large boiler once it settles in. I learned the hard way that the reason your espresso tastes metallic after descaling is often because you’ve stripped the protective oxidation layer off the copper, or worse, left residue that won’t budge. According to research by the Water Quality Association, mineral scale can significantly reduce heating efficiency, making your machine work harder than it ever should.
Is specialized descaler actually worth the extra few dollars?
I used to be the biggest skeptic in the room. “It’s just overpriced citric acid!” I’d tell anyone who asked. Well, I was only half right. While many professional cleaners use a citric or sulfamic acid base, they are specifically buffered with inhibitors to protect the brass and copper from pitting. My early mistake was using a homemade solution that was way too concentrated, which actually led to a situation where why your e61 mushroom is covered in white crust became a daily reality because the balance was all wrong. You want to dissolve the calcium, not the machine itself. The good news is that you can achieve a factory-clean boiler without the lingering scent of a salad dressing. We’re going to walk through a method that effectively removes buildup while preserving the longevity of top-rated espresso machines for coffee lovers. This isn’t just about maintenance; it’s about protecting that morning ritual we all love. Have you ever tried a “quick fix” for cleaning your gear that ended up making a bigger mess than you started with? Drop a comment below—I’d love to hear your horror stories so we can feel better about our past mistakes together. Let’s get into the specifics of how to do this right.
Flush the Scale Out Without Wrecking the Internals
To start, you need to mix your descaling solution exactly as the manufacturer recommends. If you go too strong, you risk eating into the metal; too weak, and you’re just giving the calcium a warm bath. Think of your boiler like a high-performance engine—you wouldn’t put diesel in a Ferrari. Most barista gear is made of copper or brass, and these metals are sensitive to pH changes. Pour your solution into the reservoir and let the machine reach temperature. Once it is hot, run about 4 to 6 ounces of water through the group head and another 4 ounces through the steam wand.
Don’t Let the Solenoid Get Clogged
This is where most people fail. I once descaled an old Silvia and thought I was done after one pass. Halfway through my next espresso, the machine just stopped. A tiny flake of loose scale had wedged itself perfectly into the three-way solenoid valve. Now, instead of a simple clean, I had to take the whole thing apart. Imagine scale like a layer of rust inside a pipe; if you loosen it but don’t flush it out, it just moves downstream to the narrowest point. To avoid this, toggle the pump in short bursts during the process. This creates pressure pulses that help break up the ‘soft’ scale before it becomes a blockage. If you are working with more complex internals, knowing how to remove scale from a heat exchanger without a teardown is a lifesaver because it keeps the water moving through the siphons.
Clear the Steam Path Before It Chokes
Scale loves to hide in the steam wand, which is why the reason your steam wand is making huge bubbles only is often just a buildup of minerals at the tip. Open the steam valve fully during the descaling cycle to let the solution sit in the wand for a few minutes. This dissolves the milk proteins and minerals that narrow the aperture. It’s a much better approach than poking it with a needle, which can scratch the internal finish. Adopting the 2-minute habit that prevents clogged steam wands by purging after every use will save you from doing this deep clean as often.
Rinse Until the Chemistry Is Gone
The meat of the job isn’t the cleaning; it’s the rinsing. You need to treat the rinse phase like a mission. If you leave even a trace of acid behind, it will react with your coffee and ruin the flavor profile of your beans. I usually run at least three full reservoirs of fresh, filtered water through the machine. During my ‘grey sludge’ incident, I learned that you have to be patient. I was so eager to get my morning caffeine fix that I short-changed the rinse cycle, and the result was a gritty, metallic-tasting mess that took another hour to fix. While doing your rinse, check the gaskets—sometimes the cleaning process reveals the simple o-ring fix for a leaky portafilter spout is actually needed because the scale was ‘sealing’ a leak that now needs a real part. If you still catch a whiff of the cleaner, you can use the same methods for how to get rid of the vinegar smell after descaling your machine to neutralize any lingering odors. This ensures that the only thing you taste in your next shot is the intended terroir of the coffee.
Forget the 9-Bar Rule for a Better Extraction
We have been told for decades that 9 bars is the absolute ‘gold standard’ for espresso. But here is the contrarian truth: for many modern home setups and lighter roasts, 9 bars is actually a recipe for disaster. When you hit a puck with that much force, you risk compressing the coffee grounds into a solid, impermeable brick. If you have noticed why your espresso shot slows down midway through the pull, it might not be your grind size at all; it is often the pressure itself crushing the puck. In my experience, dropping your pump pressure to 6 or 7 bars produces a far more forgiving, sweet, and balanced extraction. This lower pressure prevents ‘fines migration,’ a phenomenon where tiny particles migrate to the bottom and clog the filter.
The Headspace Trap You Did Not Know You Were Falling Into
One massive ‘oops’ factor I see even seasoned enthusiasts fall into is ignoring the relationship between their dose and the physical basket size. You can spend a fortune choosing the best barista gear for coffee enthusiasts, but if you are putting 18 grams of coffee into a 22-gram basket, you are creating too much headspace. This gap allows the water to slam into the puck with too much turbulence, leading to those frustratingly muddy and uneven shots. Knowing how to tell if your basket is too large for your dose is critical; if your puck is always soupy and the flavors are dull, the physics are working against you. Research by astrophysicist and coffee expert Jonathan Gagné in his work ‘The Physics of Filter Coffee’ highlights how water flow dynamics are heavily influenced by the resistance and structural integrity of the coffee bed, which is compromised when headspace is poorly managed.
Is your pump pressure actually sabotaging your morning shot?
It is a question that keeps the real coffee nerds up at night. If you are using a vibration pump, the pressure often ramps up too aggressively. This is why a proper pre-infusion phase is non-negotiable. Without it, you are just hammering a dry puck with 130 PSI of water, causing instant channeling. While many people look for a hardware fix, like the truth about using spring-loaded tampers for even shots, no accessory can compensate for a machine that is set to a brutal factory pressure. You must first how to select the perfect coffee grinder for your brew to ensure your particle distribution is even enough to handle the pump’s power. Have you ever fallen into the trap of blaming your beans when it was actually your machine’s internal settings? Drop a comment below—I spent nearly a year thinking I hated light roasts before I realized my over-pressure valve was set way too high. Let’s keep refining the process together.
Keep Your Burrs Sharp Without Losing Your Mind
Once you have mastered the internal pressure and the headspace of your basket, the next frontier is the consistency of your grind. I used to think that as long as the motor turned, the grinder was doing its job. I was wrong. I started noticing that why your grinder burrs are getting hot during a single dose was because of friction from old, oily residue acting like a glue. If you don’t keep those cutting edges clean, you’re not cutting beans; you’re crushing them into a heated mess. I found that the best way to clean a grinder without losing your settings is to use a vacuum and a dedicated brush rather than just running pellets through it every day. When I finally decided to get serious, I used the chalk trick for checking grinder burr alignment and realized my ‘pro’ grinder was only touching on one side. Fixing that was like putting on glasses for the first time; the flavor clarity in my cups exploded.
How do I maintain my grinder’s precision over time?
Maintenance isn’t a once-a-year event; it is a rhythm. According to technical documentation from Baratza’s engineering team, the buildup of coffee oils can actually oxidize and create a rancid film that affects the coefficient of friction on the burrs. I recommend a deep clean every two weeks if you are using dark, oily roasts. Whatever you do, remember why you should never use rice to clean your high-end grinder—the starch can gum up the internal bearings and void your warranty.
The Cheap Accessory That Saves Your Shower Screen
If there is one piece of barista gear that changed my workflow more than a $500 upgrade, it is the humble puck screen. It acts as a secondary water distributor and keeps the coffee grounds from being sucked back into your three-way solenoid. It makes cleaning your group head a five-second wipe instead of a twenty-minute scrub. Just be careful when you’re done; I’ve had many laughs (and frustrations) over why your puck screen keeps falling into the knock box at 6 AM. It is a small price to pay for a machine that stays pristine internally. Even when I am switching things up and learning how to dial in decaf without losing your mind, having a clean shower screen ensures that the water path is always predictable. I predict that in the next few years, we will see ‘smart’ burr sensors that alert you to dullness, but until then, your hands and a good brush are your best friends. **CTA:** This weekend, I want you to take the top off your grinder and perform a ‘dry’ clean with a vacuum—you will be shocked at the hidden ‘fines’ that have been sabotaging your shots.
Lessons from the Drip Tray: What the Manuals Won’t Tell You
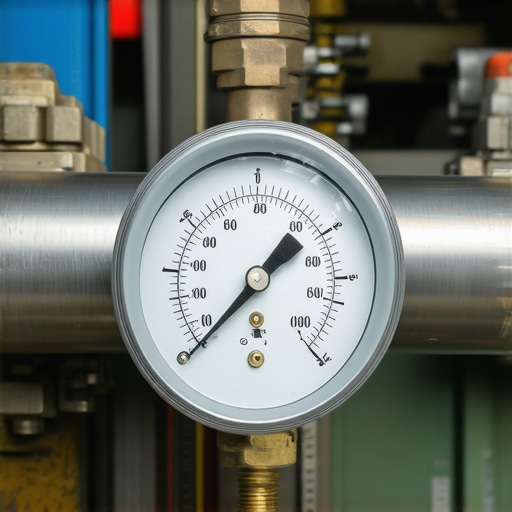
After years of tinkering, I’ve realized that the most frustrating issues often have the simplest causes. For instance, many people worry about mineral buildup but forget that water can be too pure; knowing how to tell if your water is too soft for brewing is just as important because “hungry” water can actually leach minerals from your metal components. Another hard-earned lesson: never trust the pressure gauge blindly. I spent months chasing a ghost in the machine before realizing that heat expansion was giving me false readings. Also, remember that your machine’s seals are consumables. If you find yourself fighting to lock in the portafilter, don’t force it—replace the gasket before you damage the group head ears. #IMAGE_PLACEHOLDER_E#
The Toolbox That Keeps My Shots Consistent
You don’t need a thousand-dollar budget to get professional results, but you do need the right supporting cast. I never pull a shot without a reliable scale, though it’s frustrating when your digital scale jumps when the pump starts due to vibrations or heat. To fix this, I always use a small silicone pad to isolate the scale from the machine frame. I also swear by the simple paper filter trick for better bottomless shots; it’s a five-cent upgrade that drastically improves clarity and keeps your machine cleaner by catching oils before they hit the shower screen. For those just starting out, mastering the art of home espresso tips for beginners is a great way to build a foundation before you start worrying about advanced flow profiling or pressure modification.
The Daily Ritual is Worth the Effort
At the end of the day, all this maintenance and technical tweaking serves one purpose: that perfect moment when the first drop of syrup-thick espresso hits the cup. It’s easy to get bogged down in the mechanics, but don’t let the maintenance schedule kill your passion for the craft. Whether you are avoiding the hidden cost of buying a cheap espresso machine on sale or upgrading to a prosumer dual boiler, the goal is always the same—a better cup than yesterday. Your journey into home espresso is a marathon, not a sprint, and every mistake is just a step toward becoming your own favorite barista.
Have you ever had a maintenance ‘fail’ that actually taught you something new about your machine? Let me know in the comments below—I am still convinced my vinegar incident was a necessary rite of passage!