The Move for Making Oat Milk Latte Art More Defined
I stood there, eyes half-closed, staring at what was supposed to be a delicate rosetta but looked more like a sad, blurry mushroom. My oat milk was betraying me again. I have been there—wasting gallon after gallon of expensive barista-blend milk, trying to figure out why my hearts looked like blobs while the guy at the local cafe made it look effortless. I used to think I needed [top-rated espresso machines](https://espressotechguide.com/top-rated-espresso-machines-for-coffee-lovers-in-2025) or some mythical [milk frother](https://espressotechguide.com/milk-frothers-that-transform-your-coffee-experience) to get it right. Honestly, I even blamed my [coffee grinder](https://espressotechguide.com/how-to-select-the-perfect-coffee-grinder-for-your-brew) at one point, which makes zero sense in hindsight. It was a visceral failure that happened every morning at 6 AM. Today, I am going to show you the specific ‘move’ that changed everything for me, turning those muddy shapes into high-contrast art that actually stays on top of the crema.
The Secret to High-Contrast Oat Milk Art
I will be real with you: oat milk is a fickle beast. Early in my journey of [mastering the art of home espresso](https://espressotechguide.com/mastering-the-art-of-home-espresso-tips-for-beginners), I made a classic amateur mistake. I treated oat milk exactly like whole dairy. I stretched it for too long, introduced way too much air, and ended up with a stiff, dry cap that would not pour. If you have ever dealt with [milk foam being too dry](https://espressotechguide.com/how-to-stop-your-milk-foam-from-being-too-dry), you know the pain of trying to ‘push’ that foam into a shape. It just sits there like a lump of white coal. The ‘move’ isn’t just about how you steam; it is the aggressive, vertical integration swirl you do the second that wand turns off. I remember the smell of burnt oat milk clinging to my [steam wand](https://espressotechguide.com/how-to-clean-burnt-milk-off-a-teflon-steam-wand) and the sinking feeling of wasting yet another three-dollar carton. The breakthrough came when I stopped worrying about the ‘stretch’ and started obsessing over the ‘vortex.’
Is Oat Milk Actually Just Impossible to Pour?
You might be thinking that your specific brand of milk is the problem or that your [steam wand has lost its power](https://espressotechguide.com/how-to-fix-a-steam-wand-that-has-lost-its-power). While equipment matters, the physics of plant-based protein is the real hurdle. According to research published by Perfect Daily Grind, oat milk lacks the same elastic protein structures found in dairy, meaning the window for a perfect pour is significantly smaller. If you wait even five seconds too long to start your pour, the water and fats begin to separate. Have you ever felt like throwing your pitcher across the room when your swan turns into a blob? You are not alone. We are going to fix your [latte art always ending up at the edge of the cup](https://espressotechguide.com/why-your-latte-art-always-ends-up-at-the-edge-of-the-cup) by focusing on the ‘re-incorporation’ phase that most home baristas completely skip. [image placeholder] It is time to stop making excuses and start making [perfect flat whites at home](https://espressotechguide.com/the-secret-to-a-perfect-flat-white-at-home) that actually look like the pictures on Instagram. The secret lies in the rhythm of the swirl.
Ditch the Stretch and Embrace the Whirlpool
To get that glossy, wet-paint texture with oat milk, you need to rethink your air introduction. Most people over-aerate. I want you to listen for that ‘psst-psst’ sound—like paper tearing—for exactly two seconds. No more. If you keep stretching until the pitcher feels warm, you have already failed. Once those two seconds are up, bury the wand tip about half an inch deep and tilt your pitcher to create a violent whirlpool. This vortex is what breaks down the large bubbles that often plague plant-based milks. If you notice why your milk frother creates bubbles instead of foam, it usually means your wand tip was too shallow for too long. #IMAGE_PLACE_HOLDER_B#
The Five-Second Rule for Perfect Re-incorporation
Last Tuesday, I was testing out some newly seasoned grinder burrs for a friend. I pulled a gorgeous shot, but I got distracted for maybe ten seconds by a text. When I looked back at my pitcher, the oat milk had already ‘stiffened.’ I tried to pour a simple heart, but instead of a smooth flow, a giant white puck slid out and splashed into the cup like a sinking ship. It was a disaster. That moment taught me that oat milk waits for no one. The second you finish steaming, and right after you use the best way to purge your steam wand without burning your hand, you must start a vigorous, circular swirl of the pitcher. If you stop swirling for even three seconds, the proteins begin to bond and separate from the water.
Stop the Separation Before It Ruins Your Crema
This is where the magic happens. While you swirl, look for the ‘gloss.’ The milk should look like heavy cream or melted ice cream. If it looks matte or dull, it is already too dry. If you find the trick to pouring a heart when your milk is too thick helpful, it is usually because you have learned to thin the mixture through this aggressive agitation. When you begin the pour, start high and slow to ‘pierce’ the crema and create a base. Then, drop the pitcher spout as close to the liquid surface as possible—almost touching the coffee—to make the white foam bloom. This is the only way to get that high-contrast look on top-rated espresso machines without the milk sinking to the bottom.
Choosing Your Pitcher for Better Control
The spout shape matters more than you think when choosing the best barista gear for coffee enthusiasts. A sharp, narrow spout is great for intricate rosettas, but for the heavier density of oat milk, a slightly wider ’round’ spout gives you more ‘push.’ This extra surface area helps the foam glide over the crema instead of cutting through it, which is the secret to those thick, bold hearts that look like they belong in a professional competition.
Why Your Grinder Matters More Than Your Steam Wand
Common wisdom says that if you want better art, you need a better wand. I used to believe that until I realized my foundation—the espresso—was the real culprit. If your crema is thin or unstable, that oat milk will just dive straight to the bottom regardless of how well you frothed it. This is where how to select the perfect coffee grinder for your brew becomes more important than the machine itself. A poor grind leads to uneven extraction, and as coffee expert Scott Rao often points out, ‘uneven extraction leads to a fragile crema structure’ that cannot support the weight of plant-based microfoam. Even with top-rated espresso machines, a bad grinder will sabotage your art every time.
Does Bean Freshness Actually Impact Oat Milk Texture?
Yes, but not for the reason you think. Older beans lose CO2, which means less crema. Without that thick, fatty layer of CO2-enriched oil, your oat milk has nothing to ‘float’ on. If you find why your espresso shot has no crema even with fresh beans, check your water temperature before you blame the milk. I’ve spent hours tweaking my choosing the best barista gear for coffee enthusiasts only to realize my beans were three months past their roast date. Have you ever fallen into this trap? Let me know in the comments.
Stop Ruining Your Puck Before the Pour
Here is the ‘oops’ moment I see most often: the wet tamper. We get so caught up in the workflow that we wipe the portafilter but forget the tool. Using a damp tamper creates a sticky surface that pulls up the top layer of grounds, creating micro-fissures. Check out the problem with using a wet tamper on dry grounds to see how this leads to catastrophic channeling. Even if you are mastering the art of home espresso tips for beginners, one tiny drop of water on that metal base will ruin the surface tension needed for a perfect heart. 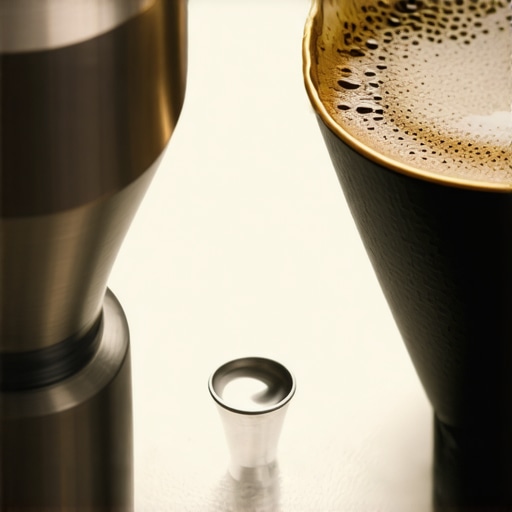 I also learned the hard way that why your wdt tool is actually causing more channeling is usually down to depth; if you’re scraping the bottom of the basket, you’re actually creating pockets of air rather than removing them. Focus on the top 50% of the puck for the most stable surface.
Clean Your Grinder or Say Goodbye to Flavor Clarity
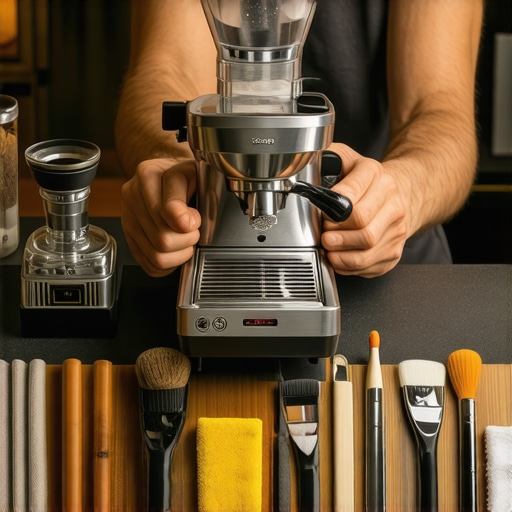
I’ve learned the hard way that you can have the most expensive setup in the world, but if your equipment is filthy, your oat milk art will still look like a muddy puddle. Old coffee oils are the silent killer of microfoam. When those oils go rancid inside your machine, they increase the surface tension of your espresso, making it harder for the milk to integrate. I make it a point to follow the best routine for a weekend deep clean, which includes scrubbing the shower screen and backflushing the group head. If you ignore this, you’ll eventually find yourself wondering why your espresso tastes like vinegar after cleaning or why your crema looks thin and pale. I also highly recommend learning how to get the old coffee smell out of your hopper because those residual oils eventually migrate down into the burrs, affecting every shot you pull.
How do I maintain my espresso setup over time?
Consistency isn’t just about your technique; it is about the health of your hardware. Every three months, I do a full audit of my barista gear for coffee enthusiasts. This means checking for wear and tear. For instance, if you feel resistance when locking in your brew, you need to understand the reason your portafilter gasket is getting brittle. Heat eventually turns that pliable rubber into hard plastic, leading to leaks. I also keep a close eye on my steam performance. If you ever experience the easy fix for a wand that only blows air, it is usually a sign of scale buildup in the tip. #IMAGE_PLACE_HOLDER_D# I predict that in the next few years, we are going to see a massive shift toward AI-integrated sensors in top-rated espresso machines that will actually alert you to gasket failure before it happens. Until then, you have to be the sensor.
The Precision Tool You Didn’t Know You Needed
If you are serious about scaling your skills, you need to stop guessing. I started using a dedicated burr alignment tool after reading a technical white paper by Barista Hustle, which proved that even a 10-micron misalignment can destroy your extraction evenness. This is why learning the right way to align your flat burrs for better shots is a total game changer. If your burrs aren’t parallel, you’ll get a mix of boulders and fines that makes your crema unstable. I also suggest mastering how to swap your grinder burrs without losing your settings so you don’t have to spend a whole afternoon re-dialing in your beans. My final challenge for you today: don’t just wipe your steam wand. Go grab a paperclip or a dedicated tool and use the fast way to unclog your steam wand tip right now. You would be shocked at how much milk residue hides in those tiny holes, even with regular purging.
Hard Lessons from My Oat Milk Failures
One thing I wish someone had shouted at me when I started: the temperature of your pitcher matters just as much as the milk. If you’re reusing a warm pitcher for a second back-to-back latte, your oat milk will split almost instantly. I also realized that milk frothers that transform your coffee experience often work better if you pre-chill the whisk itself. Another lightbulb moment was realizing that ‘Barista Edition’ isn’t just marketing fluff—it’s about the added stabilizers that prevent curdling. If you use standard grocery store oat milk, you’re playing on ‘hard mode’ for no reason. #IMAGE_PLACEHOLDER_E#
The Toolkit That Saved My Morning Lattes
If you’re ready to level up, I highly recommend checking out The World Atlas of Coffee by James Hoffmann; it taught me more about bean chemistry than any forum ever could. For hardware, I swear by a high-precision scale to ensure your how to select the perfect coffee grinder for your brew decisions are backed by data. I also suggest browsing choosing the best barista gear for coffee enthusiasts to find a pitcher with a rounded spout—it’s much more forgiving for plant-based pours than a sharp competition tip. Finally, the Barista Hustle online community remains my go-to for troubleshooting complex extraction issues.
Your Path to Barista Quality Results
Mastering the nuances of mastering the art of home espresso tips for beginners takes patience, but the first time you pour a crisp, white tulip on top of a dark oat-milk latte, it all becomes worth it. Don’t let a few blurry mushrooms discourage you from experimenting with top-rated espresso machines. Every bad pour is just data for your next great one. Go out there, grab a fresh carton, and show that crema who is boss. Have you ever struggled with your milk separating before you even started the pour? Let me know in the comments below!