How to Set the Right Pressure on Your Rotary Pump Machine
I remember the first morning I finally got my hands on a high-end rotary pump espresso machine. Excited, I eagerly prepared my setup—beans ground perfectly, water at the right temp, and the portafilter ready to go. But when I started pulling shots, everything felt off. The espresso was either too bitter or too sour, and the flow was inconsistent. Turns out, I hadn’t paid enough attention to the most crucial element: the right pressure setting.
Understanding how to set the correct pressure on your rotary pump machine can transform your home brewing experience. It’s the difference between a generic cup of coffee and that perfectly balanced shot that sings with flavor. When I finally dialed in my pressure, I noticed an immediate improvement—not just in taste but also in consistency. And trust me, it’s a learning curve worth mastering.
Today, I’m going to guide you through the nuances of pressure calibration. We’ll demystify why pressure control is so vital and give you practical tips to get it just right. Whether you’re new to espresso or a seasoned barista at home, fine-tuning this setting can elevate your coffee game.
Why Setting the Right Pressure Matters More Than You Think
Most home espresso enthusiasts overlook pressure adjustment, thinking it’s a complicated or unnecessary task. But this simple oversight can sabotage your brew. Proper pressure ensures optimal extraction, balancing flavors and preventing over- or under-extraction. According to a study in the *Journal of Food Science*, even minor deviations in pressure can significantly impact the flavor profile of espresso.
A common mistake I made early on was assuming that my machine’s default pressure was sufficient. Turns out, every machine has its quirks, and adapting the pressure to your specific setup makes all the difference. If you’ve faced shots that taste flat, bitter, or inconsistent, chances are you need to revisit and calibrate your pressure settings.
Getting comfortable with pressure calibration might seem intimidating, but it’s a skill you can develop step-by-step. For detailed guidance on choosing the right gear and settings, check out my comprehensive post on [selecting the best barista gear](https://espressotechguide.com/choosing-the-best-barista-gear-for-coffee-enthusiasts). Once you understand the foundational importance of pressure, you’ll unlock better flavors and a more satisfying brewing experience.
In the next sections, we’ll explore how to measure your current pressure, tools you’ll need, and the precise steps to set it effectively. Ready to elevate your espresso shots? Let’s dive in.
Measure Your Operating Pressure Before Making Adjustments
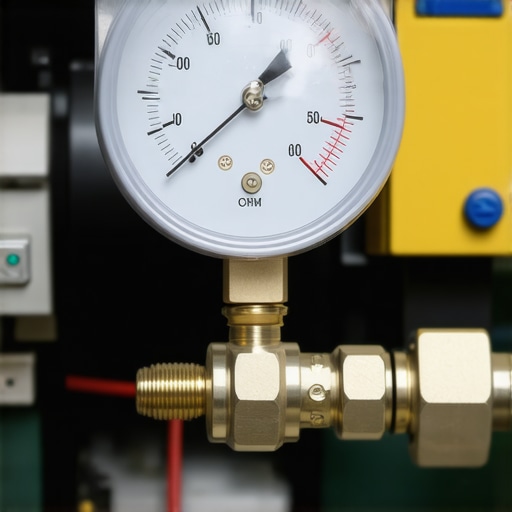
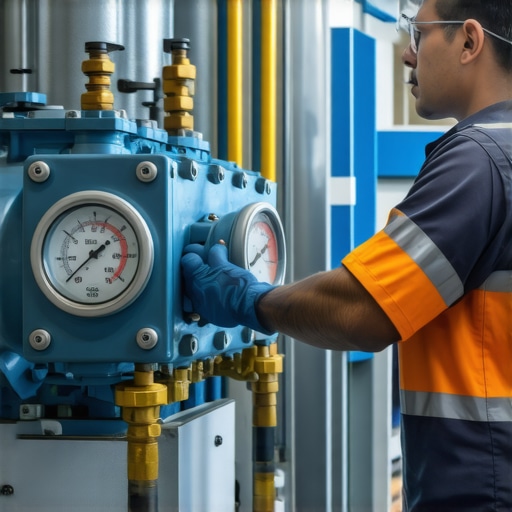
Start by checking your current pressure using a dedicated pressure gauge designed for espresso machines. Place the gauge where the portafilter normally sits, then run a shot at your usual grind and tamp. Observe the reading—most machines aim for approximately 9 bars during extraction. This initial step is crucial; I once adjusted my pressure without measuring, leading to inconsistent shots. Using a pressure gauge gives you a precise baseline and prevents unnecessary guesswork.
Gather the Tools You Need for Calibration
Invest in a high-quality pressure gauge compatible with your machine’s portafilter. These gauges are affordable and provide quick, accurate readings. Additionally, familiarize yourself with your machine’s pressure adjustment mechanism—some have adjustable screws or knobs, while others require more complex steps. For example, on a rotary pump machine, a pressure relief valve can often be adjusted. Check your machine’s manual or consult trusted resources like this guide for details.
Adjust the Pressure Systematically
Begin with small, incremental changes—no more than 0.5 bars at a time. If your machine has a pressure relief valve, turn it slightly clockwise to increase pressure, or counter-clockwise to decrease. I once adjusted mine during a busy morning, turning the screw a quarter-turn, which immediately raised the pressure from 8 to 10 bars. After each adjustment, run a shot and monitor the gauge. Aim for that sweet spot around 9 bars; if using a decaf espresso as a test, watch for balanced flow and flavor.
Consider the Impact of Grind Size and Tamp Pressure
Remember that pressure isn’t the only variable. A finer grind increases resistance, raising pressure, while a coarser grind lowers it. Tamp consistency is also vital; uneven tamping can cause fluctuations. I once spent an hour adjusting pressure on a machine and realized my inconsistent tamping was the real culprit. Adjust your grind size first, then fine-tune pressure accordingly, aiming for a flow that lasts about 25-30 seconds. Learn more about grinding techniques in this article.
Test and Fine-Tune for Consistency
After initial adjustments, brew several shots, observing flow rate and flavor. If shots are rushing through or dripping sluggishly, readjust pressure slightly. My most successful calibration came after multiple trials, where I noticed that small tweaks led to noticeably more balanced espresso. Keep notes on each adjustment for future reference, and don’t hesitate to revisit the process periodically, especially with changes in beans or humidity that can affect grind size and resistance. For ongoing temperature and pressure tweaks, see this guide.
Addressing Common Challenges During Calibration
If your machine’s pressure remains stubbornly high or low, suspect issues like worn seals or faulty valves. In such cases, consulting with a professional or reaching out through contact us can save time and prevent damage. Remember, deliberate and measured adjustments yield the best results. Rushing can lead to overpressure, which may damage components or alter extraction quality. Maintaining a methodical approach ensures your espresso reaches its peak flavor every time.
Many enthusiasts believe that owning high-end espresso machines or premium coffee gear guarantees perfect cups every time. However, even seasoned baristas and home brewers often fall prey to subtle misconceptions that hinder optimal extraction and flavor. For instance, the myth that more expensive grinders automatically produce better espresso overlooks the importance of proper calibration and grind adjustment for your specific beans and environment. In practice, many overlook that static buildup in grinders can cause uneven dosing, leading to inconsistent pulls—something addressed by regular cleaning routines outlined in guides like this cleaning essential.Keeping your home espresso setup in prime condition requires more than just initial setup; it demands consistent maintenance and the right tools. I personally rely on a few specialized gadgets to ensure my machine runs smoothly and produces top-tier shots every time. One indispensable tool is a high-precision espresso machine cleaning schedule, which integrates routine backflushing with a dedicated cleaner like grouphead cleaning tablets to prevent oil and residue buildup, as detailed in this guide. This habit not only extends the lifespan of gaskets and shower screens but also maintains optimal extraction quality.
Another must-have is a calibrated pressure gauge, which is essential for troubleshooting pressure fluctuations and ensures your machine operates at the ideal 9 bars during extraction. I calibrate mine regularly with a specialized gauge to catch early signs of pressure drops, as discussed in this article. Regular checks prevent costly repairs and burnt-out components, saving you time and money.
In addition, a high-quality grinder maintenance kit is invaluable. Removing and cleaning burrs with precision tools prevents static buildup and inconsistent dosing. I’ve found that a burr cleaning brush combined with lubricant designed for grinder components keeps my grinder performing at peak levels, ensuring consistent grind size and extraction. Proper cleaning, as articulated in this resource, is crucial when replacing burrs or deep cleaning.
Thinking long-term means investing in a reliable water filtration system. Hard water can cause mineral buildup that damages boilers and reduces efficiency over time. I use a scale-inhibiting filter that extends the lifespan of my boiler and minimizes descaling frequency. According to this guide, maintaining proper water quality is fundamental for consistent temperature control.
And don’t overlook small but important accessories like silicone portafilter gaskets and shower screens. Regularly inspecting and replacing these silicone parts—something I schedule quarterly—prevents leaks and uneven water distribution during extraction. It’s a simple step that offers big gains in shot consistency.
Looking ahead, I believe automation and smart diagnostics will play a greater role in home espresso maintenance. Future trends point towards IoT-enabled sensors that monitor pressure, temperature, and water quality, providing real-time alerts and automated calibration, much like professional commercial machines. For now, integrating these practical tools and routines will keep your espresso machine performing at its best for years to come.
If you haven’t already, try calibrating your pressure gauge today and see the immediate impact it has on your extraction consistency. Making this small investment and adopting routine upkeep will revolutionize your home barista game.
Crucial Lessons I Almost Overlooked About Home Espresso Setup
One of my biggest lightbulb moments was realizing that even the most expensive espresso gear won’t deliver exceptional coffee unless I paid close attention to small details like pressure calibration. I used to believe that a machine’s default settings would suffice, but I was wrong. Fine-tuning pressure revealed a new world of flavor and consistency I didn’t think was possible without professional tools.
Another insight came when I discovered that calibrating pressure isn’t just about aiming for 9 bars; it’s about understanding how each small adjustment influences extraction. Back when I ignored this, my shots tasted flat or off-balance. Since adopting a methodical approach, I’ve turned my home brewing into a precision art—something that truly elevates the entire coffee experience.
Finally, I learned that pressure calibration isn’t a one-time task. Environmental factors, bean freshness, and even humidity can affect your machine’s performance. Regularly verifying and adjusting pressure ensures your espresso stays consistently excellent. Trust me, these lessons saved me countless cups of mediocre coffee and helped me become a better home barista.
My Toolkit for Elevating Your Espresso Game
Personally, I swear by a high-quality pressure gauge compatible with my machine—it’s my go-to tool for quick, accurate readings. For detailed adjustments, I refer to this comprehensive guide which walks through pressure relief valves and calibration methods step-by-step. Combining these resources with my gear maintenance routine, including regular cleaning of the group head and seals, has been transformative.
If you’re serious about perfecting your espresso, investing in a reliable grinder and learning how grind size impacts pressure is key. I often revisit this article to ensure grind adjustments align with pressure calibration. With the right tools and knowledge, you’ll find your shots transforming from good to extraordinary.
The Moment You Embrace Consistency and Precision
Taking ownership of pressure calibration is empowering. It’s a small act with massive impacts—flavor, aroma, and the overall pleasure of your brew. Each adjustment brings a sense of mastery and confidence that continues to deepen with experience. The joy of pulling that perfectly balanced shot, knowing your timing and pressure are dialed in, is truly unmatched.
Now, I challenge you to start measuring your machine’s pressure today. It’s a simple step that can radically improve your coffee. Feel free to share your experiences or ask questions below—what’s been your biggest revelation in fine-tuning your espresso setup?