Why Your Dosing Cup Doesn’t Fit Your Portafilter
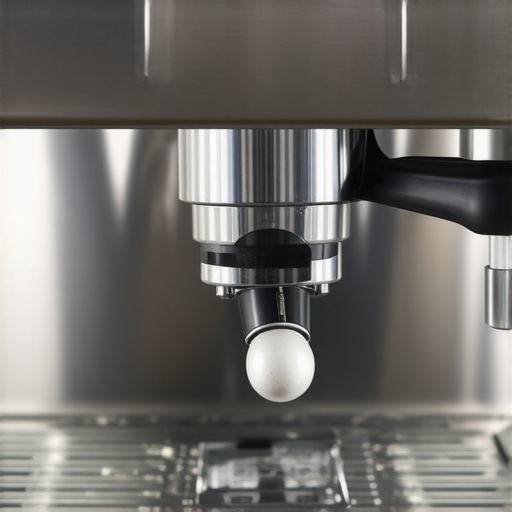
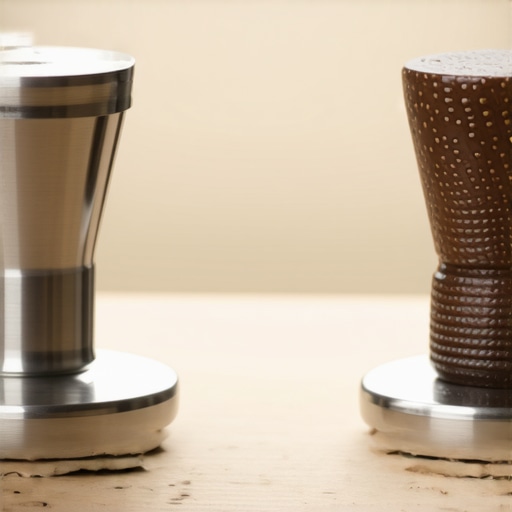
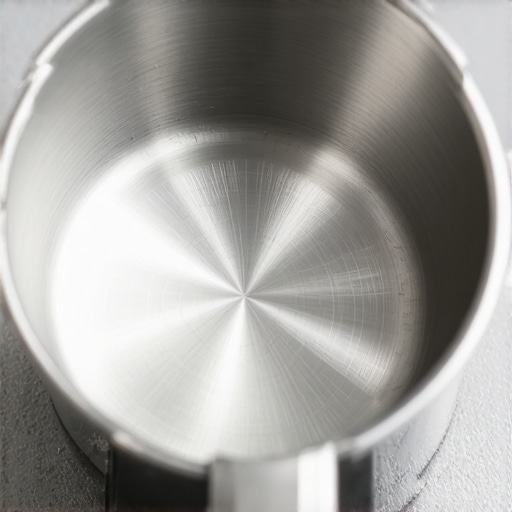
I was standing in my kitchen at 6 AM, caffeine-deprived and desperate, staring at a pile of expensive coffee grounds on my counter because my brand-new 58mm dosing cup just would not seat in my 58mm portafilter. It was a $30 piece of polished steel that felt like a personal insult in that moment. I had spent twenty minutes selecting the perfect coffee grinder for my brew, only to be defeated by a simple metal cup that refused to play nice. This wasn’t just a mess; it was a blow to my ego. I assumed that because both items were labeled with the same diameter, they would be soulmates. I was wrong. [image_placeholder_1]
That Awkward Gap Between Your Cup and Your Basket
I want to pull back the curtain on why this happens so you do not waste money or sanity like I did. Most people assume that 58mm is a universal constant, but in the world of specialty coffee, it is more like a general suggestion. We are going to look at the hidden geometry of baskets and why your distribution tool might be ruining your extraction if the fit is off by even half a millimeter. When that cup does not sit flush, it creates a lip where grounds get stuck, leading to uneven mounds and, eventually, a bitter shot that ruins your morning.
Is Universal Fit Just a Clever Marketing Lie?
You have probably seen the ads. “Compatible with all 58mm portafilters!” It sounds so simple. But the truth is, the espresso industry can be a bit like the Wild West of machining. In my early days, I bought a cheap generic cup from a random marketplace, thinking I was being savvy. It fit my stock Breville basket perfectly but would not even enter the rim of my precision VST basket. According to precision manufacturing standards often cited by industry leaders like VST, internal diameters can vary by up to 0.1mm based on the polish and wall thickness. That tiny fraction of a millimeter is the difference between a clean transfer and a countertop covered in dust. Have you ever felt that specific frustration of thinking you bought the right part, only for it to fail right at the finish line?
The Secret Math of Basket Ridges and Rims
The problem usually is not the actual hole diameter; it is the shape of the wall and the presence of a ridge. If you have ever wondered why your espresso distribution without fancy tools feels more consistent than with a poorly fitted cup, it is because that physical gap allows for “fines” to escape and settle irregularly. I once tried to force a thick-walled cup into a ridged basket, and the ridge caught the lip of the cup so hard I had to use a flathead screwdriver to pry them apart. It was a total workflow killer. When you are choosing the best barista gear, you have to account for the internal taper of the basket. If the cup is too deep or the walls are too thick, it hits the curved bottom of the basket before the seal is made. We are going to fix that today by identifying exactly which dimensions you need to measure before you click buy on your next accessory.
Stop Guessing and Start Measuring with Calipers
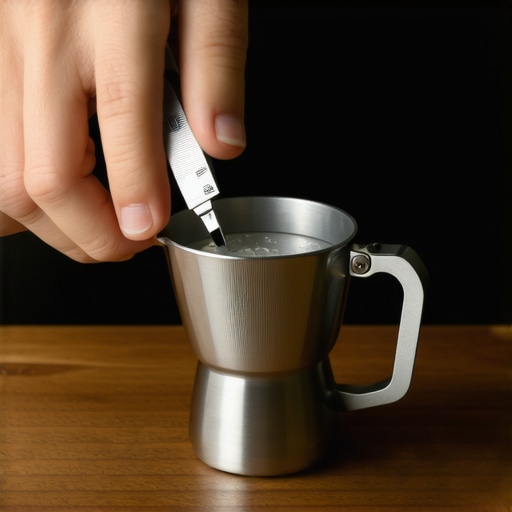
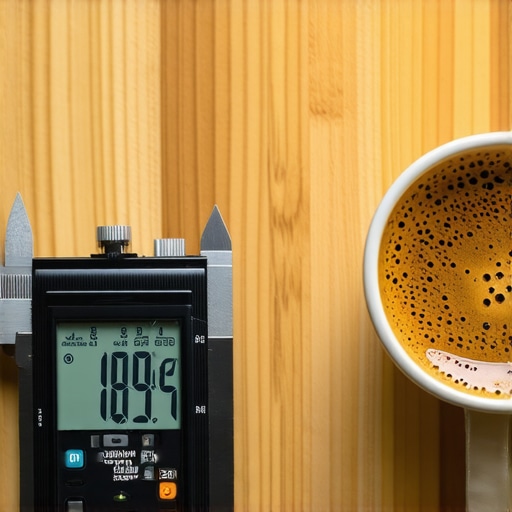
If you want to stop the kitchen-counter mess, you have to stop trusting the labels on the box. I finally caved and bought a digital caliper because I was tired of the 58mm guesswork that never seemed to result in a clean transfer. When you measure your gear, you aren’t just looking for the 58mm mark; you are looking for the exact clearance between the cup and the basket walls. Most high-end baskets like those from VST or IMS actually have an internal diameter closer to 58.7mm. If your dosing cup is exactly 58.5mm, you have a tight tolerance that leaves zero room for a shaky hand. When I first started mastering the art of home espresso tips for beginners, I realized my ‘universal’ cup was actually 58.2mm, leaving a massive 0.5mm gap where fines could migrate and escape during the flip. This is how you end up with the simple way to fix a gritty texture in your espresso—by ensuring the cup sits deep inside the rim, preventing dust from flying.
Why Ridged Baskets Are Your Biggest Enemy
The biggest hardware hurdle is often the physical ridge—that small indentation inside the basket meant to lock it against the portafilter spring. If your dosing cup has a slightly flared lip, it will hit that ridge and stop dead, creating a ‘ledge’ where coffee grounds collect. I remember a Tuesday morning when I was so rushed I didn’t notice the cup wasn’t sitting flush. I flipped the portafilter, pulled the cup away, and a perfect ring of dry grounds stayed stuck to the ridge like a tiny brown halo. When I tried to tamp, that ring collapsed into the center, creating a massive density imbalance that caused my shot to channel instantly. This is why the move for better espresso distribution without fancy tools often begins with switching to ridgeless baskets. They provide a smooth, continuous wall that allows your dosing cup to form a perfect seal regardless of how deep it sits.
Avoid the Vacuum Effect with Smart Clearances
You might think a tenth of a millimeter is overkill, but when choosing the best barista gear, precision is your only defense against daily frustration. Think of your basket and cup like a piston and cylinder. If the fit is too tight, you actually create a vacuum. I once used a custom-machined cup that was so perfectly matched to the basket that when I lifted it, the suction pulled the entire coffee puck upward, cracking the surface and ruining the bed. It was a beautiful, tragic mess of physics. To avoid this, aim for a cup that is roughly 0.3mm narrower than the internal diameter of your basket. This allows air to escape while keeping the grounds trapped.
Perform the Dry Run Before You Grind
Before you even think about how to select the perfect coffee grinder for your brew, you must test the physical mating of your accessories while they are dry and clean. Place the cup into the basket and rotate it 360 degrees. It should spin freely without any ‘gritting’ sound or catching. If you feel a click, you likely have a burr on the metal or a slight oval shape in the basket. I once spent an entire week thinking my grinder’s burrs were failing, only to realize my dosing cup was sitting slightly tilted because of a tiny manufacturing defect on its base. That tilt meant one side of the basket was always receiving more coffee than the other, leading to lopsided extractions that no amount of fancy puck prep could fix. Check your gear first, and the coffee will follow.
Let’s dig deeper into the precision myth that permeates the coffee community. You see enthusiasts bragging about zero-tolerance fits on forums, but in my experience, that is often a recipe for a morning disaster. Everyone tells you that tighter is better when it comes to the gap between your dosing cup and basket, but here is the contrarian truth: a perfect, friction-fit seal usually leads to peripheral trenching. When the cup fits too tightly against the walls, the air has nowhere to go during the flip, and a vacuum effect pulls the coffee away from the edges of the basket. According to research by Socratic Coffee on puck physics, even small disturbances in the dry bed can lead to massive variance in total dissolved solids (TDS). This is often why your distribution tool might be ruining your extraction before you even start—because the initial bed was structurally flawed during the transfer. If you are choosing the best barista gear, look for about 0.3mm of wiggle room. It is not a sign of poor manufacturing; it is a vital feature that allows the bed to settle naturally without suction.
Does Your Basket Taper Ruin the Puck Density?
One thing even seasoned baristas overlook is the internal geometry of the basket. Most 58mm baskets are not perfect cylinders; they are truncated cones. If your dosing cup is too deep, it hits the sloping sides before it can properly seal the rim. This creates a literal ledge where coffee hangs out in the air before dropping. If you have ever wondered why your bottomless portafilter is making a huge mess, it is often because that ledge caused an air pocket or a soft spot at the bottom of your puck. No amount of WDT can fix a structural void created during a bad transfer. You might find that even the right way to align your flat burrs for better shots won’t save your espresso if your basket geometry is fighting your cup at the finish line.
Avoid the Mechanical Lock from Thermal Expansion
Here is a specific oops factor that almost broke my machine and my spirit. Stainless steel has a notable coefficient of thermal expansion. I once did a dry run with a cold dosing cup and a cold portafilter, and it was a match made in heaven. But once I engaged the benefit of pre-warming your portafilter head, the basket expanded just enough to let the cup in, but then the cup heated up and seized. I had to wait ten minutes for the metal to contract just to get my coffee out. It is a workflow nightmare that explains why your shot extraction time changes every single day—your equipment’s physical size is literally shifting as it heats up. If you are mastering the art of home espresso tips for beginners, always test your accessories when the machine is at full operating temperature to ensure they still slide freely.
We often focus on the big items, like how to select the perfect coffee grinder for your brew, but the devil is in these tiny metal-on-metal interactions. If you ignore the tolerance, you are just fighting your equipment instead of enjoying your morning ritual. Have you ever fallen into this trap where a new tool actually made your workflow harder? Let me know in the comments.
The reality is that your equipment is slowly dying the moment you take it out of the box. Coffee oils are basically a slow-acting adhesive that will eventually gum up every high-precision clearance we just talked about. I learned this the hard way when my expensive portafilter started making my espresso taste like ash, simply because I ignored the danger of leaving old coffee oils in your portafilter spouts. Those oils go rancid, and no amount of ‘precision fit’ can save a shot that’s being filtered through layers of ancient, burnt carbon. If you want to keep your workflow clean, you need to treat your gear like a laboratory instrument, not just a kitchen appliance.
Keep Your Precision Gear From Turning Into Junk
Maintenance isn’t just about scrubbing; it’s about mechanical longevity. I personally swear by a deep-cleaning schedule that looks more like a car’s oil change than a dishes-after-dinner routine. For example, if you don’t stick to the best routine for a weekend deep clean, you’ll start to notice your grinder’s adjustment ring becoming stiff or catching. This is usually due to fine particles migrating into the threads. I’ve seen people use pliers on their grinders, which is a tragedy. Instead, focus on why your machine needs a backflush every single week to prevent that pressure-cooker environment from turning coffee dust into concrete inside your group head.
How Can I Keep My Barista Setup Running Like New?
The secret is a combination of preventative part replacement and constant organization. You shouldn’t wait for a leak to start thinking about how to replace a group gasket without scratching the chrome. According to the La Marzocco Home maintenance schedule, neglecting your group gasket for more than six months in a high-heat environment can lead to irreversible ‘baking’ of the rubber against the group head, making it nearly impossible to remove without specialized tools. I also recommend a dedicated space for everything; learning how to organize your barista tools in a single drawer prevents you from tossing your precision baskets into a pile where they can get dented or scratched, ruining that 0.1mm tolerance we worked so hard to achieve.
Why Your Digital Scale Is Actually Your Weakest Link
You can have the best grinder in the world, but if your measurements are off, your consistency dies. I spent a month chasing ‘ghost’ variables only to realize why your coffee scale is giving you inconsistent readings—it was simple heat interference from the drip tray. This is the ‘hidden’ maintenance: checking your sensors. As for the future, I predict we are moving toward ‘smart’ baskets with built-in nano-coatings that repel oils entirely, making the daily scrub a thing of the past. Until then, precision requires perspiration. I challenge you to pull your shower screen off today; if it’s black underneath, your maintenance has already failed. Clean it, and I promise your next shot will taste like a different bean entirely.
I was standing in my kitchen at 6 AM, caffeine-deprived and desperate, staring at a pile of expensive coffee grounds on my counter because my brand-new 58mm dosing cup just would not seat in my 58mm portafilter. It was a $30 piece of polished steel that felt like a personal insult in that moment. I had spent twenty minutes selecting the perfect coffee grinder for my brew, only to be defeated by a simple metal cup that refused to play nice. This wasn’t just a mess; it was a blow to my ego. I assumed that because both items were labeled with the same diameter, they would be soulmates. I was wrong. [image_placeholder_1]
That Awkward Gap Between Your Cup and Your Basket
I want to pull back the curtain on why this happens so you do not waste money or sanity like I did. Most people assume that 58mm is a universal constant, but in the world of specialty coffee, it is more like a general suggestion. We are going to look at the hidden geometry of baskets and why your distribution tool might be ruining your extraction if the fit is off by even half a millimeter. When that cup does not sit flush, it creates a lip where grounds get stuck, leading to uneven mounds and, eventually, a bitter shot that ruins your morning.
Is Universal Fit Just a Clever Marketing Lie?
You have probably seen the ads. “Compatible with all 58mm portafilters!” It sounds so simple. But the truth is, the espresso industry can be a bit like the Wild West of machining. In my early days, I bought a cheap generic cup from a random marketplace, thinking I was being savvy. It fit my stock Breville basket perfectly but would not even enter the rim of my precision VST basket. According to precision manufacturing standards often cited by industry leaders like VST, internal diameters can vary by up to 0.1mm based on the polish and wall thickness. That tiny fraction of a millimeter is the difference between a clean transfer and a countertop covered in dust. Have you ever felt that specific frustration of thinking you bought the right part, only for it to fail right at the finish line?
The Secret Math of Basket Ridges and Rims
The problem usually is not the actual hole diameter; it is the shape of the wall and the presence of a ridge. If you have ever wondered why your espresso distribution without fancy tools feels more consistent than with a poorly fitted cup, it is because that physical gap allows for “fines” to escape and settle irregularly. I once tried to force a thick-walled cup into a ridged basket, and the ridge caught the lip of the cup so hard I had to use a flathead screwdriver to pry them apart. It was a total workflow killer. When you are choosing the best barista gear, you have to account for the internal taper of the basket. If the cup is too deep or the walls are too thick, it hits the curved bottom of the basket before the seal is made. We are going to fix that today by identifying exactly which dimensions you need to measure before you click buy on your next accessory.
Stop Guessing and Start Measuring with Calipers
If you want to stop the kitchen-counter mess, you have to stop trusting the labels on the box. I finally caved and bought a digital caliper because I was tired of the 58mm guesswork that never seemed to result in a clean transfer. When you measure your gear, you aren’t just looking for the 58mm mark; you are looking for the exact clearance between the cup and the basket walls. Most high-end baskets like those from VST or IMS actually have an internal diameter closer to 58.7mm. If your dosing cup is exactly 58.5mm, you have a tight tolerance that leaves zero room for a shaky hand. When I first started mastering the art of home espresso tips for beginners, I realized my ‘universal’ cup was actually 58.2mm, leaving a massive 0.5mm gap where fines could migrate and escape during the flip. This is how you end up with the simple way to fix a gritty texture in your espresso—by ensuring the cup sits deep inside the rim, preventing dust from flying.
Why Ridged Baskets Are Your Biggest Enemy
The biggest hardware hurdle is often the physical ridge—that small indentation inside the basket meant to lock it against the portafilter spring. If your dosing cup has a slightly flared lip, it will hit that ridge and stop dead, creating a ‘ledge’ where coffee grounds collect. I remember a Tuesday morning when I was so rushed I didn’t notice the cup wasn’t sitting flush. I flipped the portafilter, pulled the cup away, and a perfect ring of dry grounds stayed stuck to the ridge like a tiny brown halo. When I tried to tamp, that ring collapsed into the center, creating a massive density imbalance that caused my shot to channel instantly. This is why the move for better espresso distribution without fancy tools often begins with switching to ridgeless baskets. They provide a smooth, continuous wall that allows your dosing cup to form a perfect seal regardless of how deep it sits.
Avoid the Vacuum Effect with Smart Clearances
You might think a tenth of a millimeter is overkill, but when choosing the best barista gear, precision is your only defense against daily frustration. Think of your basket and cup like a piston and cylinder. If the fit is too tight, you actually create a vacuum. I once used a custom-machined cup that was so perfectly matched to the basket that when I lifted it, the suction pulled the entire coffee puck upward, cracking the surface and ruining the bed. It was a beautiful, tragic mess of physics. To avoid this, aim for a cup that is roughly 0.3mm narrower than the internal diameter of your basket. This allows air to escape while keeping the grounds trapped.
Perform the Dry Run Before You Grind
Before you even think about how to select the perfect coffee grinder for your brew, you must test the physical mating of your accessories while they are dry and clean. Place the cup into the basket and rotate it 360 degrees. It should spin freely without any ‘gritting’ sound or catching. If you feel a click, you likely have a burr on the metal or a slight oval shape in the basket. I once spent an entire week thinking my grinder’s burrs were failing, only to realize my dosing cup was sitting slightly tilted because of a tiny manufacturing defect on its base. That tilt meant one side of the basket was always receiving more coffee than the other, leading to lopsided extractions that no amount of fancy puck prep could fix. Check your gear first, and the coffee will follow.
Let’s dig deeper into the precision myth that permeates the coffee community. You see enthusiasts bragging about zero-tolerance fits on forums, but in my experience, that is often a recipe for a morning disaster. Everyone tells you that tighter is better when it comes to the gap between your dosing cup and basket, but here is the contrarian truth: a perfect, friction-fit seal usually leads to peripheral trenching. When the cup fits too tightly against the walls, the air has nowhere to go during the flip, and a vacuum effect pulls the coffee away from the edges of the basket. According to research by Socratic Coffee on puck physics, even small disturbances in the dry bed can lead to massive variance in total dissolved solids (TDS). This is often why your distribution tool might be ruining your extraction before you even start—because the initial bed was structurally flawed during the transfer. If you are choosing the best barista gear, look for about 0.3mm of wiggle room. It is not a sign of poor manufacturing; it is a vital feature that allows the bed to settle naturally without suction.
Does Your Basket Taper Ruin the Puck Density?
One thing even seasoned baristas overlook is the internal geometry of the basket. Most 58mm baskets are not perfect cylinders; they are truncated cones. If your dosing cup is too deep, it hits the sloping sides before it can properly seal the rim. This creates a literal ledge where coffee hangs out in the air before dropping. If you have ever wondered why your bottomless portafilter is making a huge mess, it is often because that ledge caused an air pocket or a soft spot at the bottom of your puck. No amount of WDT can fix a structural void created during a bad transfer. You might find that even the right way to align your flat burrs for better shots won’t save your espresso if your basket geometry is fighting your cup at the finish line.
Avoid the Mechanical Lock from Thermal Expansion
Here is a specific oops factor that almost broke my machine and my spirit. Stainless steel has a notable coefficient of thermal expansion. I once did a dry run with a cold dosing cup and a cold portafilter, and it was a match made in heaven. But once I engaged the benefit of pre-warming your portafilter head, the basket expanded just enough to let the cup in, but then the cup heated up and seized. I had to wait ten minutes for the metal to contract just to get my coffee out. It is a workflow nightmare that explains why your shot extraction time changes every single day—your equipment’s physical size is literally shifting as it heats up. If you are mastering the art of home espresso tips for beginners, always test your accessories when the machine is at full operating temperature to ensure they still slide freely.
We often focus on the big items, like how to select the perfect coffee grinder for your brew, but the devil is in these tiny metal-on-metal interactions. If you ignore the tolerance, you are just fighting your equipment instead of enjoying your morning ritual. Have you ever fallen into this trap where a new tool actually made your workflow harder? Let me know in the comments.
The reality is that your equipment is slowly dying the moment you take it out of the box. Coffee oils are basically a slow-acting adhesive that will eventually gum up every high-precision clearance we just talked about. I learned this the hard way when my expensive portafilter started making my espresso taste like ash, simply because I ignored the danger of leaving old coffee oils in your portafilter spouts. Those oils go rancid, and no amount of ‘precision fit’ can save a shot that’s being filtered through layers of ancient, burnt carbon. If you want to keep your workflow clean, you need to treat your gear like a laboratory instrument, not just a kitchen appliance.
Keep Your Precision Gear From Turning Into Junk
Maintenance isn’t just about scrubbing; it’s about mechanical longevity. I personally swear by a deep-cleaning schedule that looks more like a car’s oil change than a dishes-after-dinner routine. For example, if you don’t stick to the best routine for a weekend deep clean, you’ll start to notice your grinder’s adjustment ring becoming stiff or catching. This is usually due to fine particles migrating into the threads. I’ve seen people use pliers on their grinders, which is a tragedy. Instead, focus on why your machine needs a backflush every single week to prevent that pressure-cooker environment from turning coffee dust into concrete inside your group head.
How Can I Keep My Barista Setup Running Like New?
The secret is a combination of preventative part replacement and constant organization. You shouldn’t wait for a leak to start thinking about how to replace a group gasket without scratching the chrome. According to the La Marzocco Home maintenance schedule, neglecting your group gasket for more than six months in a high-heat environment can lead to irreversible ‘baking’ of the rubber against the group head, making it nearly impossible to remove without specialized tools. I also recommend a dedicated space for everything; learning how to organize your barista tools in a single drawer prevents you from tossing your precision baskets into a pile where they can get dented or scratched, ruining that 0.1mm tolerance we worked so hard to achieve.
Why Your Digital Scale Is Actually Your Weakest Link
You can have the best grinder in the world, but if your measurements are off, your consistency dies. I spent a month chasing ‘ghost’ variables only to realize why your coffee scale is giving you inconsistent readings—it was simple heat interference from the drip tray. This is the ‘hidden’ maintenance: checking your sensors. As for the future, I predict we are moving toward ‘smart’ baskets with built-in nano-coatings that repel oils entirely, making the daily scrub a thing of the past. Until then, precision requires perspiration. I challenge you to pull your shower screen off today; if it’s black underneath, your maintenance has already failed. Clean it, and I promise your next shot will taste like a different bean entirely.
The Harsh Truth About Universal Compatibility
After years of wrestling with metal-on-metal friction, I’ve realized that the term ‘universal’ is the biggest trap in the espresso industry. My biggest lightbulb moment came when I stopped blaming my technique and started blaming the physics of my equipment. I discovered that a dosing cup that feels ‘secure’ is often too tight, trapping air and ruining the puck density before you even tamp.
I also learned that you should never buy a piece of gear without checking the return policy; even top-tier brands have batches where the tolerance is off by a hair. Remember that your equipment changes over time. Mastering the art of home espresso tips for beginners means accepting that you are managing a shifting system of variables, from metal expansion to oil buildup. Cleanliness isn’t just about hygiene; it’s about preserving those vital mechanical clearances.
Tools That Saved My Morning Sanity
If you want to move beyond the frustration of messy counters, there are a few items I consider non-negotiable for a modern setup. First, a cheap set of digital calipers will save you more money in failed accessory purchases than any online review. Use them to measure your basket’s actual internal rim before you hit the ‘buy’ button.
I also highly recommend moving to ridgeless precision baskets from IMS or VST; the lack of an internal groove makes a world of difference for a smooth, clean transfer. When you are choosing the best barista gear for coffee enthusiasts, prioritize brands that publish their exact manufacturing specs. Finally, always have the mess-free way to clean a conical burr grinder in your back pocket to ensure fines aren’t gumming up your cup’s seal, and incorporate the best routine for a weekend deep clean to keep every interaction as smooth as the day you unboxed it.
[image_placeholder_E]
Start Your Journey to Consistency
Don’t let the talk of tenths of a millimeter intimidate you. Every professional barista started with a messy counter and a shot that tasted like battery acid. The goal isn’t to reach perfection on day one; it’s to eliminate the small technical frustrations so you can actually enjoy the ritual of brewing. By focusing on the fit and maintenance of your equipment, you’re making your morning routine more peaceful and your results more predictable. Mastering the art of home espresso tips for beginners is a marathon of small adjustments. Take it one millimeter at a time, and soon your gear will feel like an extension of your hand. Have you ever bought a ‘universal’ accessory that didn’t actually fit your machine? Let me know your gear heartbreaks in the comments below!