How to Spot a Failing Solenoid Valve Before It Floods Your Kitchen
I stood there, barefoot in a cold puddle of water, staring at my espresso machine while it hummed a low, ominous tune that I’d never heard before. It was 6:00 AM, and instead of a rich, syrupy ristretto, I was staring at a miniature lake creeping toward the edge of my granite countertop. If you’ve ever walked into your kitchen and felt that sudden “squelch” under your heel, you know exactly the sinking feeling I’m talking about. My 3-way solenoid valve had finally given up the ghost. I knew it was coming, too. For weeks, my machine was doing that weird thing where how to fix the annoying drip after your espresso shot stops just wasn’t working anymore, but I ignored it. I convinced myself it was just “old machine charm.” It wasn’t. It was a cry for help.
Don’t Let a Tiny Valve Ruin Your Morning
The solenoid valve is the unsung hero of your espresso setup. It’s the gatekeeper that manages water flow and, more importantly, relieves pressure so your puck doesn’t turn into a muddy mess. When it starts to fail, it doesn’t always go out with a bang; sometimes it’s a slow, sneaky leak that eventually leads to a flooded kitchen or a tripped circuit breaker. I learned the hard way that why your home circuit breaker trips when you turn on the boiler is often linked directly to internal leaks spraying where they shouldn’t. If you are using top-rated espresso machines for coffee lovers in 2025, you might think you’re immune, but even the best gear needs maintenance.
Is Fixing a Solenoid Actually Worth the Hassle?
You might be wondering if you can just live with a little extra water in your tray. Trust me, I’ve been there. I once spent a month ignoring a wet puck, only to realize later that why your espresso basket is always wet after a shot is the first major red flag. According to the engineering team at Parker Hannifin, a global leader in motion and control technologies, solenoid valves are precision instruments that rely on a perfect seal; even a microscopic piece of grit can prevent them from closing, leading to constant dripping or internal overheating. Have you ever noticed your machine buzzing louder than usual or dripping long after you’ve pulled the lever? Today, I’m going to show you exactly how to spot these early warning signs. We’ll look at the “hiss,” the “drip,” and why how to tell if your machine boiler is accumulating lime scale is the secret to preventing these failures in the first place.
Spot the Red Flags Before the Flood
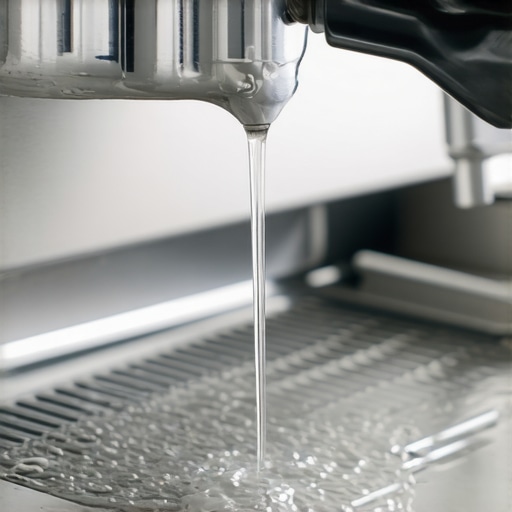
First, we need to rule out the ‘fake’ solenoid failures. I once spent two hours tearing apart my machine only to realize the water on my counter was coming from the group head, not the valve. If you see water spraying horizontally from where the handle meets the machine, you are likely looking at why your group head gasket is leaking after just one month rather than a solenoid death. If the water is pooling directly under the chassis, check how to fix a drip tray that leaks into the machine body first. However, if the water is exiting the exhaust tube constantly—even when the machine is just sitting there—you’ve found your culprit.
Identifying the Ghost in the Machine
A healthy solenoid should make a crisp, audible ‘click’ the moment you engage the brew switch and another when you turn it off. If that sound is muffled or non-existent, the internal plunger is likely stuck. When mine failed, the machine didn’t just leak; it hummed with a vibration that felt like it was going to walk right off the counter. If you are using any of the top-rated espresso machines for coffee lovers in 2025, this hum is usually a sign that the electrical coil is trying to move a plunger that’s glued shut by lime scale.
Get Inside Without Voiding Your Sanity
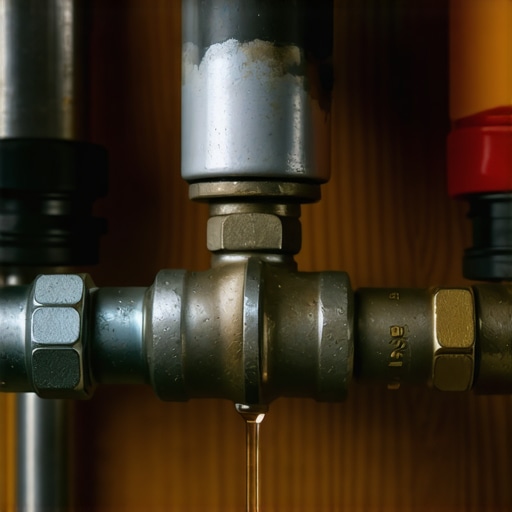
To get inside, unplug everything. I cannot stress this enough. I once got a ‘wakeup call’ from a 110V terminal because I was too impatient to pull the plug while reaching for a wrench. Once the top panel is removed, locate the solenoid—it’s usually a brass block with a black or red plastic cube (the coil) sitting on top. If you see moisture around the base of the plastic, the zip tie fix for loose espresso machine tubing might provide a temporary seal for the hoses, but for a true solenoid fix, you must disassemble the core.
The Vinegar Soak That Actually Works
Unscrew the nut holding the plastic coil and slide it off. This reveals the metal valve stem. You’ll need a wrench to carefully unscrew this from the brass base. Inside, you’ll find a tiny spring and a plunger with a small rubber seat. If this plunger is covered in white, crusty buildup, that is your problem. This is exactly why your espresso machine takes longer to heat up lately; that scale is acting as an insulator and a mechanical glue. Soak the metal and brass parts in a 50/50 mix of warm water and white vinegar for 20 minutes. I once tried to ‘scrape’ the scale off with a screwdriver and ruined the precision seal—don’t be me. Let the chemistry do the work. If the rubber tip is deeply pitted or torn, no amount of cleaning will help and you’ll need to order a replacement plunger. Reassemble everything in reverse, ensuring the spring is seated perfectly straight. When you finally flip the switch and hear that sharp, metallic ‘thwack’ of the valve opening, you’ll know you’ve beaten the leak. Just make sure everything is dry before you plug it back in, otherwise why your home circuit breaker trips when you turn on the boiler will be the next guide you need to read.
People often tell you that 9 bars of pressure is the ‘golden rule’ for espresso. In my experience, sticking strictly to that is exactly the move for better espresso without buying a new machine that most people miss—by ignoring the benefits of lower pressure. If you are pulling modern light roasts, 9 bars can actually cause massive channeling and harsh acidity. The Specialty Coffee Association (SCA) often highlights in their brewing standards that extraction yield and flavor balance are more dependent on water chemistry and temperature stability than raw pump pressure alone. Have you ever fallen into the trap of obsessing over the gauge while your shot still tastes like battery acid? Let me know in the comments.
The Descaling Trap That Kills Valves
One of the biggest mistakes I see—and I have certainly been guilty of this—is performing an aggressive descale on a machine that has been neglected for years. You think you are doing a good thing, but you are actually dislodging ‘scale flakes’ that act like shrapnel. These flakes travel through the system and head straight for the narrow orifice of your 3-way solenoid. This is frequently the reason your espresso tastes metallic after descaling and why your valve might jam or leak immediately after a cleaning cycle. If you have ever wondered how to tell if your machine boiler is accumulating lime scale, do not wait for the ‘big clean.’ Frequent, mild maintenance with proper water filtration is always superior to a once-a-year chemical bath that risks clogging your internals.
Is Your Water Too Soft for Your Machine to Function?
It sounds counterintuitive, but if your water is too pure—like distilled or Reverse Osmosis water without remineralization—your machine’s sensors might fail. Most top-rated espresso machines for coffee lovers in 2025 use a conductivity probe to detect water levels in the boiler. If the water lacks ions, the probe cannot complete the circuit, and the boiler may overfill or the heating element might burn out because it ‘thinks’ it is empty. This is often how to tell if your water is too soft for brewing. Beyond the sensors, ‘hungry’ water will actually leach metals from your brass and copper components, resulting in a permanent metallic taint that no amount of flushing can fix.
Precision Baskets Are Not Always the Answer
Many enthusiasts buy a high-end precision basket thinking it is an instant quality upgrade. However, these baskets have higher flow rates and require a much finer grind. If your grinder isn’t up to the task, you will see why your bottomless portafilter shows channels every time despite your best tamping efforts. Sometimes, the simple paper filter trick for better bottomless shots provides more consistency than a 30-dollar piece of steel. Don’t let the marketing convince you that gear replaces technique; even the best barista gear for coffee enthusiasts requires a deep understanding of how puck resistance actually works.
Stop Throwing Away Your Grind Settings Every Time You Clean
If your espresso machine is the heart of your kitchen, the grinder is undoubtedly the brain. I spent years thinking a quick puff of air or a handful of cleaning pellets was enough, but I was wrong. I realized that why your coffee grinder retains more grounds than it should isn’t just about mess; it’s about flavor contamination. Now, I use a dedicated shop vac and a set of bamboo skewers to get into the nooks. When you finally find that sweet spot for a difficult bean, you need to learn the best way to clean a grinder without losing your settings so you aren’t starting from scratch every Sunday morning. I personally use a small piece of painter’s tape to mark my dial before I even think about unscrewing the collar. It saves me about four shots of ‘dialing-in’ waste every time.
How do I maintain my grinder’s precision over years of use?
Long-term maintenance is less about the deep cleans and more about the micro-habits. According to the technical maintenance bulletins from Mahlkönig, a leader in professional grinding technology, burr alignment can actually shift due to thermal expansion and vibration over hundreds of cycles. To combat this, I recommend checking your burr ‘touch point’ every six months. If you hear the burrs chirping unevenly, it’s time to shim them. While you’re at it, the cotton swab trick for cleaning hidden grinder crevices is the only way to remove the rancid oils that build up in the exit chute. These oils are often the hidden culprit behind why your shots suddenly taste ‘off’ despite using fresh beans.
The Barista Gear That Actually Moves the Needle
We’ve all seen the flashy accessories, but most of them are just counter-clutter. When choosing the best barista gear for coffee enthusiasts, I always tell people to invest in the things that remove human error. For me, that was a high-quality WDT tool and a calibrated tamper. I resisted for a long time, but the truth about using spring-loaded tampers for even shots is that they eliminate the ‘was I level?’ anxiety. If you are struggling with consistency, look at your prep before you look at your machine’s PID settings. Even top-rated espresso machines for coffee lovers in 2025 cannot fix a puck that was tamped at a 5-degree angle.
Where Home Espresso Technology is Heading
I predict we are about to see a massive shift toward ‘smart’ flow profiling where the machine learns your preferences. We are already seeing sensors that can detect the exact moment of blonding and shut off the pump. While some purists hate the idea, I think it will make mastering the art of home espresso much more accessible for the average person who just wants a cafe-quality latte at 7:00 AM without a physics degree. If you want to stay ahead of the curve, start practicing with a bottomless portafilter now. It is the best diagnostic tool ever invented. If you are seeing mess, go back and check why your bottomless portafilter shows channels every time to refine your technique before the machines start doing it for you. Try this today: the next time you pull a shot, use a flashlight to watch the bottom of the basket. If it doesn’t bead uniformly, your WDT technique needs work.
The Hardest Lessons I Learned While Chasing the Perfect Extraction
Looking back at my journey with home espresso, I realized that the most expensive mistakes weren’t caused by bad beans, but by ignoring the machine’s mechanical whispers. First, I learned that a clean machine is a consistent machine; ignoring a tiny leak today is an invitation for a flooded kitchen tomorrow. I used to think descaling was a ‘once a year’ chore, but now I know it’s a constant dialogue with your water chemistry. Another lightbulb moment was realizing that gear doesn’t replace technique. You can buy all the top-rated espresso machines for coffee lovers in 2025, but if you don’t understand how to listen for the solenoid click or how to spot channeling early, your results will always be a gamble. Finally, I discovered that ‘perfect’ is the enemy of ‘delicious.’ Sometimes, the move for better espresso without buying a new machine is simply slowing down and paying attention to the details of your puck prep.
My Go-To Kit for Keeping the Coffee Flowing
Maintaining high-end equipment requires a few specific tools that I’ve come to rely on daily. I always keep a high-quality WDT tool nearby to ensure the grounds are perfectly distributed before tamping. For maintenance, a simple set of bamboo skewers and a dedicated shop vac are essential for the best way to clean a grinder without losing your settings without damaging the burrs. I also highly recommend keeping a notebook (or a digital log) of your grind settings and water hardness levels. I trust the technical bulletins from manufacturers like Mahlkönig for deep-dive maintenance, and I always keep a spare set of group head gaskets on hand because they always seem to fail on a Sunday morning. If you are just starting out, how to select the perfect coffee grinder for your brew is the first resource you should study to build a solid foundation.
The Future of Your Morning Ritual
The world of coffee is constantly evolving, but the core principles of heat, pressure, and precision remain the same. As you move forward, don’t be intimidated by the complexity of your machine. Whether you are troubleshooting how to fix the annoying drip after your espresso shot stops or experimenting with light roasts, every challenge is an opportunity to learn more about the science of home espresso. Embrace the process, stay curious about the mechanics, and remember that even the most seasoned baristas started with a messy kitchen and a few sour shots. Your next great cup is just one small adjustment away. Have you ever had a machine ‘glitch’ that actually taught you something new about how coffee works? Let me know in the comments below!