Why Your Drip Tray Is Filling Up Even When You Aren’t Pulling Shots
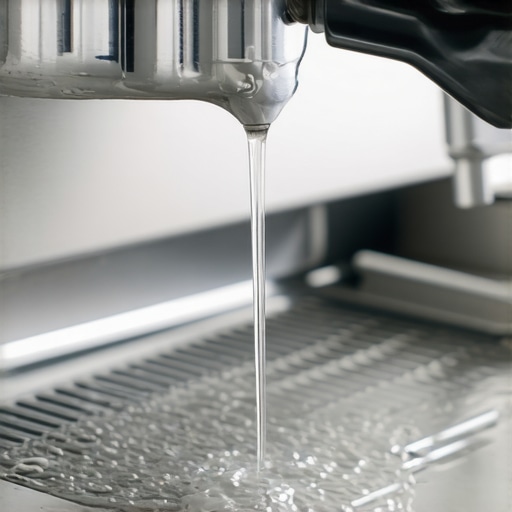
I walked into my kitchen at 6:00 AM, bleary-eyed and desperate for caffeine, only to find my espresso machine sitting in a small, lukewarm lake. I hadn’t even turned the thing on yet, but the drip tray was overflowing like a clogged storm drain. It’s a bizarre, sinking feeling when your gear starts acting on its own. For weeks, I just assumed I was being messy or that I’d forgotten to empty it the night before. But when it happened three days in a row, I realized my machine was ‘bleeding’ water while I slept. This isn’t just a minor annoyance; it’s a sign that something under the hood is struggling, and if you don’t catch it, you’re looking at a much bigger repair bill down the road.
Stop Guessing Where All That Water Is Coming From
When you see water accumulating without pulling a single shot, your mind immediately goes to the worst-case scenario. I remember thinking my boiler had finally given up the ghost, and I was already browsing top-rated espresso machines for coffee lovers in 2025 just to prepare for the inevitable. But here is the reality: most of the time, that water is coming from the expansion valve or a leaky solenoid. When the machine heats up, the water expands. If your valves aren’t sealing perfectly, that expansion pressure pushes water right past the seals and into your tray. Early on, I made the mistake of over-tightening everything, thinking brute force would stop the leak. Spoiler alert: it didn’t. It just crushed my gaskets and made the problem twice as expensive to fix. You need to know how to spot a failing solenoid valve before it turns your kitchen into a swamp. Today, I’m going to show you exactly how to diagnose these phantom leaks so you can stop wasting water and start enjoying your morning routine again.
Is My Machine Actually Broken Beyond Repair?
It is easy to get cynical and think that modern machines are just built to fail. You might wonder if this constant dripping is just a ‘feature’ of high-pressure brewing. The truth is that even the most carefully chosen barista gear requires maintenance. According to technical experts at Whole Latte Love, the 3-way solenoid valve is often the primary culprit because it is constantly exposed to heat and scale, which can prevent it from seating properly. If you’ve been lax on your maintenance schedule, you might want to check if your machine boiler is accumulating lime scale, as those tiny flakes of calcium are the perfect size to get stuck in a valve and keep it propped open. Have you ever walked into your kitchen and found a mysterious puddle under your machine? It’s a frustrating rite of passage for many home baristas, but it’s rarely a death sentence for your equipment. If your tray is misbehaving, you might also need to look at how to fix a drip tray that leaks into the machine body, which is a whole different headache. We’re going to dive into the mechanical reasons for this ‘ghost’ water and get your machine back to its dry, efficient self.
Trace the Water Back to the Source
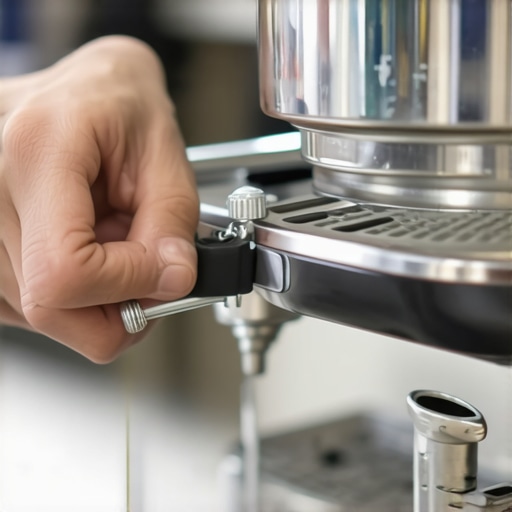
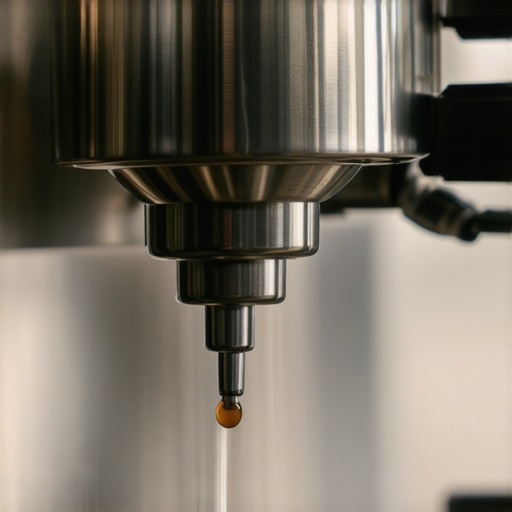
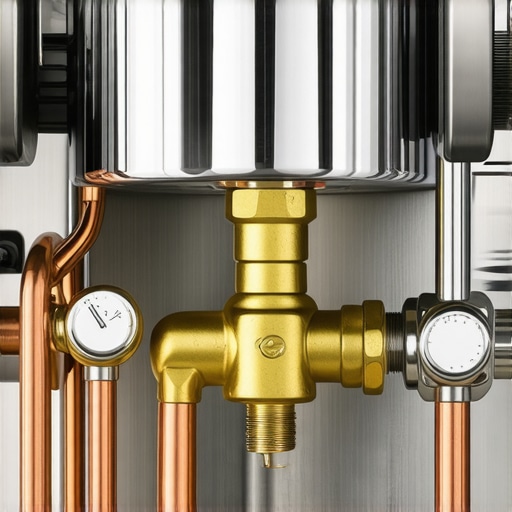
To solve the mystery of the phantom puddle, you have to play detective with a flashlight and a bit of patience. Most modern espresso machines have a series of silicone tubes tucked behind the drip tray that act as exhaust ports. I remember taking the stainless steel shell off my machine for the first time, convinced I’d find a cracked pipe or a catastrophic failure. Instead, I sat there for ten minutes with a flashlight until I saw a tiny, rhythmic ‘drip… drip…’ coming from the discharge tube of the over-pressure valve (OPV). A single grain of calcium had propped the valve open just enough to let the boiler pressure escape into the tray. To find your culprit, you need to pull the tray out slightly while the machine is heating up and watch those tubes. If water is trickling out before you even touch a button, you’ve narrowed it down to either the expansion valve or the solenoid.
Watch the Discharge Tubes While the Machine Heats
The expansion valve is like a safety relief on a water heater; its job is to bleed off excess pressure so your machine doesn’t explode. However, if the internal spring weakens or scale builds up on the rubber seat, it starts ‘weeping.’ You can often diagnose this by checking how to check your espresso machines group head flow rate. If your flow is lower than usual but your drip tray is fuller, the water is simply taking the path of least resistance through that leaky valve. Think of it like a garden hose with a tiny pinhole—the more pressure you apply, the more water escapes through the hole instead of the nozzle. If you see constant dripping during the warm-up phase, your expansion valve likely needs a quick soak in a citric acid solution or a total replacement.
Flush the Solenoid to Clear Trapped Debris
The 3-way solenoid valve is the most hardworking part of your gear, acting as a gatekeeper that redirects pressure away from the coffee puck after a shot. When it fails, it usually doesn’t fail all at once. It starts by letting a microscopic amount of water past the seal. I once spent an entire afternoon backflushing my machine with detergent because I thought I had a coffee oil clog. It turned out that mastering the art of home espresso requires knowing when to stop cleaning and start inspecting. If you hear a buzzing sound or see water constantly exiting the ‘exhaust’ into the tray, try a series of rapid-fire backflushes with a blind filter. This sudden pressure change can sometimes dislodge the grit that is keeping the valve from seating properly. If that doesn’t work, you might be dealing with the hidden reason your machine is taking forever to heat up, which is often a valve that won’t fully close, preventing the boiler from reaching stable pressure.
Clean Out the Lime Scale Clogging the System
If your machine is older than six months and you haven’t been using specialized water, scale is the most likely antagonist in your kitchen drama. These tiny rock-like deposits love to settle right on the flat surfaces of your valves, preventing a watertight seal. Before you go out and buy a whole new set of internal components, you should learn the best way to descale a boiler without using harsh vinegar. Harsh acids can sometimes loosen large chunks of scale that then travel downstream and clog the solenoid entirely—turning a slow drip into a dead machine. When I finally descaled my old heat-exchanger machine, the amount of white ‘snow’ that came out of the group head was staggering. It’s no wonder the valves couldn’t close. Also, be careful with your cleaning agents; I’ve seen many baristas make the dish soap mistake that ruined your group head seal, which only adds more leaks to an already frustrated setup. Consistency in water quality is the only way to keep these valves dry in the long run.
Stop Obsessing Over the 9-Bar Rule
For decades, the industry has treated the 9-bar pressure mark as a sacred commandment. If you’ve spent any time in enthusiast forums, you’ve likely been told that anything less is basically filter coffee and anything more is a disaster. But let me drop a truth bomb: chasing high pressure is often the very reason why your espresso shot is channeling on the left side only or producing erratic results. In my own testing, dropping the pressure to 6 or 7 bars creates a much more forgiving extraction. When you ram water through a coffee puck at high velocity, you risk creating ‘micro-channels’ where the water finds a path of least resistance, leaving the rest of the coffee dry and under-extracted. Expert researcher Dr. Christopher Hendon from the University of Oregon has highlighted in several studies that reducing pressure and using a slightly coarser grind can actually lead to more reproducible, sweet shots. It’s the move for better espresso without buying a new machine that most people are too afraid to try.
Does Pushing More Pressure Actually Make Better Crema?
The common myth is that higher pressure equals thicker crema, which we’ve been conditioned to associate with quality. In reality, crema is just trapped CO2, and while a high-pressure pump can whip it into a thick foam, it doesn’t necessarily mean the coffee underneath tastes good. If you find your shots are consistently harsh, you might try the ice water hack for stopping a bitter extraction, but the real fix is often adjusting your internal over-pressure valve. Have you ever fallen into this trap of thinking higher numbers on the gauge always mean better coffee? Let me know in the comments if you’ve dared to brew at lower pressures.
#IMAGE_PLACE_HOLDER_C#
Don’t Kill Your Grinder with This Common Trap
One of the biggest mistakes I see home baristas make—especially those moving from a basic setup to choosing the best barista gear for coffee enthusiasts—is the bean choice for specific hardware. If you’ve invested in a super-automatic machine, you absolutely must know why you should never use oily beans in a super-automatic. Those dark, glistening beans look delicious, but they are a death sentence for internal grinders. The oils act like glue, catching every stray coffee particle until the burrs are completely seized. This is the ‘Oops’ factor that leads to many expensive repair bills. If you’re using a standalone grinder and find that why your grinder settings feel like they changed overnight, it’s rarely the machine’s fault; it’s usually a combination of bean age and atmospheric humidity. Learning how to select the perfect coffee grinder for your brew involves understanding these nuances, rather than just looking at the price tag. Keep your burrs dry, your pressure low, and your curiosity high—it’s the only way to truly master the craft.
How do I maintain my espresso setup over time?
Success isn’t about the one-off deep clean after a disaster; it’s about the micro-habits you form every single morning. I’ve seen beautiful, expensive Italian machines turned into scrap metal within two years because the owners ignored the basics. For me, the non-negotiable routine starts with the steam wand. If you aren’t purging before and after every use, you’ll eventually face the frustration of why your steam wand tips keep getting blocked by milk residue. That dried milk isn’t just gross; it creates backpressure that can damage your seals and even ruin your boiler pressure. Once a week, I also dedicate ten minutes to my grinder. You don’t need a degree in engineering to keep things smooth—learning the best way to clean a grinder without taking it apart will save your burrs from the rancid oil buildup that ruins even the most expensive single-origin beans.
Make Your Gear Last a Decade
I personally swear by the ‘dry-wipe and purge’ method for every single shot. It sounds tedious, but it prevents the mineral and organic buildup that leads to mechanical failure. If you use an automatic frother for your morning lattes, you’ve likely dealt with the panic of a dead motor; knowing how to fix a milk frother that wont spin often comes down to simply clearing a sugar-clogged spindle before the electronics overheat. La Marzocco’s technical advisors emphasize in their official preventative maintenance guides that checking your vacuum breaker valve every six months is non-negotiable for preventing internal moisture damage to your circuit boards. It’s this level of granular care that separates the hobbyists from the true home baristas. Even if you’ve invested in milk frothers that transform your coffee experience, they still need that gentle, consistent touch to stay functional through the years.
Why a Puck Screen is My Best $15 Investment
If you want to scale your results without spending thousands on choosing the best barista gear for coffee enthusiasts, look at the small stuff that actually touches your coffee. I started using a 1.7mm stainless steel puck screen six months ago, and I haven’t looked back. It keeps my group head remarkably clean by acting as a physical barrier against grounds, though I did have to learn the hard way about why your puck screen keeps falling into the knock box. It’s a minor trade-off for the consistency it brings to water distribution across the coffee bed. For those trying to push their skills further, I recommend trying the simple paper filter trick for better bottomless shots. It’s a low-cost experiment that significantly improves clarity in light roasts, showcasing the potential of your current gear without requiring a total hardware overhaul.
Where the Home Barista Scene Goes Next
Looking at the landscape of top-rated espresso machines for coffee lovers in 2025, it’s clear that the future is all about data-driven precision rather than just heavy metal. We are moving away from ‘feeling’ the shot and toward integrated apps that track flow rate and temperature stability in real-time. This precision allows us to replicate cafe-quality results with terrifying accuracy, even in a home kitchen. If you want to stay ahead of the curve, stop focusing on the shine of the chrome and start focusing on the consistency of your inputs. My advanced tip for you today: buy a high-precision jeweler’s scale and weigh your output every single time. If you can’t measure it, you can’t fix it. Try adjusting your dose by just 0.2 grams tomorrow—you’ll be shocked at how much it changes the flavor profile of your favorite roast.
Lessons My Flooded Kitchen Taught Me About Machine Maintenance
After years of tinkering, I’ve realized that the most frustrating leaks are usually the most preventable. First, never ignore a rhythmic hiss. If your machine sounds like a tiny steam train while idling, a gasket is failing, and it is only a matter of time before it lets go completely. Second, your water quality is ninety percent of the battle; learning how to tell if your water is too soft for brewing or too hard will save your boiler more than any expensive cleaning chemical ever could. Finally, I have learned that patience is a legitimate maintenance tool. Rushing a descale or forcing a stuck valve usually leads to a snapped component. Sometimes the best move is a simple o-ring fix for a leaky portafilter spout rather than a total teardown.
#IMAGE_PLACEHOLDER_E#
The Toolkit That Keeps My Countertop Dry
If you want to move beyond basic troubleshooting, you need specific supplies in your coffee drawer. I personally rely on dedicated backflushing detergent; it is the only way to ensure your 3-way solenoid does not get gummed up with rancid coffee oils that cause phantom drips. I also recommend picking up a set of stainless steel dental picks. These are the unsung heroes for removing stubborn, baked-on gaskets without scratching your expensive brass components. For the theoretical side, I always keep a brew journal nearby. Understanding how different roast levels react to pressure helps you predict how they will behave during extraction. If you are still in the research phase, keep an eye on the top-rated espresso machines for coffee lovers in 2025 to see which manufacturers are finally making user-serviceability a priority.
Your Journey Toward the God Shot Begins with One Clean Valve
Espresso is a fascinating dance between high-pressure physics and delicate organic chemistry. It is easy to get discouraged when a leak turns your morning routine into a repair session, but remember that every mechanical hiccup is just an opportunity to learn your machine’s personality. When you finally get that perfectly balanced, syrupy extraction, you will realize that mastering the art of home espresso is about the long-term relationship you build with your gear. Don’t be afraid to get your hands a little dirty because the reward is in every single cup you pull. Have you ever had a phantom leak that turned out to be a simple fix? Let me know in the comments below!