Why Your Burr Grinder Is Throwing Chaff Everywhere
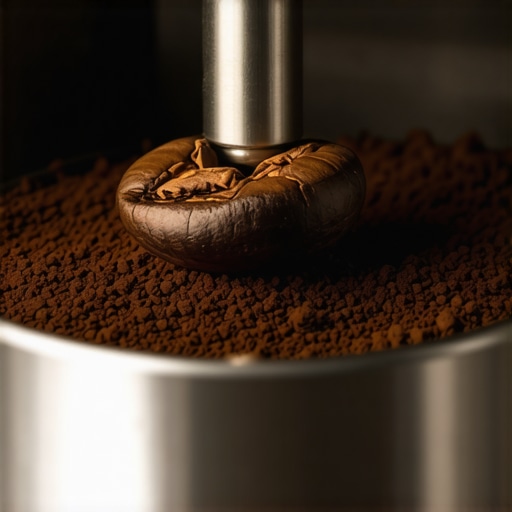
I stood there in my pajamas, holding a portafilter, watching in horror as tiny, papery flakes of coffee skin defied gravity and adhered themselves to my white kitchen cabinets. It was 6:30 AM, and my high-end burr grinder had just turned my counter into a literal confetti parade. That papery mess is chaff, and when it starts flying, it feels like your morning ritual is being sabotaged by physics itself. If you’ve ever felt that sharp sting of annoyance when your carefully selected coffee grinder decides to rebel, you are not alone. Today, we are going to ground those flying flakes for good and reclaim your clean workspace. [image]
Stop the Silver Skin Sneak Attack
Chaff is essentially the dried ‘silver skin’ of the coffee bean that gets released during the roasting process. Most of it stays in the bean’s center fold until your burrs tear it open. The real culprit behind the mess isn’t just the skin itself, but the static electricity that turns these light flakes into magnetic projectiles. When I first started my journey with home espresso, I made the amateur mistake of thinking a more expensive grinder would magically solve this. It doesn’t. In fact, some high-speed burrs can actually generate more static because of the increased friction. According to research by the American Chemical Society, the moisture content and the friction of the beans can significantly impact the ‘triboelectric’ charging during the grind. I’ve spent way too many mornings chasing these little papery flakes around with a hand-vac before I finally figured out that my grinder wasn’t broken—it was just thirsty for a little moisture. When we talk about choosing the best barista gear, we often focus on burr size or motor wattage, but we ignore the environment. If your kitchen is as dry as a desert in the winter, that static is going to be your worst enemy.
Is this just a sign of a cheap grinder?
You might be worried that your gear is failing or that you bought a ‘lemon,’ but even the most premium equipment can suffer from chaff explosions. It is often a combination of low humidity and the roast level of your beans. If you are noticing that your coffee grounds are clumping like little rocks alongside the chaff mess, you’re likely dealing with a massive static buildup. I remember trying to wipe the chaff away with a damp cloth, only to have it smear into a brown paste—don’t do that! We need a better approach. Have you ever spent more time vacuuming your counter than actually sipping your latte? Let me know in the comments, because I’ve been there and it’s a soul-crushing way to start a Tuesday. Before we dive into the technical fixes, we need to understand how to stop static from ruining your grinding workflow entirely. We are going to look at the ‘Ross Droplet Technique’ and why a simple tool might save your sanity.
Clear the Path for Cleaner Grinds
One thing I overlooked for years was the discharge chute. If that path isn’t clear, the chaff has nowhere to go but out and up, caught in the air currents of the motor. Learning how to clean your grinders discharge chute regularly is the first step in managing the mess. When oil and old grounds build up, they create a sticky surface that catches chaff and holds it until a massive ‘chaff-bomb’ eventually lets go.
Tame the Static with a Single Water Droplet
The Ross Droplet Technique (RDT) is the most effective way to stop static from ruining your grinding workflow. Think of static electricity in your grinder like a balloon rubbing against a wool sweater; the more friction there is, the more those tiny chaff flakes want to cling to every available surface. I remember one cold Tuesday morning when I was in a rush and thought, ‘more water is better, right?’ I sprayed three full pumps into my dosing cup instead of the recommended single mist. Ten seconds later, my grinder started groaning like a tired lawnmower. Instead of fluffy grounds, I had created a thick, muddy paste that required a full teardown of the burr chamber to clean. You only need the tiniest amount of moisture—literally a single drop or a quick spritz from a fine mister. This moisture acts as a conductor, neutralizing the charge before it can turn your kitchen counter into a brown snow globe. If you skip this step during a dry winter, you’ll find that your coffee grounds are clumping like little rocks inside your basket, which inevitably leads to uneven extraction and a messy cleanup. 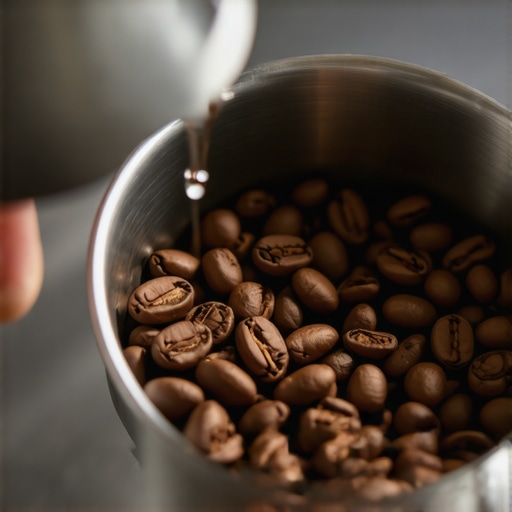
Season Your Burrs to Reduce Friction
If you just unboxed a new piece of gear, the static might be at its peak. When you first select the perfect coffee grinder for your brew, the burrs are often surgically sharp and exceptionally smooth, which actually increases the ‘triboelectric’ effect during the first few weeks of use. You need to ‘season’ them to break them in properly. I typically run about five to ten pounds of cheap, stale beans through a new grinder before I even attempt to dial in a high-end roast. This process coats the burrs in a micro-layer of coffee oils, which acts as a natural lubricant and shield against static buildup. If you are struggling with a brand-new machine and finding chaff everywhere, learning how to properly season new steel burrs for better consistency is non-negotiable. Without that seasoning, your retention will be sky-high, and you’ll constantly wonder why your coffee grinder retains more grounds than it should despite what the marketing materials promised.
Clear the Chute Before the Chaff Explodes
Chaff is light and airy, meaning it loves to get tucked into the dark corners of your machine. The discharge chute is the main bottleneck where the real trouble begins. Over time, residual coffee oils act like a glue, catching individual chaff flakes and building a structural dam. Eventually, this dam breaks, and a ‘chaff bomb’ ruins your precise dose. I make it a habit every Sunday to use a simple tool to clear the path. Knowing how to clean your grinders discharge chute with a pipe cleaner can prevent those sudden, messy overflows from happening in the middle of your morning rush. It’s the same principle as clearing a dryer lint trap; if the air and grounds can’t flow freely, physics will find a more chaotic exit. This maintenance is especially vital when you’re mastering the art of home espresso, where consistency in your dose weight is the only thing standing between a sweet, balanced shot and a sour, sputtering mess.I stood there in my pajamas, holding a portafilter, watching in horror as tiny, papery flakes of coffee skin defied gravity and adhered themselves to my white kitchen cabinets. It was 6:30 AM, and my high-end burr grinder had just turned my counter into a literal confetti parade. That papery mess is chaff, and when it starts flying, it feels like your morning ritual is being sabotaged by physics itself. If you’ve ever felt that sharp sting of annoyance when your carefully selected coffee grinder decides to rebel, you are not alone. Today, we are going to ground those flying flakes for good and reclaim your clean workspace. [image]
Stop the Silver Skin Sneak Attack
Chaff is essentially the dried ‘silver skin’ of the coffee bean that gets released during the roasting process. Most of it stays in the bean’s center fold until your burrs tear it open. The real culprit behind the mess isn’t just the skin itself, but the static electricity that turns these light flakes into magnetic projectiles. When I first started my journey with home espresso, I made the amateur mistake of thinking a more expensive grinder would magically solve this. It doesn’t. In fact, some high-speed burrs can actually generate more static because of the increased friction. According to research by the American Chemical Society, the moisture content and the friction of the beans can significantly impact the ‘triboelectric’ charging during the grind. I’ve spent way too many mornings chasing these little papery flakes around with a hand-vac before I finally figured out that my grinder wasn’t broken—it was just thirsty for a little moisture. When we talk about choosing the best barista gear, we often focus on burr size or motor wattage, but we ignore the environment. If your kitchen is as dry as a desert in the winter, that static is going to be your worst enemy.
Is this just a sign of a cheap grinder?
You might be worried that your gear is failing or that you bought a ‘lemon,’ but even the most premium equipment can suffer from chaff explosions. It is often a combination of low humidity and the roast level of your beans. If you are noticing that your coffee grounds are clumping like little rocks alongside the chaff mess, you’re likely dealing with a massive static buildup. I remember trying to wipe the chaff away with a damp cloth, only to have it smear into a brown paste—don’t do that! We need a better approach. Have you ever spent more time vacuuming your counter than actually sipping your latte? Let me know in the comments, because I’ve been there and it’s a soul-crushing way to start a Tuesday. Before we dive into the technical fixes, we need to understand how to stop static from ruining your grinding workflow entirely. We are going to look at the ‘Ross Droplet Technique’ and why a simple tool might save your sanity.
Clear the Path for Cleaner Grinds
One thing I overlooked for years was the discharge chute. If that path isn’t clear, the chaff has nowhere to go but out and up, caught in the air currents of the motor. Learning how to clean your grinders discharge chute regularly is the first step in managing the mess. When oil and old grounds build up, they create a sticky surface that catches chaff and holds it until a massive ‘chaff-bomb’ eventually lets go.
Tame the Static with a Single Water Droplet
The Ross Droplet Technique (RDT) is the most effective way to stop static from ruining your grinding workflow. Think of static electricity in your grinder like a balloon rubbing against a wool sweater; the more friction there is, the more those tiny chaff flakes want to cling to every available surface. I remember one cold Tuesday morning when I was in a rush and thought, ‘more water is better, right?’ I sprayed three full pumps into my dosing cup instead of the recommended single mist. Ten seconds later, my grinder started groaning like a tired lawnmower. Instead of fluffy grounds, I had created a thick, muddy paste that required a full teardown of the burr chamber to clean. You only need the tiniest amount of moisture—literally a single drop or a quick spritz from a fine mister. This moisture acts as a conductor, neutralizing the charge before it can turn your kitchen counter into a brown snow globe. If you skip this step during a dry winter, you’ll find that your coffee grounds are clumping like little rocks inside your basket, which inevitably leads to uneven extraction and a messy cleanup.
Season Your Burrs to Reduce Friction
If you just unboxed a new piece of gear, the static might be at its peak. When you first select the perfect coffee grinder for your brew, the burrs are often surgically sharp and exceptionally smooth, which actually increases the ‘triboelectric’ effect during the first few weeks of use. You need to ‘season’ them to break them in properly. I typically run about five to ten pounds of cheap, stale beans through a new grinder before I even attempt to dial in a high-end roast. This process coats the burrs in a micro-layer of coffee oils, which acts as a natural lubricant and shield against static buildup. If you are struggling with a brand-new machine and finding chaff everywhere, learning how to properly season new steel burrs for better consistency is non-negotiable. Without that seasoning, your retention will be sky-high, and you’ll constantly wonder why your coffee grinder retains more grounds than it should despite what the marketing materials promised.
Clear the Chute Before the Chaff Explodes
Chaff is light and airy, meaning it loves to get tucked into the dark corners of your machine. The discharge chute is the main bottleneck where the real trouble begins. Over time, residual coffee oils act like a glue, catching individual chaff flakes and building a structural dam. Eventually, this dam breaks, and a ‘chaff bomb’ ruins your precise dose. I make it a habit every Sunday to use a simple tool to clear the path. Knowing how to clean your grinders discharge chute with a pipe cleaner can prevent those sudden, messy overflows from happening in the middle of your morning rush. It’s the same principle as clearing a dryer lint trap; if the air and grounds can’t flow freely, physics will find a more chaotic exit. This maintenance is especially vital when you’re mastering the art of home espresso, where consistency in your dose weight is the only thing standing between a sweet, balanced shot and a sour, sputtering mess. The mistake most of us make is assuming that precision equals perfection. It is a common belief that if you invest in the top-rated espresso machines for coffee lovers in 2025, the machine will handle the variables for you. In my experience, the opposite is true: the more sophisticated the equipment, the more it demands from the operator. I once watched a friend spend two hours trying to ‘fix’ a perfectly good grinder, not realizing that the heat from the morning sun hitting his counter was expanding the metal burrs just enough to throw off his calibration.
The Price Tag Myth That Ruins Your Workflow
We often fall into the trap of thinking high-end gear is ‘plug and play.’ However, premium burrs are engineered with such tight tolerances that even minor shifts in ambient temperature can cause noticeable changes in extraction. If you are noticing that your grinder settings feel like they changed overnight, it’s rarely a hardware failure. It is usually the beans reacting to the relative humidity of your kitchen.
Why do your grind settings shift every single morning?
This is the ‘hidden nuance’ that separates beginners from experts. According to research published in the *Journal of Agricultural and Food Chemistry*, the internal structure of a coffee bean is extremely sensitive to moisture absorption, which changes how it fractures under the pressure of the burrs. On a humid day, the beans are more pliable and may require a finer setting to achieve the same resistance. On a dry day, they shatter more easily, creating those tiny ‘fines’ that can clog your basket. If you don’t account for this, you’ll find yourself chasing a perfect shot that doesn’t exist. 
Don’t Kill Your Motor with These Oily Beans
Here is the ‘Oops’ factor that breaks more grinders than anything else: the lure of the super-dark roast. I love a smoky profile as much as the next person, but those glistening, oily beans are a nightmare for internal components. If you aren’t vigilant, you will eventually find why your coffee grinder is stalling with dark roast beans. The oil acts like a cement, binding the chaff and fines together into a sludge that the motor simply can’t push through. This is even more critical for those with integrated units; you should understand why you should never use oily beans in a super-automatic machine, as the internal brew group is much harder to deep-clean than a standalone portafilter.
Simple Fixes for a Frustratingly Noisy Morning
Beyond the mess, let’s talk about the sound. A vibrating grinder can be a sensory overload at 6:00 AM. I used to think a loud motor meant the bearings were shot, but often it’s just the resonance of the machine against a hard granite counter. Learning how to quiet a loud grinder using only a rubber mat can save your ears and your relationship with your housemates. Have you ever fallen into this trap of blaming your gear for what turned out to be an environmental issue? Let me know in the comments, because we’ve all been tempted to throw a perfectly good machine out the window when a shot goes sour for no apparent reason.”,”image”:{“imagePrompt”:”Macro photography of dark, shiny, oily coffee beans inside a stainless steel espresso grinder hopper, highlighting textures and surface moisture.”,”imageTitle”:”Dark Oily Coffee Beans in a Grinder Hopper”,”imageAlt”:”Close-up of oily dark roast coffee beans inside a professional burr grinder hopper.”},”categoryId”:0,”postTime”:””}I have learned that the secret to a decade-long relationship with your gear isn’t just cleaning it—it is knowing when the internals are screaming for help. For instance, if you own an E61-style machine, that iconic chrome lever should never feel like you are grinding sand. I personally use Molykote 111 for my lubrication because it is food-safe and does not wash away after a couple of backflushes. Learning how to properly lubricate your e61 group head cam is exactly what stops that ‘squeak of death’ from ruining your 7:00 AM peace.
Stop the Squeak Before It Breaks
The biggest killer of top-rated espresso machines for coffee lovers in 2025 isn’t heavy usage; it is the neglect of the invisible parts. Scale is the obvious villain, but the solenoid valve is the silent one. If you notice a sudden lag in pressure or a strange hiss after the shot finishes, you need to know how to spot a failing solenoid valve before it floods your kitchen. It is a relatively cheap part that can save you a massive repair bill down the line. Also, pay close attention to your heat-up time. If you start to feel why your espresso machine takes longer to heat up recently, you are likely looking at a calcium-crusted heating element that is working twice as hard for half the result.
How do I keep my espresso setup running for a decade?
Consistency is key. I recommend a monthly deep-clean cycle that involves removing the shower screen and checking for pitting. I also swear by precision baskets over the standard ones that come in the box. If you are still using the stock basket, you are basically driving a sports car with wooden wheels. Upgrading to a VST or IMS basket changes the hole geometry entirely. According to the technical documentation from VST Research, their precision filters are engineered to have zero ‘dead zones,’ which ensures every single gram of coffee is extracted evenly across the puck surface. When you pair this level of precision with milk frothers that transform your coffee experience, the jump in cup quality is undeniable. 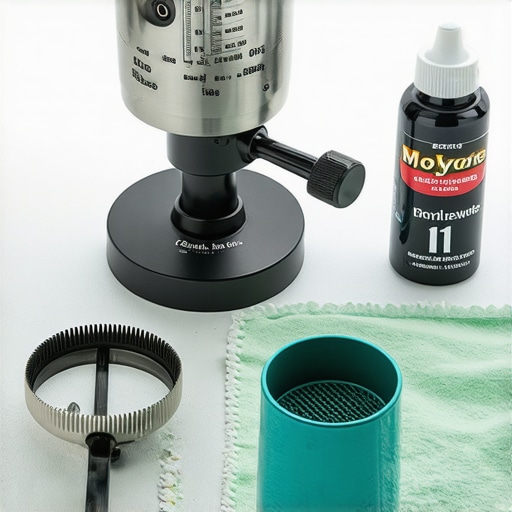
The Future of the High-Tech Coffee Counter
Looking ahead, I predict we are moving rapidly toward ‘Smart Maintenance.’ We are already seeing the integration of sensors that track water mineral content in real-time, similar to the standards set by the Specialty Coffee Association (SCA) for water hardness. In a few years, your machine will not just tell you to descale; it will tell you exactly which mineral is building up on your boiler walls. For now, the most advanced thing you can do is keep your scale dry. If you notice why your espresso scale is jumping numbers while the shot is pulling, it is usually just steam interference or a low battery. Take a moment this weekend to pull your lever apart and apply a fresh layer of food-grade grease; your machine will sound, and feel, like new.I stood there in my pajamas, holding a portafilter, watching in horror as tiny, papery flakes of coffee skin defied gravity and adhered themselves to my white kitchen cabinets. It was 6:30 AM, and my high-end burr grinder had just turned my counter into a literal confetti parade. That papery mess is chaff, and when it starts flying, it feels like your morning ritual is being sabotaged by physics itself. If you’ve ever felt that sharp sting of annoyance when your carefully selected coffee grinder decides to rebel, you are not alone. Today, we are going to ground those flying flakes for good and reclaim your clean workspace. [image]
Stop the Silver Skin Sneak Attack
Chaff is essentially the dried ‘silver skin’ of the coffee bean that gets released during the roasting process. Most of it stays in the bean’s center fold until your burrs tear it open. The real culprit behind the mess isn’t just the skin itself, but the static electricity that turns these light flakes into magnetic projectiles. When I first started my journey with home espresso, I made the amateur mistake of thinking a more expensive grinder would magically solve this. It doesn’t. In fact, some high-speed burrs can actually generate more static because of the increased friction. According to research by the American Chemical Society, the moisture content and the friction of the beans can significantly impact the ‘triboelectric’ charging during the grind. I’ve spent way too many mornings chasing these little papery flakes around with a hand-vac before I finally figured out that my grinder wasn’t broken—it was just thirsty for a little moisture. When we talk about choosing the best barista gear, we often focus on burr size or motor wattage, but we ignore the environment. If your kitchen is as dry as a desert in the winter, that static is going to be your worst enemy.
Is this just a sign of a cheap grinder?
You might be worried that your gear is failing or that you bought a ‘lemon,’ but even the most premium equipment can suffer from chaff explosions. It is often a combination of low humidity and the roast level of your beans. If you are noticing that your coffee grounds are clumping like little rocks alongside the chaff mess, you’re likely dealing with a massive static buildup. I remember trying to wipe the chaff away with a damp cloth, only to have it smear into a brown paste—don’t do that! We need a better approach. Have you ever spent more time vacuuming your counter than actually sipping your latte? Let me know in the comments, because I’ve been there and it’s a soul-crushing way to start a Tuesday. Before we dive into the technical fixes, we need to understand how to stop static from ruining your grinding workflow entirely. We are going to look at the ‘Ross Droplet Technique’ and why a simple tool might save your sanity.
Clear the Path for Cleaner Grinds
One thing I overlooked for years was the discharge chute. If that path isn’t clear, the chaff has nowhere to go but out and up, caught in the air currents of the motor. Learning how to clean your grinders discharge chute regularly is the first step in managing the mess. When oil and old grounds build up, they create a sticky surface that catches chaff and holds it until a massive ‘chaff-bomb’ eventually lets go.
Tame the Static with a Single Water Droplet
The Ross Droplet Technique (RDT) is the most effective way to stop static from ruining your grinding workflow. Think of static electricity in your grinder like a balloon rubbing against a wool sweater; the more friction there is, the more those tiny chaff flakes want to cling to every available surface. I remember one cold Tuesday morning when I was in a rush and thought, ‘more water is better, right?’ I sprayed three full pumps into my dosing cup instead of the recommended single mist. Ten seconds later, my grinder started groaning like a tired lawnmower. Instead of fluffy grounds, I had created a thick, muddy paste that required a full teardown of the burr chamber to clean. You only need the tiniest amount of moisture—literally a single drop or a quick spritz from a fine mister. This moisture acts as a conductor, neutralizing the charge before it can turn your kitchen counter into a brown snow globe. If you skip this step during a dry winter, you’ll find that your coffee grounds are clumping like little rocks inside your basket, which inevitably leads to uneven extraction and a messy cleanup.
Season Your Burrs to Reduce Friction
If you just unboxed a new piece of gear, the static might be at its peak. When you first select the perfect coffee grinder for your brew, the burrs are often surgically sharp and exceptionally smooth, which actually increases the ‘triboelectric’ effect during the first few weeks of use. You need to ‘season’ them to break them in properly. I typically run about five to ten pounds of cheap, stale beans through a new grinder before I even attempt to dial in a high-end roast. This process coats the burrs in a micro-layer of coffee oils, which acts as a natural lubricant and shield against static buildup. If you are struggling with a brand-new machine and finding chaff everywhere, learning how to properly season new steel burrs for better consistency is non-negotiable. Without that seasoning, your retention will be sky-high, and you’ll constantly wonder why your coffee grinder retains more grounds than it should despite what the marketing materials promised.
Clear the Chute Before the Chaff Explodes
Chaff is light and airy, meaning it loves to get tucked into the dark corners of your machine. The discharge chute is the main bottleneck where the real trouble begins. Over time, residual coffee oils act like a glue, catching individual chaff flakes and building a structural dam. Eventually, this dam breaks, and a ‘chaff bomb’ ruins your precise dose. I make it a habit every Sunday to use a simple tool to clear the path. Knowing how to clean your grinders discharge chute with a pipe cleaner can prevent those sudden, messy overflows from happening in the middle of your morning rush. It’s the same principle as clearing a dryer lint trap; if the air and grounds can’t flow freely, physics will find a more chaotic exit. This maintenance is especially vital when you’re mastering the art of home espresso, where consistency in your dose weight is the only thing standing between a sweet, balanced shot and a sour, sputtering mess.
The Price Tag Myth That Ruins Your Workflow
We often fall into the trap of thinking high-end gear is ‘plug and play.’ However, premium burrs are engineered with such tight tolerances that even minor shifts in ambient temperature can cause noticeable changes in extraction. If you are noticing that your grinder settings feel like they changed overnight, it’s rarely a hardware failure. It is usually the beans reacting to the relative humidity of your kitchen.
Why do your grind settings shift every single morning?
This is the ‘hidden nuance’ that separates beginners from experts. According to research published in the *Journal of Agricultural and Food Chemistry*, the internal structure of a coffee bean is extremely sensitive to moisture absorption, which changes how it fractures under the pressure of the burrs. On a humid day, the beans are more pliable and may require a finer setting to achieve the same resistance. On a dry day, they shatter more easily, creating those tiny ‘fines’ that can clog your basket. If you don’t account for this, you’ll find yourself chasing a perfect shot that doesn’t exist.
Don’t Kill Your Motor with These Oily Beans
Here is the ‘Oops’ factor that breaks more grinders than anything else: the lure of the super-dark roast. I love a smoky profile as much as the next person, but those glistening, oily beans are a nightmare for internal components. If you aren’t vigilant, you will eventually find why your coffee grinder is stalling with dark roast beans. The oil acts like a cement, binding the chaff and fines together into a sludge that the motor simply can’t push through. This is even more critical for those with integrated units; you should understand why you should never use oily beans in a super-automatic machine, as the internal brew group is much harder to deep-clean than a standalone portafilter.
Simple Fixes for a Frustratingly Noisy Morning
Beyond the mess, let’s talk about the sound. A vibrating grinder can be a sensory overload at 6:00 AM. I used to think a loud motor meant the bearings were shot, but often it’s just the resonance of the machine against a hard granite counter. Learning how to quiet a loud grinder using only a rubber mat can save your ears and your relationship with your housemates.
Stop the Squeak Before It Breaks
The biggest killer of top-rated espresso machines for coffee lovers in 2025 isn’t heavy usage; it is the neglect of the invisible parts. Scale is the obvious villain, but the solenoid valve is the silent one. If you notice a sudden lag in pressure or a strange hiss after the shot finishes, you need to know how to spot a failing solenoid valve before it floods your kitchen. It is a relatively cheap part that can save you a massive repair bill down the line. I have learned that the secret to a decade-long relationship with your gear isn’t just cleaning it—it is knowing when the internals are screaming for help. For instance, if you own an E61-style machine, that iconic chrome lever should never feel like you are grinding sand. I personally use Molykote 111 for my lubrication because it is food-safe and does not wash away after a couple of backflushes. Learning how to properly lubricate your e61 group head cam is exactly what stops that ‘squeak of death’ from ruining your 7:00 AM peace.
How do I keep my espresso setup running for a decade?
Consistency is key. I recommend a monthly deep-clean cycle that involves removing the shower screen and checking for pitting. I also swear by precision baskets over the standard ones that come in the box. If you are still using the stock basket, you are basically driving a sports car with wooden wheels. Upgrading to a VST or IMS basket changes the hole geometry entirely. When you pair this level of precision with milk frothers that transform your coffee experience, the jump in cup quality is undeniable.
Why Your Counter Stays Messy No Matter How Much You Spent
One of the biggest surprises I faced was realizing that expensive gear doesn’t always equal a cleaner workflow. In many cases, high-speed professional burrs generate more friction, which actually worsens the static mess in a dry kitchen. I spent months blaming my machine when the real enemy was just the winter air. Another ‘lightbulb moment’ was understanding that beans are essentially organic sponges; they change every single day based on the weather. If you notice that your espresso shot volume varies even with the same dose, it’s likely the beans reacting to the environment, not a gear failure. Finally, I learned that maintenance isn’t just about cleaning—it’s about lubrication. Applying food-grade grease to moving parts prevents the tiny micro-vibrations that cause your settings to drift over time.
My Personal Toolkit for a Perfect Morning Routine
I’ve narrowed down my morning routine to just a few items that make the biggest difference. First, a tiny 10ml glass spray bottle for the Ross Droplet Technique; it’s the single most effective way to stop static from ruining your grinding workflow. Second, I never skip my monthly check-up with Molykote 111. Learning how to properly lubricate your e61 group head cam keeps the action smooth and prevents expensive wear on the brass internals. Lastly, I suggest upgrading to precision baskets; they require much more focus on better espresso distribution without fancy tools, but the clarity in the cup is worth the extra effort. #IMAGE_PLACE_HOLDER_D#
Don’t Let the Learning Curve Stop Your Progress
Home espresso is a journey of constant adjustment and refinement. It’s easy to get frustrated when things don’t go perfectly, but remember that even the best baristas started with a counter covered in coffee grounds. Each time you fix a clumping issue or silence a vibrating motor, you are mastering the art of home espresso one step at a time. Keep experimenting, keep cleaning, and most importantly, keep enjoying the process. Have you ever found a ‘chaff-bomb’ hiding in your grinder chute after a week of heavy use? Let me know your cleaning horror stories below!