How to stop using a wet cloth on your steam wand
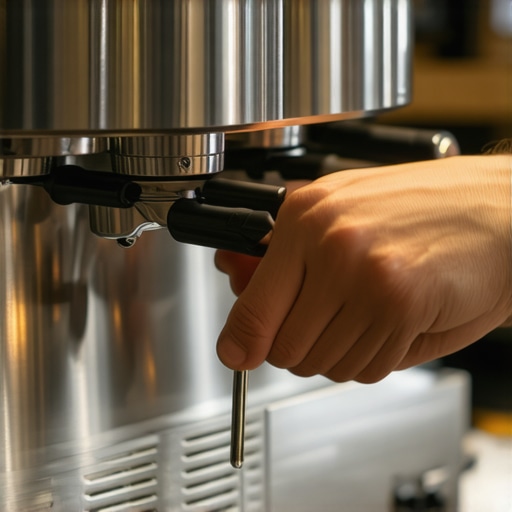
I stared at the damp, graying rag slumped over the drip tray of my machine, and for a second, I actually considered using it again. We’ve all been there, right? You just finished steaming a perfect pitcher of milk, the espresso is waiting, and you grab the nearest damp cloth to wipe the wand. But then you catch a whiff. That sour, funky smell of old milk proteins that have been sitting in a lukewarm rag for three hours. It’s a rite of passage for every home barista, but it’s one that’s holding your coffee back. I used to think a wet cloth was the only way to keep things sanitary. I was wrong. In fact, my early refusal to switch meant I constantly dealt with why my steam wand tips keep getting blocked by milk residue, which turned my morning routine into a chore. Today, I’m going to show you how to break the cycle and actually keep your gear pristine without the soggy mess.
The Damp Mess That’s Quietly Killing Your Latte Game
The truth is, that wet cloth is a breeding ground for things you don’t want near your drink. When you use a standard kitchen towel, you aren’t just wiping away milk; you’re often smearing a thin layer of bacteria and old fats back onto the hot metal. According to data from the Global Hygiene Council, standard kitchen cloths can contain significantly more bacteria than a bathroom handle if they aren’t dried or replaced constantly. For someone mastering the art of home espresso, this is the silent enemy of flavor. I learned this the hard way when I realized my milk started tasting off, even though the beans were fresh. I had let a film of burnt milk build up because my wet cloth wasn’t actually abrasive enough to clean, yet it was damp enough to keep the wand sticky. Have you ever caught yourself smelling your steam wand and regretting it immediately?
Does a Fancy Microfiber Cloth Really Make a Difference?
You might be skeptical. I certainly was. I thought barista-specific gear was just a way to get me to spend more money. But when I finally started choosing the best barista gear for coffee enthusiasts, I realized that the texture of the cloth dictates how much residue stays behind. A dry or slightly misted microfiber pulls the milk off the metal instead of just sliding over it. Have you ever noticed a weird, crusty ring forming at the top of your wand? That’s the wet cloth signature. It’s a nightmare to clean later.
Breaking the Cycle of Steam Wand Maintenance
The move away from the soggy rag isn’t just about hygiene; it’s about preserving your machine. When I was a beginner, I used a dripping wet cloth and actually ended up with moisture seeping into areas it shouldn’t. It eventually led to a situation where I had to learn the one way to fix a clogged steam wand without chemicals because I’d been so negligent with the external cleaning. By switching to a dedicated, high-pile cloth system, you’re not just cleaning; you’re protecting the chrome and the steam quality. Let’s look at how we can ditch the germs and get that wand shining like new.
Stop Smearing and Start Purging
Think of your steam wand like a high-performance garden hose; if you don’t clear the line before and after use, you are just pushing old debris and stale water through your system. Before the milk pitcher even touches the wand, you need to blast a two-second burst of steam into the drip tray. This clears out the ‘cold water’ condensation that accumulates in the pipe. If you skip this, you’ll find why your espresso machine steam is wet and spluttery when you actually start frothing. I learned this the hard way during a busy brunch at home. I skipped the purge, and the excess water instantly turned my milk into a thin, bubbly mess that tasted like nothing. It ruined the texture and made the wand ten times harder to clean because the initial spray didn’t have enough pressure to clear the tip.
The Two Second Rule for Better Steam Quality
Immediately after you finish steaming, the milk on the wand is in a liquid state. Within five seconds, the residual heat of the metal begins to ‘bake’ those proteins into a hard, plastic-like shell. This is the reason your milk smells like its burning before the temp is right next time you turn it on. To prevent this, your purge must be instantaneous. Pull the pitcher away, and while the milk is still swirling, hit that steam lever for a full second. This blows the milk out of the internal holes before it has a chance to be sucked back into the boiler via a vacuum effect.
Master the Dual Zone Microfiber Technique
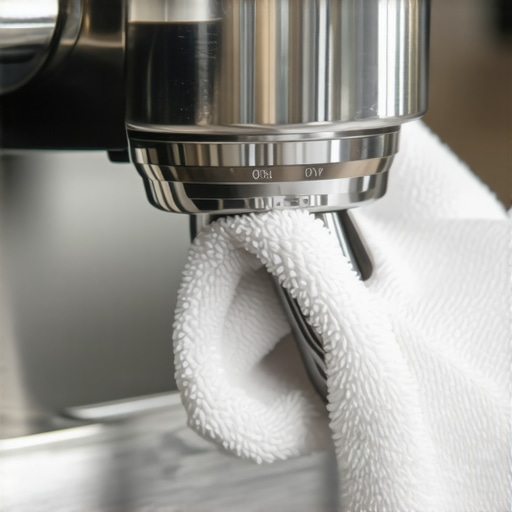
Ditch the kitchen towel and get two high-quality microfiber cloths. Keep one bone-dry and the other lightly misted—not soaking. When the wand is still hot, the misted cloth acts like a steam cleaner, lifting the milk fats instantly. I once used a bone-dry cotton rag on a scorched wand, and the fibers actually melted onto the metal. It was a nightmare to scrape off. By using a misted microfiber, the steam from the wand creates a micro-barrier that prevents sticking. This is essential for the secret to perfecting your milk texture on a single boiler because a clean wand ensures consistent steam flow every single time.
Keep the Tip Holes Clear Every Single Time
The tiny apertures at the end of the wand are the most vulnerable part of your setup. Even a microscopic speck of milk can throw off your vortex. If you notice your milk is spinning unevenly, it’s likely because your steam wand tip holes keep getting clogged by internal buildup. Use the corner of your damp microfiber to specifically ‘floss’ the tip of the wand after every drink. I spent weeks wondering why my foam was lopsided until I realized one of my four holes was 50% blocked by a tiny bit of dried oat milk. Once I cleared it, I regained that perfect swirl required for the trick to getting the perfect swirl in your milk pitcher. Keeping this area pristine is the difference between professional microfoam and a cup of hot, soapy milk.I used to think that cranking the steam knob to its absolute limit was the secret to pro-level foam. I was wrong. The biggest myth in the home barista community is that more pressure always equals better microfoam. In reality, on most home setups, opening the valve 100% too quickly is exactly why your espresso machine steam is wet and spluttery. When you dump all that pressure at once, the small boiler can’t keep up with the thermal demand, leading to a massive drop in temperature and excess water condensation in your milk. You aren’t frothing; you’re diluting. I’ve found that the move for better temperature stability on budget machines is often to wait for the heater light to kick back on before you even start. This ensures you have a head of steam that actually lasts the full 20 seconds needed for a silky pitcher.
Watch Out for the Hidden Vacuum Trap
There is a specific ‘oops’ moment that can literally ruin your machine’s internals, and most people don’t even realize they’re doing it. It’s called the vacuum effect. If you turn off the steam while the wand tip is still submerged in the milk, the cooling air inside the wand creates a momentary vacuum that sucks liquid milk up into the pipe. This is exactly why your steam wand tips keep getting blocked by milk residue over time. If that milk reaches the boiler, you’re looking at a professional repair bill. I fell into this trap for months until I noticed the reason your milk smells like its burning before the temp is right was because old proteins were literally cooking inside the wand arm. Always pull the pitcher down before you fully close the valve to ensure the last bit of air is blowing out, not sucking in.
Why Does My Machine Lose Power Halfway Through Frothing?
This is the most common advanced reader frustration. You start with great pressure, but by the time you’re ready to roll the milk, the vortex dies. This happens because of a misunderstanding of boiler recovery. To combat this, I recommend the benefit of pre-warming your portafilter head and the group head thoroughly, which reduces the overall strain on the boiler’s thermal mass. According to a study by the Specialty Coffee Association (SCA) on thermal dynamics, even a five-degree fluctuation in the steam’s starting temperature can change the viscosity of the milk proteins significantly. If you’re struggling to understand the reason your steam pressure dips when you open the valve, try ‘surfing’ the temperature by bleeding off a little steam to force the heating element to stay active while you work. Have you ever fallen into this trap where your steam just dies mid-pour? Let me know in the comments. Whether you are learning how to texture milk for a flat white versus a latte or just trying to get a consistent morning cup, these tiny thermal nuances are what create that glossy, paint-like finish we all crave.
Stop Ignoring the Water Quality Problem
I used to think my coffee machine was a fortress of stainless steel, but water is the ultimate slow-motion wrecking ball. If you aren’t paying attention to what’s going into your reservoir, you’re essentially playing a game of chicken with calcium deposits. I finally got serious about this when I realized my heating times were doubling. According to La Marzocco’s official Water Specification technical brief, even stainless steel boilers face severe risk when chloride levels exceed 30ppm. This is why the easy way to test your machines water hardness at home is the first thing I teach anyone who buys a real machine. If you skip this, you’ll eventually end up searching for how to recover from a failed descaling process because the buildup got too thick for a standard flush. Don’t be that person.
How do I maintain my espresso setup over years of use?
The secret isn’t one big cleaning day every six months; it’s the five-minute weekly ritual. For me, that means a full chemical backflush. I ignored this for the first year of my journey, and the rancid oil buildup made every shot taste like a literal ashtray. Now, I know why your machine needs a backflush every single week—it preserves the three-way solenoid valve and keeps your flavors crisp. If you notice your pump sounds strained or you see how to stop your espresso machines feet from vibration walking, it’s usually a sign that internal components are fighting against scale or misaligned parts. Consistency comes from a machine that isn’t struggling to breathe.
Give Your Burrs the Respect They Deserve
We spend so much time on the machine that the grinder becomes an afterthought, but your burrs are the primary architects of flavor. I remember the day I realized my espresso was tasting muddy regardless of the beans. I finally checked and learned how to tell if your espresso grinder burrs are dull; they were rounded off after years of use. Now, I make it a point to use a small brush and a vacuum once a month. If you’re dealing with clumping, how to clean your grinders discharge chute with a pipe cleaner is the single best hack I’ve ever found for restoring that fluffy, static-free mound of grounds.
The Future of Home Barista Tech
Looking ahead, I see the industry moving toward even more integrated sensors—machines that will literally alert your phone when the water hardness shifts or the burr gap widens. We are already seeing this with high-end smart scales. If you find why your espresso scale is jumping numbers while the shot is pulling, you’re already dealing with the intersection of precision electronics and high-vibration machinery. Mastering these tools today prepares you for the high-tech shift coming in 2025 and beyond. My advice? Start today by doing one thing: grab a water test kit and find out exactly what you’re feeding your machine. Your future self (and your wallet) will thank you.
The Hardest Lessons I Learned While Chasing the God Shot
After years of trial and error, I’ve realized that the best coffee isn’t made by the person with the most expensive machine, but by the person who maintains their gear with the most discipline. One major lightbulb moment was realizing that a tiny bit of old residue was often the simple way to fix a gritty texture in your espresso without buying new burrs. Another was accepting that my home espresso routine was only as good as my worst habit—leaving the steam wand unpurged for even a few minutes. If you focus on the hygiene, the flavor follows naturally.
- Consistency is a result of cleanliness, not just expensive beans.
- Your water quality dictates the lifespan of your machine more than your usage frequency.
- Small, daily habits prevent the need for expensive, soul-crushing repairs.
The Essentials That Saved My Morning Workflow
I didn’t start getting professional results until I looked beyond the machine itself. First, I had to learn how to select the perfect coffee grinder for your brew, because no amount of cleaning can fix the uneven extraction of a bad grind. I also recommend looking into high-end milk frothers that transform your coffee experience if you are frequently hosting and need a backup. For those just mastering the art of home espresso, I suggest keeping a dedicated journal of when you last descaled and backflushed—your memory will fail you, but the records won’t.
Your Kitchen is the New Best Cafe in Town
It’s easy to feel overwhelmed by the technicalities of boiler pressure and thermal stability, but remember why you started this journey: for that perfect, quiet moment with a cup of coffee you made yourself. Don’t let the maintenance feel like a chore. Instead, see it as a ritual that respects the craft. With a clean wand and a calibrated machine, you’ll find the trick to swirling milk without splashing out of the pitcher becomes second nature. Your home espresso journey is a continuous path of refinement, and every clean shot is a win.
Have you ever had a disaster with a clogged steam wand or a scale-filled boiler that stopped you in your tracks? Let me know your horror stories in the comments below!