Why Your Steam Wand Tip Holes Keep Getting Clogged
I was standing in my kitchen last Tuesday, trying to impress my mother-in-law with a tulip-poured flat white. I turned the steam knob, expecting that familiar, powerful hiss. Instead? I got a pathetic, high-pitched whistle that sounded like a tea kettle in distress. I looked down, and those tiny little holes on the end of my top-rated espresso machines were completely sealed shut with crusty, white residue. It was embarrassing, it was gross, and honestly, it was entirely my own fault. If you have ever felt that moment of panic when your milk just won’t swirl, you know exactly what I am talking about. Today, we are going to fix that frustrating blockage once and for all and make sure it never ruins your morning latte again.
Stop Fighting Your Steam Wand Every Morning
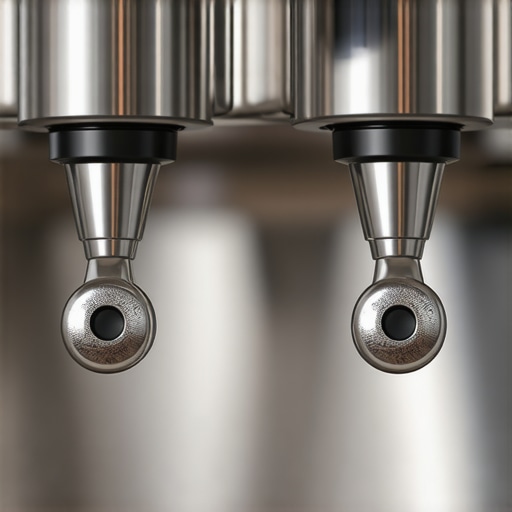
Most of us spend a lot of time choosing the best barista gear or obsessing over grind size, but we completely ignore the 1.5mm holes where the steam actually exits. When you finish frothing and turn the steam off, a tiny vacuum is created. This vacuum sucks a small amount of milk back into the tip. If you do not purge immediately, that milk bakes into a rock-hard protein glue. This is the primary reason why your steam wand only makes thin hot milk instead of that silky microfoam we all crave. I made the mistake early on of thinking a simple wipe with a damp cloth was enough. I was wrong. I eventually had to learn how to clean the inside of your steam wand pipe because the buildup had traveled so far up the arm.
Is It Really Possible to Ruin a Machine Just by Skipping a Purge?
It might seem like a minor annoyance, but the Specialty Coffee Association notes that milk residue is a leading cause of mechanical failure and ‘off’ flavors in high-end equipment. It is not just about the blockage; it is about the hygiene risk of warm milk sitting in a dark, damp pipe. Have you ever noticed your steam wand losing pressure halfway through a drink? That is the sign that the ‘milk-glue’ is winning. Fortunately, there is a one way to fix a clogged steam wand without chemicals that actually works. We are going to dive into the physics of why this happens and how to keep those holes clear so every pour looks like a pro’s.
Purge the Wand Like Your Latte Depends on It
Think of your steam wand like a garden hose. If you leave muddy water sitting in the nozzle, it’s going to dry and crust over. The moment you pull that pitcher away, you have about three seconds of ‘golden time’ before the milk proteins start to grip the stainless steel. The most vital habit is finding the best way to purge your steam wand without getting burned. You need a short, aggressive blast of steam to blow out the internal residue before the cooling pipe creates that dreaded vacuum. I remember one frantic Monday morning when I was running late; I skipped the purge, thinking a quick wipe was enough. Two hours later, I came back to a machine that felt like it was trying to breathe through a straw. I had to spend twenty minutes fighting a blockage that a two-second purge would have prevented. If you skip this, you are essentially inviting ‘milk-glue’ to take up permanent residence in your top-rated espresso machines.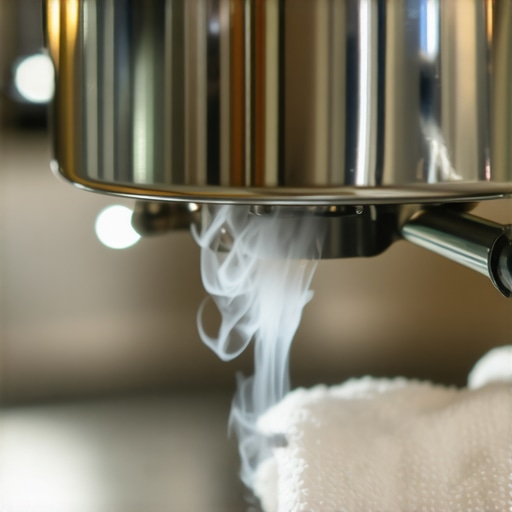
How to Clear a Stubborn Blockage Without Scratches
If you find yourself staring at a tip where only one of the four holes is working, don’t reach for a steak knife. You need surgical precision here. Most barista gear kits come with a thin wire tool, but a simple unbent paperclip or a dedicated cleaning needle works wonders. Carefully insert the wire into each hole of the tip. You aren’t just pushing the clog deeper; you are breaking the seal. This is often the only way to fix a steam wand that only blows out weak air. I once tried to use a wooden toothpick for this, and the tip snapped off inside the wand hole. It was a nightmare. I had to disassemble the entire assembly just to fish out a splinter. Stick to metal tools that won’t break under pressure. Once the holes are physically clear, the real work begins.
The Deep Soak That Actually Works
When the blockage is internal, you need to soften the proteins. Think of it like soaking a lasagna pan; you can’t just scrub the surface and expect the burnt-on cheese to vanish. Submerge the tip in a pitcher of hot water. Many people use specialized detergents, but there is a one way to fix a clogged steam wand without chemicals by using a simple steam-and-soak cycle. Let the wand sit in the water for at least fifteen minutes, then turn the steam on full blast into a cloth. This creates a pressure-cooker effect inside the pipe, forcing the softened milk out. This method is the secret to the trick to getting the perfect swirl in your milk pitcher because it ensures the steam velocity is consistent across all exit points. If one hole is even partially blocked, your vortex will be lopsided, and your microfoam will be full of big, ugly bubbles. This is exactly why your steam wand tips keep getting blocked by milk residue—failure to deep clean allows thin layers to build up like arterial plaque until the machine finally gives up. Keep it clear, and your morning flat white will thank you.
Why More Holes in Your Steam Tip Might Be Your Worst Enemy
Most home baristas assume that to get cafe-quality milk, they need a four-hole steam tip. They look at top-rated espresso machines in professional shops and want to mimic that setup. However, this is one of the most common mistakes when choosing the best barista gear for a home kitchen. On machines with smaller boilers, a four-hole tip often dissipates pressure too quickly, resulting in weak steam that can’t create a proper vortex. In my experience, sticking with a two-hole tip is actually the secret to silky microfoam on a single boiler machine because it maintains higher steam velocity. High velocity is what shears the milk proteins into tiny bubbles; without it, you just get hot, soapy-looking liquid. It is a classic case of ‘less is more’ that many enthusiasts overlook until they’ve already wasted gallons of milk trying to figure out why some steam wands have two holes and others have four.
Does Your Machine Suffer from the Wet Steam Delusion?
One nuance that even seasoned home baristas miss is the difference between dry steam and wet steam. If you don’t purge your wand long enough, you are injecting liquid water directly into your pitcher. This is often why your espresso machine steam is wet and spluttery. Research from the Coffee Science Foundation suggests that excess water dilution can destabilize the whey proteins (lactoglobulin) that are responsible for foam persistence. If you’ve ever wondered why your art looks great for ten seconds and then dissolves, wet steam is the likely culprit. You need to purge until the ‘hiss’ is consistent and sharp, not ‘gurgly.’ This ensures you are only adding heat and air, not unwanted volume that ruins how to texture milk for a flat white versus a latte.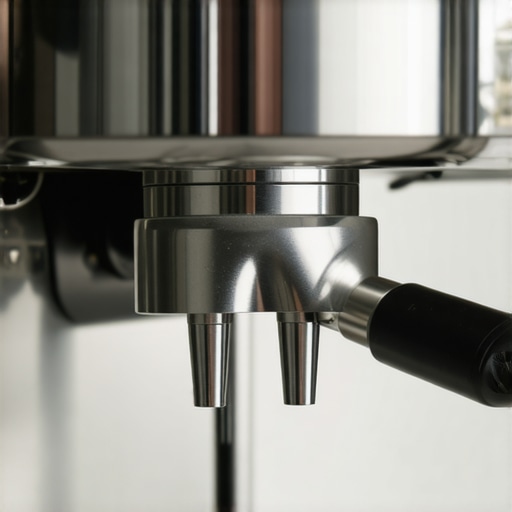
The ‘Oops’ Factor: The Danger of the Over-Tightened Tip
A trap I see people fall into constantly happens right after they finish a deep clean. You’ve successfully removed the ‘milk-glue,’ and now you’re putting the tip back on. The temptation is to grab a wrench and tighten it until it won’t budge. Don’t do it. Over-tightening can crush the delicate internal O-ring or even strip the threads on the wand arm. You need to learn how to tighten a loose steam wand nut without scratching the chrome to keep the assembly airtight without causing mechanical fatigue. If you feel any resistance, stop. A finger-tight seal plus a tiny quarter-turn with a cloth is usually all it takes. Furthermore, pay attention to your pitcher’s orientation. Even with perfect steam, the trick to swirling milk without splashing out of the pitcher relies on the angle of the wand relative to the surface. If you’re tilted too far, you’ll introduce large ‘gulping’ bubbles that no amount of swirling can fix. Have you ever fallen into this trap of over-complicating your gear only to realize it was a simple maintenance or technique error? Let me know in the comments below.While we focus on the steam wand, it’s easy to forget that the water feeding it is the real culprit. I learned this the hard way after my third year of home brewing when my machine started making a horrific screeching sound. According to technical documentation from La Marzocco, keeping your water TDS (Total Dissolved Solids) between 75 and 150 ppm is the sweet spot for flavor and machine health. Anything higher, and you’re essentially inviting a calcium party inside your copper pipes. If you’ve noticed your heat-up times dragging, it’s time to learn how to tell if your machine boiler is accumulating lime scale. Trust me, you do not want to be in a position where you have to figure out how to recover from a failed descaling process on a Sunday morning when the local repair shop is closed.
How do I maintain my espresso setup over years of use?
The secret isn’t just deep cleaning once a month; it’s the rinse-and-repeat mentality. Beyond the wand, your grinder is your most important ally. I used to think my machine was broken because my shots were inconsistent, but it turned out to be static buildup. Finding how to stop static from ruining your grinding workflow changed everything for me. Now, I use a RDT (Ross Droplet Technique) spray bottle—just a tiny spritz of water on the beans before grinding—which is one of those tips for beginners that even pros swear by. Also, don’t forget the discharge chute. Using how to clean your grinders discharge chute with a pipe cleaner every few weeks ensures that old, rancid oils don’t contaminate your fresh beans.#IMAGE_PLACE_HOLDER_D#
Why the Future of Home Espresso is More Precise Than Ever
Looking ahead, I see a massive shift toward sensor-integrated technology. We are moving away from guessing the pressure and toward real-time flow profiling. Even on top-rated espresso machines, the next big thing is digital feedback loops that adjust temperature based on the specific density of your bean. For now, though, we have to rely on choosing the best barista gear that allows for manual control. If your current grinder feels like it’s fighting you, you might need to look at how to fix a grinder adjustment ring that is stuck before you consider upgrading the whole unit. I personally swear by the WDT tool; it’s a simple array of needles that breaks up clumps. If you don’t use one, you’ll likely see why your bottomless portafilter shows channels every time.
Stop Ignoring the Silent Vibrations
One thing that drove me crazy for months was a persistent rattling. I thought it was the pump, but it was actually the drip tray. I discovered how to stop your drip tray from vibrating across the counter using just a few adhesive silicone dots, and the silence was glorious. It’s these small ergonomic fixes—like the best angle for tamping to avoid wrist strain—that keep the hobby enjoyable rather than a chore. My challenge to you this week: spend five minutes checking your water hardness with a test kit. It’s the single most important step in mastering the art of home espresso and will save you hundreds in repairs down the line.
Hard Truths About Maintaining the Perfect Pull
After years of trial and error, I have realized that the smallest oversights lead to the biggest headaches. One major lightbulb moment for me was discovering the reason your steam wand valve feels gritty is almost always a lack of internal lubrication and microscopic milk buildup. It is not just about the tip; it is about the entire assembly. Another lesson? Consistency is a moving target. I used to blame my beans until I understood why your espresso shot volume varies even with the same dose—it often comes down to how much moisture your puck retains from the previous day’s cleaning habits. Finally, remember that your equipment is a living system; ignoring a tiny drip now leads to a flood later. If you want to keep your top-rated espresso machines running like new, you have to listen to the sounds it makes during the purge.
Gear That Actually Makes a Difference in My Kitchen
You do not need a thousand-dollar setup to make world-class coffee, but you do need the right essentials. When choosing the best barista gear, I always prioritize a high-quality WDT tool and a precision scale. These two items alone removed 90% of my channeling issues. I also highly recommend looking into how to select the perfect coffee grinder for your brew because your steam wand technique won’t matter if the espresso base is sour or thin. For cleaning, a simple dedicated steam wand brush and a microfiber cloth are non-negotiable. I trust these tools because they focus on physics rather than flashy marketing, ensuring every variable is under your control.
#IMAGE_PLACEHOLDER_E#
Take Control of Your Morning Ritual
Don’t let a clogged wand or a spluttering machine intimidate you. Every professional barista started with a messy kitchen and a few ruined lattes. By implementing these cleaning habits and understanding the ‘why’ behind the ‘how,’ you are well on your way to mastering the art of home espresso. Your morning coffee should be a moment of zen, not a battle with a piece of stainless steel. Keep your equipment clear, stay curious about your process, and your home espresso will eventually rival your favorite local cafe. Have you ever faced a steam wand blockage that felt like a permanent death sentence for your machine? Let me know in the comments below!