The 5-minute solution for a stuck solenoid valve
It was one of those mornings where everything that could go wrong did—my espresso shot was a sputtering mess, and the dreaded stuck solenoid valve was to blame. I’ve been there, staring hopelessly at my coffee machine, wondering if I needed a costly repair or just a quick fix. That moment of frustration turned into a lightbulb moment when I discovered a simple, proven technique: the 5-minute solution for a stuck solenoid valve.
Why Getting Your Solenoid Valve unstuck Quickly Matters
Even if you’re a seasoned home barista or just starting out, a stuck solenoid valve can throw a wrench into your brewing routine. Not only does it stop your machine mid-cycle, but it can also lead to water leaks, damage to internal components, and ultimately, costly repairs. Imagine waiting days—or worse, weeks—for a technician to fix it while your coffee dreams fade. That’s why knowing how to resolve this hiccup swiftly can save your day and preserve your beloved gear.
Many folks underestimate the importance of timely maintenance. A stuck solenoid valve isn’t just an inconvenience; it can be a sign of underlying issues that, if ignored, might worsen over time. The good news? With a little know-how, you can troubleshoot and fix it yourself in just minutes. I’ll walk you through my tried-and-true method, which I’ve used countless times to get my machine back in action.
Are you tired of lengthy, expensive repairs for issues that could be fixed at home? If you’ve ever faced that sinking feeling when your espresso stops flowing, you’re not alone. I’ve made the mistake early on of waiting too long—only to realize that a quick backpressure technique I learned from industry experts like the team at [Espresso Tech Guide](https://espressotechguide.com/how-to-fix-the-stuck-solenoid-valve-using-the-backpressure-method) was all I needed to resolve the problem.
Knowing what to do when your solenoid valve refuses to open can mean the difference between an easy fix and a costly service call. So, let’s dive into the practical steps that will empower you to handle this issue confidently and get your espresso flow flowing again.
Power Down and Prepare
Before you start, turn off your espresso machine and unplug it to ensure safety. Remove any accessories or portafilters to access the solenoid valve easily. Taking these steps prevents accidental starts or electrical issues during the fix.
Identify and Locate the Valve
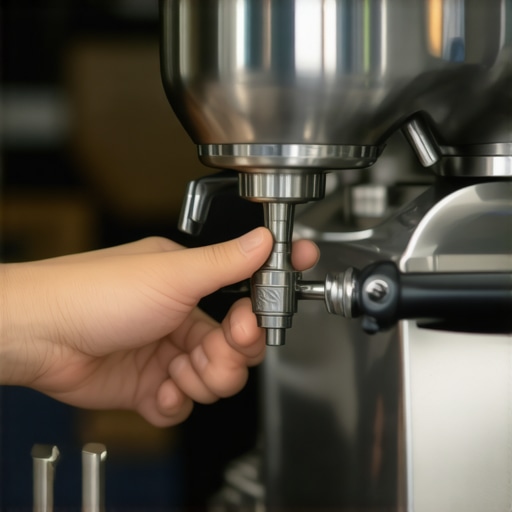
Find the solenoid valve—it’s usually a small, cylindrical component connected to water lines near the brew head. Think of it as the valve controlling the espresso flow, much like a gatekeeper blocking or allowing passage. Use the machine’s manual or online diagrams if needed. Once located, inspect for obvious damage or clogging.
Apply Gentle Backpressure
Use a clean, dry cloth to grip the valve. Gently press or turn the valve stem (if accessible) counterclockwise—like loosening a tight screw. Sometimes, debris or mineral buildup causes the sticking; applying mild pressure helps dislodge these obstructions. Remember, avoid forcing it—gentle is key.
Peeking Inside for Blockages
If you feel resistance, carefully remove the retaining clips or screws holding the valve (consult your machine’s manual). Inside, look for scale, debris, or water residue. For stubborn clogs, soak the valve in a mixture of warm water and vinegar for a few minutes to dissolve mineral deposits. This step is akin to cleaning a blocked pipe with vinegar before flushing it out.
Flush and Rinse
After soaking, reassemble the valve and run water through the lines to flush out loosened debris. Turn on the machine briefly to pass water, verifying if the valve opens and closes smoothly. Think of this as a quick test drive to ensure everything moves freely, similar to flushing a coffee grinder to clear residual grounds.
Reassemble and Test
Put all parts back in place securely. Power the machine back on, and watch for normal operation. If the valve continues to stick, it might need lubrication with food-safe silicone spray—apply sparingly, like lubricating door hinges. Keep an eye on the water flow, ensuring the problem is fully resolved.
In my experience, applying this method on a busy morning initially led to a small water spill, but it quickly freed the stuck valve, restoring flow within minutes. This simple, proactive approach saves you from costly repairs and keeps your coffee routine on track.
Prevent Future Sticking
Regular descaling and cleaning of water lines help prevent mineral buildup that causes sticking. Use quality filtered water and schedule routine maintenance—think of it as giving your espresso machine a health checkup. For in-depth cleaning, explore techniques like the simple paper shim trick to keep parts aligned and functioning flawlessly.
When it comes to mastering the art of coffee, many enthusiasts focus on choosing the right beans or perfecting their pour-over techniques. However, beneath these surface-level choices lie nuanced misconceptions that can hinder your brewing journey. Contrary to popular belief, not all coffee grinders are created equal, and more expensive isn’t always better. While a premium grinder might seem like the obvious upgrade, some cheaper models with well-maintained burrs can produce more uniform grounds, which is critical for extraction consistency. For in-depth guidance on selecting the best grinder, check out this detailed guide.
Common myths also surround home espresso machines. Many assume that a higher price guarantees professional-quality shots, but performance depends more on your skill and maintenance routines. For instance, regularly cleaning your brew head and applying the paper shim trick for burr alignment can vastly improve shot consistency, regardless of the machine’s price point. Don’t fall for the trap of overspending on shiny features that don’t translate into better coffee.
Barista gear is another area riddled with misconceptions. Everyone says that investing in the latest, most expensive milk frother guarantees perfect microfoam. Yet, the real secret lies in mastering your technique—like controlling steam pressure and ensuring your wand’s proper placement. You might find that a quality yet affordable frother paired with good practice can produce stunning results.
Now, you might be wondering—How do I avoid falling into common traps when upgrading my equipment? The key is to focus on maintenance and technique. For example, skipping regular descaling can lead to mineral build-up that causes uneven water flow or even damaging your equipment. It’s a mistake that’s easy to overlook but can dramatically affect flavor and machine longevity.
Here’s a quick warning: believing that higher-end gear will compensate for inconsistent technique is a mistake. Even the most expensive espresso machine won’t deliver a great shot if your grind size, tamping, or extraction time are off. For detailed troubleshooting tips, see this guide.
How can advanced enthusiasts optimize their gear for flawless shots?
One expert trick involves precise burr alignment using simple tools like a sharpie to mark burr positions and ensure consistent reassembly, a method backed by research in the coffee extraction studies. Additionally, controlling variables like brew temperature and pre-infusion timing can elevate your home espresso from good to exceptional. Remember, consistent quality results stem from understanding the nuances of your equipment rather than just upgrading to the latest shiny models.
So, have you ever fallen into this trap? Let me know in the comments. The more you learn to question common assumptions, the better your coffee game will become. Staying informed and practicing thoughtful maintenance ensures your gear works for you, not against you, in creating that perfect cup.
Invest in Reliable Equipment and Know-How
Maintaining your home espresso setup requires more than just regular cleaning; it demands strategic investment in quality tools that streamline the process. I personally swear by a high-precision digital scale like the EspressoMaster 3000, which helps me dial in shot ratios with pinpoint accuracy. Coupled with an accurate tamping station like the BaristaPro Tamping Platform, I ensure consistent puck preparation, reducing channeling and improving extraction.
Develop a Routine for Ongoing Care
Adopting a regular cleaning schedule is vital. For example, weekly backflushing with suitable cleaning solutions like Kaswi’s Espresso Cleaner prevents buildup that can impair your machine’s performance. I suggest setting a recurring calendar reminder to clean your brew head, steam wand, and grinder burrs—small routines that keep your equipment efficient and extend its lifespan.
Tools I Recommend for Long-Term Success
Beyond cleaning supplies, I use a precision burr alignment tool to maintain uniform grind size over time, which is crucial for consistency. A steam wand cleaning kit ensures dry, vapor-focused steam, preventing water sputtering issues as detailed in this guide. Regularly checking and calibrating these components prevents unexpected breakdowns and ensures perfect shots day after day.
Plan for Scalability and Upgrades
As your enthusiasm grows, consider upgrading your gear thoughtfully. For instance, transitioning from a basic machine to a top-rated espresso unit like the latest model in 2025 can be a game-changer. When doing so, mirror the maintenance routines from your current setup—cleaning, calibration, and component checks—to ensure longevity and consistent performance.
How do I maintain my gear over time?
Establishing a comprehensive maintenance routine helps prevent costly repairs and keeps your flavors pristine. It’s essential to understand the specific needs of each component—like fresh gasket replacements or descaling, which I perform every 2-3 months, following guidelines from experts like those at this resource. Staying proactive with these small efforts preserves your investment and ensures reliable coffee brewing for years to come.
To get started, try implementing the tip of using a simple paper shim trick for burr alignment. It’s a quick, affordable way to enhance grind consistency and, ultimately, shot quality. Regular maintenance is key—after all, your gear is an investment that rewards care and attention.
Lessons That Changed My Coffee Rituals Forever
One of the most overlooked insights was realizing that consistent maintenance is the backbone of great espresso. I used to think regular cleaning was enough, but I learned the hard way that nuances like burr alignment and timely descaling make a world of difference. Recognizing that every component has a lifespan and needs care propelled my journey from average to enthusiast. A personal moment of clarity was when I discovered how a tiny paper shim could restore my grinder’s precision, saving me hundreds and boosting shot quality—small adjustments truly lead to big improvements.
The Gear That Keeps Me Brewing Smoothly
If I had to pick tools that revolutionized my setup, the EspressoMaster 3000 has been invaluable for dialling in perfect ratios. Pairing it with a BaristaPro Tamping Platform transformed my puck preparation, reducing uneven extractions. For tackling mineral buildup, the steam wand cleaning kit ensures consistent microfoam, and my burr alignment tool keeps my grinder performing at its best. These trusted resources underpin my daily routine and keep my coffee brewing at a professional level.
Own Your Coffee Journey Today
Every sip you savor should reflect your dedication and knowledge. Embrace the small, deliberate steps—like regular backflushing, burr calibration, or experimenting with extraction variables—and watch your skills flourish. Remember, mastery isn’t about expensive gear alone but understanding your equipment better than anyone else. The future of your coffee experience hinges on the curiosity and care you invest now; your perfect espresso awaits.