Why Your Espresso Puck is Always Soupy at the End
I’ll never forget the morning I finally graduated from a pressurized basket to the ‘big leagues’ of home espresso. I’d spent my hard-earned cash on a shiny new machine and one of those top-rated espresso machines for coffee lovers in 2025, thinking I was finally a real barista. But after pulling what looked like a decent shot, I unlocked the portafilter only to be greeted by a dark, swampy soup. Splat. It was a mess, and a good chunk of it landed right on my favorite shirt. It felt like a personal failure, like the machine was laughing at my lack of skill. If you have ever felt that sting of frustration while cleaning sludge off your counter, take a deep breath. We are going to fix your workflow and get those satisfying, dry ‘thuds’ back in the knockbox. I’ve spent years tinkering with my own gear to stop this exact problem, and the solution is often simpler than you think.
The Physics of Why Your Coffee Bed Stays Sopping Wet
A soupy puck usually isn’t a sign of a broken machine, but it is a sign that something in your ritual is slightly off. When I started out, I made the mistake of thinking I just needed to tamp harder—like I was trying to compress a piece of coal into a diamond. Spoiler alert: it didn’t help one bit. The truth is that water retention is almost always about headspace. If there is too much room between your coffee and the shower screen, water simply pools there after the pump stops. This is especially common when you are mastering the art of home espresso tips for beginners and haven’t quite figured out the right dose for your basket size. According to research by the Coffee Science Foundation, the efficiency of moisture removal is heavily dependent on the mechanical action of the 3-way solenoid valve and the resistance of the coffee bed itself. If that valve doesn’t have a solid ‘back pressure’ to work with, that water stays right on top of your grounds like a mini-swimming pool.
Wait, does a wet puck even ruin the taste of my coffee?
This is the skepticism I hear most often from my fellow coffee geeks at the local shop. The short answer? Not necessarily. You can actually have a situation where your espresso shot is running too fast but the puck is dry, yet the flavor is thin and sour. Conversely, a soupy mess can sometimes taste like a dream. But let’s be honest—nobody likes a soggy mess when they’re trying to move fast in the morning. We want that clean, firm disc that pops out in one piece so we can get on with our day without needing a hazmat suit for the kitchen. If you find yourself constantly scrubbing your basket, it’s worth the five minutes to troubleshoot.
Stop Blaming the Machine and Look at Your Basket Dose
If you are using a large 18g or 21g basket but only putting in 14g of coffee, you’re basically creating a void for leftover pressurized water to occupy. You need to ensure you have the perfect coffee grinder for your brew adjusted so that the volume of coffee fills that basket appropriately. The gap between the coffee and the group head should be minimal—just enough for the grounds to expand slightly. Have you ever been convinced your machine was dying just because of a little extra water in the portafilter? Drop a comment below—I’ve definitely been in that panic-mode before. Next, we will look at how to adjust your grind and dose to ensure that water has nowhere to hide.
Stop the Water Rush with a Tighter Grind
Think of your coffee puck like a sponge. If the holes in the sponge—the microscopic gaps between those tiny coffee particles—are too large, gravity cannot do all the work and the machine’s vacuum action cannot pull the moisture through. When you are using the perfect coffee grinder for your brew, your goal is to find that sweet spot where the resistance is high enough to create pressure, but the particles are uniform enough to let the solenoid valve suck the puck dry at the end of the shot. If your grounds are too coarse, the water just hangs out in the gaps like a puddle on a gravel road. I remember a particularly frustrating week where I was dealing with coffee grounds clumping like little rocks; those clumps created uneven pockets of water that refused to drain. Once I broke up the clumps and went a notch finer, the swamp vanished instantly.
The Coin Test for Perfect Headspace
One of the most common reasons for a wet puck is simply not having enough coffee in the basket. If you leave a massive canyon between the top of your coffee and the shower screen, water will fill that void and stay there because there is nothing to push it through. To fix this, try the ‘Coin Test.’ Dose your portafilter, tamp it down, and place a small coin on top of the grounds. Lock the portafilter into the machine, then immediately take it out without brewing. If the coin is pressed firmly into the coffee, you have the right amount. If the coin hasn’t moved at all, you need to increase your dose. When you are choosing the best barista gear for coffee enthusiasts, always pay attention to the rated capacity of your baskets. Using an 18g basket for a 15g shot is a guaranteed recipe for a soggy mess. 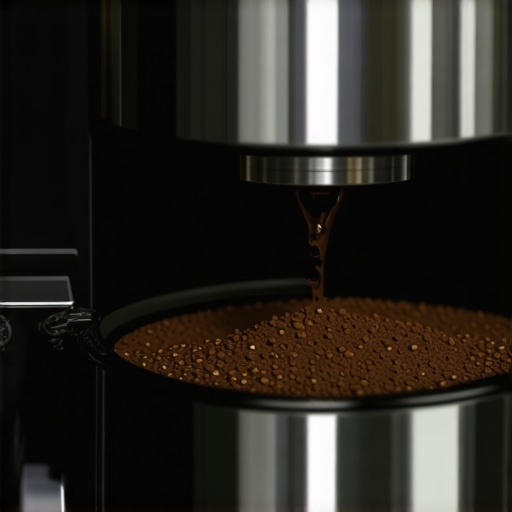
Check the Exit Route for Residual Water
Your espresso machine has a ‘slurp’ phase. That is the technical term for when the 3-way solenoid valve opens up to dump excess pressure and water into the drip tray. If you notice your espresso machine is discharging too much water into the drip tray during the shot, or conversely, nothing at all at the end, your valve might be the culprit. A sticky or partially blocked valve cannot create the necessary vacuum to ‘lift’ the water off the puck. This often happens because your group head shower screen is getting clogged so fast with old oils, which restricts the back-pressure flow.
Verify Your Solenoid Is Still Kicking
You can usually hear the solenoid click at the end of a shot. It is that sharp, metallic ‘thwack’ followed by a hiss of water hitting the tray. If that sound is muffled or missing, it is time for a deep clean. I once let a machine go six months without a backflush and the solenoid became so gummed up with rancid oils that every puck I pulled looked like a melted brownie. Learning how to spot a failing solenoid valve before it floods your kitchen is a vital skill for any home barista who wants to keep their workflow clean and their coffee tasting fresh. If the valve is working but the puck is still wet, try a longer ‘dwell time’—letting the portafilter sit for 30 seconds after the shot ends to let the remaining pressure equalize naturally.It’s a common rite of passage: you see a wet puck and immediately assume you aren’t tamping hard enough. We’ve all been there, leaning our entire body weight onto that handle like we’re trying to seal a leak in a dam. But here is the nuance: tamping harder than about 15-20 pounds of pressure does virtually nothing for the density of the puck, but it can absolutely wreck your extraction. Research by the Specialty Coffee Association (SCA) suggests that once the coffee particles are packed, additional force doesn’t significantly reduce the void space; instead, it risks an uneven bed that encourages channeling. When you over-tamp, you often cause your espresso shot to extract from only the edges of the basket. This bypasses the center, leaving a soggy, under-extracted core while the edges are over-extracted and bitter. Instead of brute force, focus on the move for better espresso distribution without fancy tools. A level bed is ten times more important for a dry puck than a heavy-handed tamp.
Can a higher brew temperature actually dry out your coffee puck?
Surprisingly, yes. Water viscosity changes with temperature. If your machine is running too cool—perhaps because you didn’t allow enough time for the benefit of pre-warming your portafilter head—the water is ‘thicker’ and harder for the solenoid to evacuate. This is a common trap for owners of top-rated espresso machines for coffee lovers in 2025 that use smaller thermoblocks. If the temperature isn’t stable, the physics of that final ‘slurp’ phase change.  One mistake I see advanced hobbyists make is obsessing over the puck’s appearance at the expense of flavor. I’ve seen people grind so fine to get a ‘dry’ puck that they end up tasting burnt notes even with light roast beans. They’ve achieved the perfect physical disc, but the coffee is undrinkable. Don’t fall into the trap of prioritizing the knockbox over the cup. Especially when you are trying to learn how to prevent channelling in a bottomless portafilter shot, remember that a slightly damp puck that tasted like blueberries is always better than a dry brick that tastes like ash.
Avoid the Deceptive Puck Screen Trap
Many of us started using puck screens to keep the group head clean. While they are great for choosing the best barista gear for coffee enthusiasts, they can mask a major problem. Because the screen sits on top, it can hold a layer of water against the coffee even if the solenoid is working perfectly. If you lift the screen and find a swamp, you likely have a headspace issue rather than a mechanical one. Have you ever fallen into this trap where a new gadget actually made your workflow more confusing? Let me know in the comments. Finally, if you are struggling with consistency, check your equipment’s health. A grinder adjustment that moves while you’re grinding can subtly change your particle size from shot to shot, leaving you with one dry puck and one swampy mess with no apparent explanation. You might think you’re losing your mind, but it’s just the gear.
Why Backflushing is Your Machine’s Best Friend
I learned the hard way that a clean portafilter doesn’t mean a clean machine. If you want to avoid that swampy puck and bitter taste, you have to get intimate with chemical backflushing. According to the maintenance white papers released by La Marzocco’s technical division, a mere 1mm of scale or oil buildup in a solenoid channel can reduce effective pressure by up to 15%. This is exactly why your group head shower screen is getting clogged so fast; those oils bake on under the heat and create a sticky varnish. Once a week, I use a blind basket and a high-quality espresso detergent. If you skip this, you will eventually need to learn how to spot a failing solenoid valve before it floods your kitchen because it simply cannot close properly anymore.
How do I keep my espresso machine running like new for years?
Consistency isn’t just about your grind; it’s about water. I personally use a BWT Bestsave pouch in my reservoir because scale is the silent killer of boilers. If you are choosing the best barista gear for coffee enthusiasts, do not just look at the shiny chrome—look at the ease of maintenance. I also keep a set of pipe cleaners specifically to clean the tiny air hole in your automatic milk frother. It is a tiny detail, but if that hole is blocked, your latte art dreams are dead on arrival.
Stop Letting Milk Residue Kill Your Microfoam
If you have ever noticed your steam wand losing its ‘oomph,’ it is likely not the boiler—it is the tip. Milk fats are incredibly stubborn. I make it a rule to purge before and after every use, but even then, a deep soak in a dedicated milk cleaner once a month is non-negotiable. This prevents the situation where your steam wand tip holes keep getting clogged. I have found that using a dedicated micro-tool to poke through those holes can save a wand that most people would assume is broken. 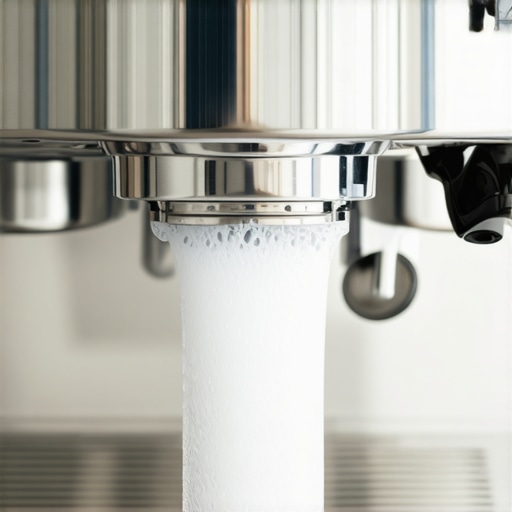
The Future of Precision in Home Espresso
I predict we are moving toward a ‘smart’ maintenance era. We are already seeing top-rated espresso machines for coffee lovers in 2025 that alert you to exact mineral buildup levels in real-time. The guess-work is being phased out. For now, my best advice is to stop over-complicating the gadgets and master your cleaning routine. Go grab some Cafiza today and run a backflush cycle; you might be surprised at how much flavor you have been missing and how much cleaner your pucks behave.
Hard Truths I Learned from a Hundred Messy Pucks
After years of stained shirts and watery messes, I’ve realized that a dry puck is often more about physics than it is about magic. First, don’t chase a dry puck at the cost of a sour shot. If your coffee tastes amazing but the puck is a bit damp, take the win. Second, I’ve learned that a consistent mastering the art of home espresso tips for beginners approach involves checking your headspace every single time you change beans. Third, never underestimate how much old coffee oils can act like glue inside your machine. If you find your drip tray that leaks into the machine body, it’s often a sign of a blockage deeper in the system that’s forcing water where it shouldn’t go.
The Low-Tech Gear That Makes a High-Tech Difference
You don’t need a thousand-dollar setup to fix a soupy mess. My essential toolkit starts with a simple WDT tool; using the move for better espresso distribution without fancy tools can resolve 90% of your channeling and puck-wetness issues. I also highly recommend investing in a precision basket that matches your typical dose. When choosing the best barista gear for coffee enthusiasts, prioritize a high-quality tamper that fits your basket snugly to prevent those side-leakage problems. Finally, if you just upgraded your setup, make sure you know how to properly season new steel burrs for better consistency so your grind size stops jumping around on you.
Own Your Morning Routine Like a Pro Barista
The road to a perfect cup is paved with a few soggy pucks and a lot of trial and error. Don’t let a little water in the portafilter discourage you from the incredible hobby of home espresso. With a few tweaks to your dose, a cleaner solenoid, and a bit of patience, you’ll soon be pulling shots that look and taste like they came from the best café in town. Have you ever struggled with a specific bean that always seems to leave a puddle behind? Let me know below!