Why Your Grinder Screeches Only When Grinding Fine
I remember standing in my kitchen at 6:00 AM, heart pounding, as my brand-new grinder emitted a sound so sharp it probably woke up my neighbors three doors down. I had just shifted the dial toward the espresso range, expecting that satisfying, low-frequency crunch of beans. Instead, I got a high-pitched metallic shriek that made me dive for the power switch. In those early days, I was convinced I’d bought a lemon. It was a visceral moment of panic that many of us face when we start chasing that perfect syrupy extraction. I actually made the classic mistake of thinking I could just crank the dial to the finest setting while the motor was off, which lead to a jammed mess that took me an hour to clear. That screeching isn’t just a nuisance; it’s a desperate signal from your machine that something—usually the burrs or the motor—is under way too much stress. Today, we are going to dive into why this happens only when you go fine and how you can silence the noise before you cause permanent damage to your gear.
Why Metal-on-Metal is Your Grinder’s Worst Nightmare
When you hear that high-pitched whine, your first instinct is likely that the motor is dying. While that is a possibility, the more common culprit is that you are actually hearing the burrs touch. When you calibrate for espresso, you are working with tolerances thinner than a human hair. If you haven’t mastered the trick to finding the true zero point on your grinder, you might be forcing those metal plates to rub against each other. This friction creates immense heat and can dull your expensive burrs in a matter of seconds. Have you ever heard that heart-stopping metallic squeal when you’re just trying to dial in a new bag of beans? It’s a common hurdle, but it’s one you need to address immediately to protect your investment.
Is my expensive grinder just a total piece of junk?
It’s easy to feel buyer’s remorse when your premium gear sounds like a circular saw hitting a nail. However, even the best perfect coffee grinder for your brew can screech if the alignment is off or if there is a build-up of old, oily residue. Science backs this up; according to research published in the Journal of Food Engineering, the mechanical stress on grinding components increases exponentially as particle size decreases, which can cause the internal housing to flex slightly. This flex is often what brings those spinning burrs into contact. If you suspect your gear is failing, it’s worth learning how to tell if your espresso grinder burrs are dull before you assume the motor is the problem. Often, a simple deep clean or a slight adjustment to your workflow is all it takes to get back to that peaceful morning hum. Using the move that saves your grinder from unnecessary wear, like adjusting the grind size only while the motor is running, can prevent the majority of these terrifying noises.
Stop the Screech with Proper Calibration
If you’ve heard that high-pitched whine, your grinder is screaming for a gap. Think of your burrs like the brake pads on a high-performance car; they need to be close to do their job, but if they touch without any coffee beans in between, you get friction, heat, and that awful sound. The most common reason for this is that your “zero” isn’t actually zero. I once spent an entire Saturday afternoon recalibrating a friend’s machine because they had tightened the adjustment collar so far that the burrs were physically locked together. We spent an hour just getting the burrs apart without stripping the screws. You need to understand the reason your grinder burrs are touching early before you try to force a finer setting. Often, the internal shims have shifted, or the manufacturer’s factory setting was just a suggestion.
Find Your True Zero Without Damaging the Metal
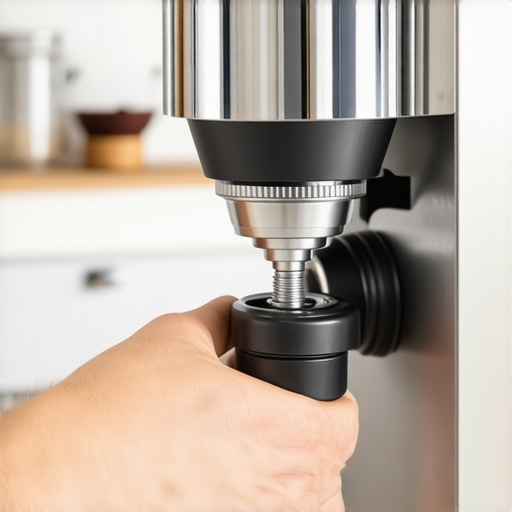
To fix this, you have to find the point where the burrs just barely kiss. Start with the grinder running and empty. Slowly move the dial finer until you hear the faintest change in pitch—a tiny “chirp.” This is your true zero. From there, back off immediately. If you skip this, you’re likely grinding metal into your morning latte. To get the best out of choosing the best barista gear for coffee enthusiasts, you must respect these tolerances. If the chirp sounds more like a grind, you’ve gone too far. Consider the right way to align your flat burrs for better shots to ensure that when they do get close, they are perfectly parallel. An unaligned burr will strike on one side while leaving a massive gap on the other, causing both noise and terrible extraction.
Always Run the Motor Before You Change the Dial
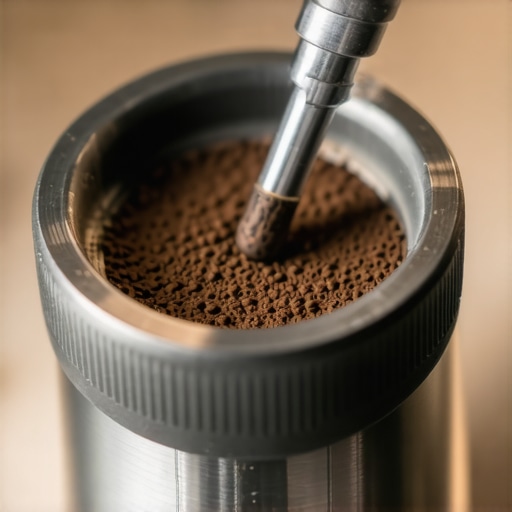
This is the golden rule of home espresso. If there are bean fragments caught between the burrs and you try to tighten the grind while the motor is off, you are essentially trying to compress a rock with a screw. This jams the burrs and forces the motor to strain against an immovable object when you finally flip the switch, leading to that terrifying electrical hum. I learned this the hard way with a bag of light roast beans that were hard as pebbles. I jammed my machine so tight I had to use a pipe wrench to move the adjustment collar. Now, I never touch the dial unless those burrs are spinning. This simple habit is the move that saves your grinder from unnecessary wear and keeps the screeching at bay.
Clear the Compressed Gunk from the Chute
Sometimes the noise isn’t the burrs at all, but the motor struggling to push coffee through a wall of old, oily residue. Espresso-fine coffee is sticky. Over time, it builds up in the exit chute, creating a “plug.” The motor has to work twice as hard to force new grounds past this obstruction, which can cause a high-pitched vibration in the housing. You don’t always need to tear the whole thing down; learning how to clean the grinder chute without taking it apart can save your motor from overheating. If you notice a change in the sound of the motor even when you aren’t at the finest setting, or if you hear the reason your grinder makes a thumping noise during use, it’s a sign that the internal pathways are blocked. A clean grinder is a quiet grinder.
I remember standing in my kitchen at 6:00 AM, heart pounding, as my brand-new grinder emitted a sound so sharp it probably woke up my neighbors three doors down. I had just shifted the dial toward the espresso range, expecting that satisfying, low-frequency crunch of beans. Instead, I got a high-pitched metallic shriek that made me dive for the power switch. In those early days, I was convinced I’d bought a lemon. It was a visceral moment of panic that many of us face when we start chasing that perfect syrupy extraction. I actually made the classic mistake of thinking I could just crank the dial to the finest setting while the motor was off, which lead to a jammed mess that took me an hour to clear. That screeching isn’t just a nuisance; it’s a desperate signal from your machine that something—usually the burrs or the motor—is under way too much stress. Today, we are going to dive into why this happens only when you go fine and how you can silence the noise before you cause permanent damage to your gear. <\/p>
Why Metal-on-Metal is Your Grinder’s Worst Nightmare <\/h2>
When you hear that high-pitched whine, your first instinct is likely that the motor is dying. While that is a possibility, the more common culprit is that you are actually hearing the burrs touch. When you calibrate for espresso, you are working with tolerances thinner than a human hair. If you haven’t mastered the trick to finding the true zero point on your grinder<\/a>, you might be forcing those metal plates to rub against each other. This friction creates immense heat and can dull your expensive burrs in a matter of seconds. Have you ever heard that heart-stopping metallic squeal when you’re just trying to dial in a new bag of beans? It’s a common hurdle, but it’s one you need to address immediately to protect your investment. <\/p>
Is my expensive grinder just a total piece of junk? <\/h3>
It’s easy to feel buyer’s remorse when your premium gear sounds like a circular saw hitting a nail. However, even the best perfect coffee grinder for your brew<\/a> can screech if the alignment is off or if there is a build-up of old, oily residue. Science backs this up; according to research published in the Journal of Food Engineering <\/i>, the mechanical stress on grinding components increases exponentially as particle size decreases, which can cause the internal housing to flex slightly. This flex is often what brings those spinning burrs into contact. If you suspect your gear is failing, it’s worth learning how to tell if your espresso grinder burrs are dull<\/a> before you assume the motor is the problem. Often, a simple deep clean or a slight adjustment to your workflow is all it takes to get back to that peaceful morning hum. Using the move that saves your grinder from unnecessary wear<\/a>, like adjusting the grind size only while the motor is running, can prevent the majority of these terrifying noises. <\/p>
Stop the Screech with Proper Calibration <\/h2>
If you’ve heard that high-pitched whine, your grinder is screaming for a gap. Think of your burrs like the brake pads on a high-performance car; they need to be close to do their job, but if they touch without any coffee beans in between, you get friction, heat, and that awful sound. The most common reason for this is that your \”zero\” isn’t actually zero. I once spent an entire Saturday afternoon recalibrating a friend’s machine because they had tightened the adjustment collar so far that the burrs were physically locked together. We spent an hour just getting the burrs apart without stripping the screws. You need to understand the reason your grinder burrs are touching early<\/a> before you try to force a finer setting. Often, the internal shims have shifted, or the manufacturer’s factory setting was just a suggestion. <\/p>
Find Your True Zero Without Damaging the Metal <\/h3>
To fix this, you have to find the point where the burrs just barely kiss. Start with the grinder running and empty. Slowly move the dial finer until you hear the faintest change in pitch—a tiny \”chirp.\” This is your true zero. From there, back off immediately. If you skip this, you’re likely grinding metal into your morning latte. To get the best out of choosing the best barista gear for coffee enthusiasts<\/a>, you must respect these tolerances. If the chirp sounds more like a grind, you’ve gone too far. Consider the right way to align your flat burrs for better shots<\/a> to ensure that when they do get close, they are perfectly parallel. An unaligned burr will strike on one side while leaving a massive gap on the other, causing both noise and terrible extraction. <\/p>
Always Run the Motor Before You Change the Dial <\/h3>
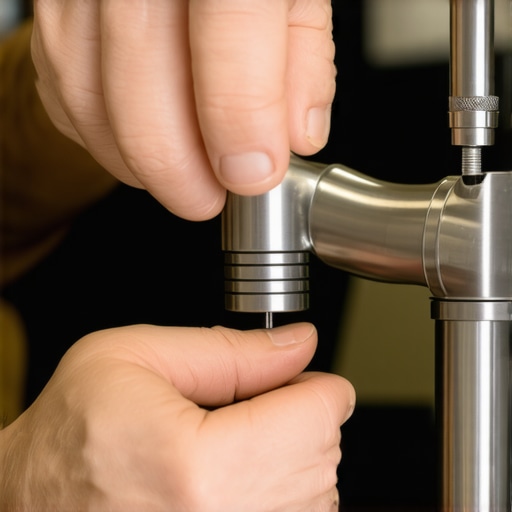
This is the golden rule of home espresso. If there are bean fragments caught between the burrs and you try to tighten the grind while the motor is off, you are essentially trying to compress a rock with a screw. This jams the burrs and forces the motor to strain against an immovable object when you finally flip the switch, leading to that terrifying electrical hum. I learned this the hard way with a bag of light roast beans that were hard as pebbles. I jammed my machine so tight I had to use a pipe wrench to move the adjustment collar. Now, I never touch the dial unless those burrs are spinning. This simple habit is the move that saves your grinder from unnecessary wear<\/a> and keeps the screeching at bay. <\/p>
Clear the Compressed Gunk from the Chute <\/h3>
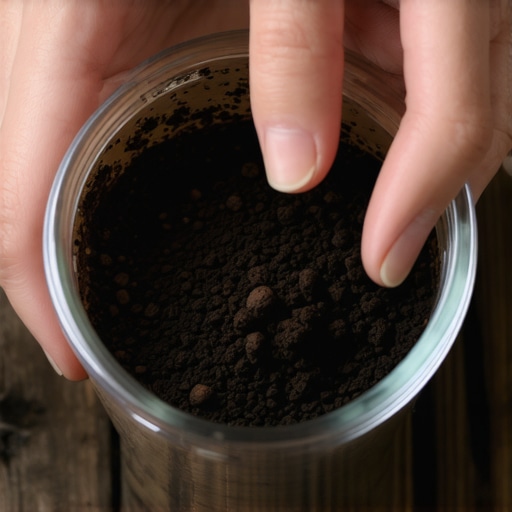
Sometimes the noise isn’t the burrs at all, but the motor struggling to push coffee through a wall of old, oily residue. Espresso-fine coffee is sticky. Over time, it builds up in the exit chute, creating a \”plug.\” The motor has to work twice as hard to force new grounds past this obstruction, which can cause a high-pitched vibration in the housing. You don’t always need to tear the whole thing down; learning how to clean the grinder chute without taking it apart<\/a> can save your motor from overheating. If you notice a change in the sound of the motor even when you aren’t at the finest setting, or if you hear the reason your grinder makes a thumping noise during use<\/a>, it’s a sign that the internal pathways are blocked. A clean grinder is a quiet grinder. <\/p>
Why Your Brand New Burrs Might Be Lying to You <\/h2>
We often assume that out-of-the-box performance is the gold standard, but with high-end barista gear, the opposite is usually true. This is where most enthusiasts get it wrong: they start chasing the \”perfect\” settings on day one. New burrs have microscopic burrs and sharp edges from the manufacturing process that actually produce a less uniform grind than burrs that have been smoothed out by a few pounds of coffee. If you don’t take the time to learn the best way to season new grinder burrs fast<\/a>, you’ll find yourself constantly adjusting your dial because the \”breaking in\” process is happening while you’re trying to pull a shot. I’ve seen people return perfectly good equipment because they couldn’t get a consistent shot in the first week. Be patient; your equipment needs to find its rhythm before it quietens down. <\/p>
Does the weight of your beans actually matter? <\/h3>
This is a nuance that moves beyond the basics of mastering the art of home espresso tips for beginners<\/a>. It’s called \”column pressure.\” When your hopper is full, the weight of the beans pushes the ones at the bottom into the burrs more consistently. As the hopper empties, that downward force decreases, often leading to a slightly coarser grind and faster shots. Research by the Specialty Coffee Association (SCA) highlights that even minor variations in bean feed rate can alter the particle size distribution. This is a common trap: you dial in your espresso with a full hopper on Monday, but by Thursday, your shots are running thin. Understanding why your shots taste different on a full hopper<\/a> is the difference between a frustrated hobbyist and a true home pro. <\/p>
Don’t Let a Soupy Puck Mess with Your Head <\/h2>
One of the biggest \”oops\” moments in the home espresso world is the obsession with the perfectly dry puck. I’ve seen so many people panic because their basket looks like a muddy puddle after a shot. They immediately think they’ve ground too fine or that their machine is losing pressure. In reality, a wet puck is often just a result of the three-way solenoid valve doing its job or having a bit of extra headspace in the basket. It has almost zero impact on the flavor profile. If you start changing your grind size just to fix a cosmetic issue, you’re falling for a classic gear trap. Instead of obsessing over the reason why your espresso puck is always soupy at the end<\/a>, focus on the extraction time and the balance of the shot. <\/p>
Furthermore, be careful with fancy accessories. It’s easy to think more gear equals better coffee, but why your distribution tool might be ruining your extraction<\/a> is a conversation every advanced user should have. If your tool is set too deep, it can actually compress the top layer while leaving the bottom loose, causing massive channeling. Also, don’t ignore the hidden threat of water chemistry; you need to know how to tell if your water hardness is damaging your boiler<\/a> before scale buildup silences your machine. Even on entry-level units, you can find success by using the move for better temperature stability on budget machines<\/a>. Have you ever fallen into the trap of over-adjusting for a wet puck? Let me know in the comments. <\/p>
Protect Your Boiler Before the Scale Takes Over
I’ve seen more machines die from neglect than from actual mechanical failure. Most people treat their espresso machine like a microwave, but it’s more like a vintage car. If you ignore the internals, you’re on a fast track to a repair bill that costs as much as a new unit. One of the most critical aspects is water chemistry. Expert Jim Schulman, in his renowned ‘Inanely Complex Water Guide’ for Home-Barista, emphasizes that the balance of calcium and magnesium is what determines whether your machine thrives or develops a calcified heart. You really need to know how to tell if your water hardness is damaging your boiler before you see white flakes in your tea water. I personally use a simple drop-test kit every month because municipal water fluctuates more than you’d think. While it’s tempting to use zero-mineral water to avoid the hassle, the truth about using distilled water in your machine is that it can actually leach metal from your boiler and cause your sensors to malfunction.
How do I maintain my espresso setup over time?
Longevity comes down to the things you do when you aren’t actually brewing. Every Sunday, I go through the best routine for a weekend deep clean, which includes scrubbing the group head and soaking the portafilter. But the non-negotiable step is the chemical backflush. If you skip this, old coffee oils turn rancid inside your three-way valve, which is why your machine needs a backflush every single week. I’ve noticed that if I miss even one week, the solenoid starts to stick, leading to that annoying ‘sneeze’ when I pull the portafilter off. Speaking of parts, be gentle with your hardware; why your portafilter handle should never be tightened too far is a lesson in saving your group gasket from premature flattening. A light snug fit is all you need for a perfect seal.
Clean Up Your Workflow with These Pro Hacks
My kitchen used to look like a disaster zone until I realized that a cluttered space leads to a cluttered workflow. I finally took the time to learn how to organize your barista tools in a single drawer using custom foam inserts, and it changed my morning speed significantly. I also recommend checking your seals regularly. If you find your portafilter slipping, you might need to learn how to replace a group gasket without scratching the chrome to keep things tight. Looking ahead, I suspect we are moving toward ‘smart’ maintenance alerts where sensors in the machine will tell us exactly when the scale is reaching a critical level or when a burr needs replacing based on motor torque. For now, we rely on our ears and eyes. I strongly encourage you to try a full chemical backflush this weekend—you will be shocked at the difference in clarity in your next shot. If you find your steam power isn’t what it used to be, you might need to check how to fix a steam wand that has lost its power by clearing out those tiny milk deposits.
The Lessons My Screaming Grinder Taught Me
After years of trial and error, I’ve realized that the metallic scream of a grinder is rarely a death sentence, but always a wake-up call. Here are a few lightbulb moments from my journey that might save your sanity: Tolerance is everything. When you’re aiming for that syrupy espresso texture, you’re playing with microns. A fraction of a turn too far isn’t just a bad shot; it’s a physical collision between expensive components. Listen to the motor, not just the burrs. A subtle change in pitch often precedes a full-blown jam. If you learn to hear the strain, you can save your motor before the internal thermal fuse blows. Finally, cleanliness is quietness. Half the terrifying mechanical noises I used to panic about were actually just compressed coffee rocks vibrating against the housing or the exit chute.
Build Your Ultimate Coffee Countertop
Investing in the right tools is about more than just aesthetics; it’s about creating a repeatable, peaceful workflow. If you’re still hunting for the right hardware, start by selecting the perfect coffee grinder for your brew based on your specific daily volume and bean preference. For those ready to upgrade their entire setup, I recommend looking at the top-rated espresso machines for coffee lovers in 2025 to find a unit that matches your grinder’s capabilities perfectly. Don’t forget that even the best machines need a little help; choosing the best barista gear for coffee enthusiasts, like a simple RDT spray bottle or a high-quality bellows, can significantly reduce maintenance issues like how to stop static from ruining your grinding workflow.
Don’t Let the Learning Curve Stop You
The transition from a casual coffee drinker to a skilled home barista is paved with weird noises, wasted beans, and a fair bit of frustration. It’s easy to feel defeated when your high-end coffee grinders make a sound like a failing transmission, but remember that every noise is a data point in your education. You are learning a craft that combines physics, chemistry, and sensory art. As you continue mastering the art of home espresso tips for beginners, you’ll find that the once-scary noises become familiar signals that help you refine your technique. Keep pushing, keep tasting, and most importantly, keep your burrs spinning before you adjust that dial. Have you ever had a moment where you thought you’d permanently broken your gear because of a terrifying metallic noise? Let me know in the comments below!