The Reason Your Double Ristretto Tastes Like Vinegar
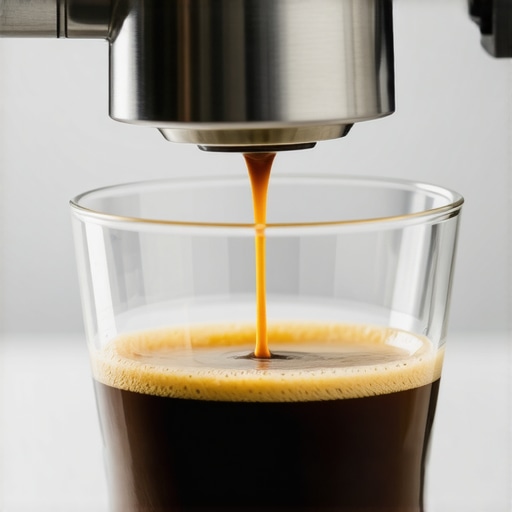
I remember staring at my setup last Tuesday, feeling like a total fraud. I had just pulled what looked like a gorgeous double ristretto—dark, syrupy, and promising. Then I took a sip. My eyes watered. My tongue curled. It did not taste like chocolate or berries; it tasted like straight white vinegar. I almost threw the portafilter through the kitchen window. We have all been there, standing in a beautiful kitchen with a cup of liquid regret, wondering why the gold standard of espresso shots feels like a personal attack on our taste buds. Today, I am going to help you diagnose that sharp, acidic punch so you can finally enjoy the sweetness you were promised.
The Sour Reality of the Double Ristretto
Look, a ristretto is supposed to be the concentrated soul of the bean. But when it goes wrong, it goes aggressively wrong. Usually, it is a simple case of under-extraction. Your water just did not have enough time or heat to pull out the sugars that balance out those bright acids. Sometimes, however, the culprit is even simpler—like why your espresso tastes like vinegar after cleaning. I learned the hard way that a rushed descale can leave behind acidic residues that mimic the worst under-extraction you have ever tasted. If you have recently cleaned your machine and the sourness is overwhelming, start there before you touch your grinder settings.
Is the ristretto actually worth the hype?
Many enthusiasts feel like they have to love the ristretto to be a real barista, but if your palate is being scorched by acetic acid, “better” is the last word you would use. I used to think I just did not have a refined enough taste for it. I was wrong; the shot was just objectively bad. According to research by the Specialty Coffee Association (SCA), the ideal extraction yield is between 18% and 22%, and falling short of that window results in those characteristic sour notes. If you are struggling with consistency, you might want to look into mastering the art of home espresso to get your baselines right first.
Stop Chasing the Wrong Grind Size
My biggest mistake early on was thinking that if the shot was sour, I just needed more coffee. I kept packing the basket tighter and tighter, thinking more mass would fix the flavor. It was a disaster. What I should have been looking at was the trick to finding the true zero point on your grinder. If your grind is even a hair too coarse for a short ristretto pull, the water rushes through too fast, leaving all the sweetness trapped inside the puck. It is a waste of good beans and a miserable way to start the morning. Have you ever pulled a shot that looked like liquid gold but tasted like salad dressing? Leave a comment and let me know I am not the only one who has winced at their own brewing efforts.
Stop Brewing Into Cold Steel
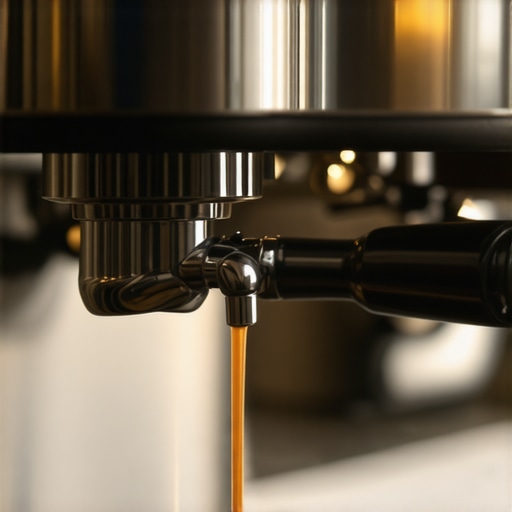
The biggest thief of espresso sweetness isn’t always the grind; it is heat loss. Imagine trying to sear a steak in a lukewarm pan—it just gets gray and rubbery. When you lock a cold portafilter into your group head, it acts like a heat sink, instantly sucking 10 or 15 degrees out of your brew water. That drop in temperature prevents the hot water from dissolving the complex sugars, leaving you with nothing but the early-stage acids. I spent an entire Saturday morning once wasting half a bag of premium Ethiopian Yirgacheffe, wondering why every shot tasted like lemon juice, only to realize I hadn’t let my machine heat up for more than five minutes. Since then, I have sworn by the benefit of pre-warming your portafilter head by running a blank shot through it first. If you are working with an entry-level setup, you can also look into the move for better temperature stability on budget machines to ensure your water stays hot from the boiler to the cup.
Align Your Burrs or Face the Sourness
If your grinder burrs are not perfectly parallel, you are essentially brewing two different coffees at the same time. One side of the burr set produces ‘dust’ (fines) that over-extracts and turns bitter, while the other side produces ‘boulders’ (large chunks) that under-extract and turn sour. In a short ristretto, those boulders dominate the flavor profile. Most people assume their brand-new grinder is perfect out of the box, but learning the right way to align your flat burrs for better shots can be the difference between a muddy mess and a syrupy delight. It is a technical chore, but it is one of those ‘set it and forget it’ upgrades that pays dividends in every single shot you pull.
Don’t Let Channels Ruin Your Ristretto
Because a double ristretto uses a very fine grind and a short water volume, the puck is under immense pressure. If there is even a tiny weak spot in your coffee bed, the water will find it, blast a hole through it, and leave the rest of the coffee dry. This is called channeling, and it is the primary reason for that weird salty-sour finish. I used to think fancy spinny tools were the answer, but why your distribution tool might be ruining your extraction is often due to surface-level grooming that ignores the air pockets at the bottom of the basket. Instead, I have moved toward the move for better espresso distribution without fancy tools, focusing on a deep-bed WDT (using thin needles) to break up clumps before I ever touch a tamper.
Verify Your Pump Is Actually Helping You
Finally, we have to talk about the ‘muscle’ of your machine. If your pump pressure is set too high—say, 11 or 12 bars—it actually compresses the coffee puck so tightly that the water can’t flow through evenly, causing it to find paths of least resistance (more channeling!). Most prosumer machines are factory-set for 9 bars, but it is worth checking. You don’t need a degree in engineering for this; there is the easy way to test your pump pressure at home using a simple blind basket and your machine’s gauge. If that gauge is bouncing or staying stuck at zero, you are fighting a losing battle against physics, not your beans.
Stop Blaming Your Machine for Bad Coffee
Many beginners make the mistake of spending thousands on a shiny Italian espresso machine while settling for a budget blade or small burr grinder. It is the most common “all show and no go” trap in the hobby. If you cannot control the particle distribution with extreme precision, your expensive machine is effectively just a glorified water heater. I have seen enthusiasts get frustrated when their how to select the perfect coffee grinder for your brew decisions were based on chrome and aesthetics rather than burr geometry. The truth is, your grinder is the most critical piece of gear on your counter. Even a professional-grade machine cannot save a shot if the grind size is inconsistent, as the water will simply flow through the gaps, leaving you with that dreaded sourness.
The Dangerous Lure of Pure Water
You might think you are being a hero by using distilled or reverse osmosis water to prevent lime scale buildup. In reality, you are ruining your coffee and potentially killing your machine’s internal components. Distilled water is “ionically hungry”—because it lacks minerals, it actually leaches ions directly from the metal components of your boiler and copper pipes, which can cause pinhole leaks over time. More importantly, coffee requires minerals like magnesium and calcium to “grab” onto the flavor compounds in the beans. Without them, your ristretto will taste hollow, flat, and aggressively sharp. I spent weeks chasing a “sour” ghost until I realized the truth about using distilled water in your machine is that it destroys the very sweetness you are trying to extract.
Does your water chemistry actually change the extraction yield?
According to the groundbreaking research in Water for Coffee by experts Maxwell Colonna-Dashwood and Christopher Hendon, the mineral composition of your water is the primary driver of which specific flavors get pulled from the coffee grounds. High magnesium levels are significantly better at extracting complex, fruity acids, while calcium helps provide the heavy body we love in espresso. If your water is “soft” but lacks the right mineral balance, no amount of puck prep will fix that vinegar taste. This is where how to tell if your water hardness is damaging your boiler becomes a dual-purpose skill: you are protecting your long-term investment while simultaneously perfecting your palate.
Don’t Let Stale Water Corrode Your Routine
Another nuance that many seasoned home baristas overlook is the hygiene of the water reservoir itself. It is easy to just top off the tank every morning, but why you should never leave water in your reservoir overnight becomes clear once you see the microscopic biofilm that develops on the plastic. That slime does not just taste bad; it can eventually interfere with your water level sensors. If you notice why your coffee scale is giving you inconsistent readings or your machine is behaving erratically, check for simple physical interference or buildup first. Also, remember to implement the move that saves your grinder from unnecessary wear by purging a few grams of coffee if your grinder has been sitting unused for more than an hour. Have you ever fallen into the trap of over-cleaning the water but under-cleaning the actual gear? Let me know in the comments.
It is one thing to pull a great shot today, but it is another thing entirely to ensure your machine isn’t a paperweight six months from now. I’ve seen too many beautiful setups end up on eBay for ‘parts only’ because the owner ignored basic hygiene. One of the most overlooked tasks is internal cleanliness. If you aren’t doing it, you need to learn why your machine needs a backflush every single week. It isn’t just about the flavor; it’s about preventing the three-way solenoid valve from seizing up. According to the official La Marzocco Home maintenance guides, mineral buildup and coffee oils are the leading causes of pressure loss and mechanical failure. This is also why I’m a stickler for changing seals before they fail. You can learn how to replace a group gasket without scratching the chrome in about ten minutes, and it saves you the headache of a portafilter that leaks mid-shot.
How do I keep my coffee gear running like new for years?
The secret is a staggered maintenance schedule. I do a light purge every day, but Saturday mornings are for the ‘deep dive.’ This is when I use the best routine for a weekend deep clean to scrub the shower screen and soak my baskets in backflush detergent. If you notice your steamer is acting up, you might need to check for how to fix a steam wand that has lost its power. Don’t wait for the steam to stop entirely; if the pressure feels weak, there is likely a milk blockage or a loose internal pin. I also recommend being proactive with your grinder. Stale grounds hide in the nooks, so knowing how to clean the grinder chute without taking it apart is a lifesaver for daily consistency and prevents that ‘old coffee’ funk from ruining a fresh bag.
As we look at where the home barista world is heading, I predict we are going to see a massive shift toward ‘active’ maintenance sensors integrated into our boilers. We are already seeing top-rated espresso machines for coffee lovers in 2025 that alert you specifically when the flow rate suggests a scale buildup before it actually damages the heating element. Until then, you have to be the sensor. This extends to your choosing the best barista gear for coffee enthusiasts as well. I personally use a high-precision scale and a needle-thin WDT tool every single time. If your numbers look weird, remember why your coffee scale is giving you inconsistent readings—it’s usually just a stray bean under the platform or a low battery, not a ghost in the machine.
The Pro Move for Grinder Longevity
If you want to be a hero to your future self, implement the move that saves your grinder from unnecessary wear. Most people start their grinder with a full hopper already engaged, which puts massive torque on the motor and can lead to premature motor failure. I always start the motor before I drop the beans in, or at the very least, use a bellows to clear the chamber. It sounds like a small detail, but it adds years to the life of your burrs and the motor’s capacitor. If you’re currently struggling with a sour ristretto, my challenge to you is this: take five minutes to learn how to tell if your water hardness is damaging your boiler. If your water is the problem, no amount of expensive gear will save your coffee. Fix the water first, then enjoy the liquid gold you deserve.
Hard-Won Lessons from My Espresso Addiction
After years of wrestling with sour shots, I’ve realized that the most expensive machine in the world can’t fix a lack of patience. I used to rush through my puck prep, thinking those extra thirty seconds didn’t matter, but they are the difference between a drain pour and a masterpiece. Another big shift was learning to trust my tongue over the timer; if a shot pulls in 20 seconds but tastes divine, it’s a winner. Finally, I’ve stopped chasing ‘perfection’ and started chasing ‘enjoyment’—espresso is a hobby, not a performance review.
The Tools I Actually Use Every Morning
If you are looking to upgrade your setup, I highly recommend focusing on choosing the best barista gear for coffee enthusiasts rather than just buying what looks good on Instagram. For those just starting out, mastering the art of home espresso is a journey that requires the right foundational knowledge. If you enjoy milk drinks, finding milk frothers that transform your coffee experience can turn a decent shot into a cafe-quality latte. I personally rely on my high-precision scale and my trusted WDT tool to keep my extractions consistent every single time.
Take the Leap into Better Brewing
Brewing the perfect double ristretto isn’t about being a scientist; it’s about paying attention to the small details that others overlook. From your water chemistry to the warmth of your portafilter, every choice you make shows up in the cup. Don’t let a few sour shots discourage you. Each one is just data helping you get closer to that syrupy, sweet gold. Keep experimenting, keep tasting, and most importantly, keep enjoying the process.
Which of these fixes are you going to try first on your next brew? Let me know in the comments below!