Why Your Hand Grinder is Getting Harder to Turn
I’ll never forget the Tuesday morning my trusty hand grinder decided to stage a protest. I was groggy, reaching for my favorite light roast, and suddenly the crank handle felt like it was stuck in a bucket of cold molasses. I actually checked my arm for a strain before I realized the problem was in the metal, not my muscles. If you’re here, you’re likely feeling that same frustrating ‘catch’ or a heavy, sluggish rotation that makes your morning brew feel like a chore.
That Sudden Resistance Isn’t Just in Your Head
When I first started out, I made the classic rookie mistake of assuming manual grinders were basically maintenance-free. I thought if I didn’t see huge chunks of beans stuck in the burrs, everything was fine. I even spent hours researching how to select the perfect coffee grinder for your brew, thinking maybe I just needed a ‘better’ one. But the truth is, even the most high-end gear will eventually seize up if you don’t treat it right. Today, I’m going to show you exactly why that handle is fighting you and how to get back to that buttery-smooth glide you had on day one. We’re going to look at everything from bean density to the hidden gunk that ruins your leverage.
Did I Buy a Lemon or Is It Actually Broken?
It’s the first thing that crosses your mind when the grinding gets tough: ‘Did the bearings go shot already?’ or ‘Are the burrs dull?’ It’s a valid fear, especially when you’ve invested a decent chunk of change into your kit. You might notice why your manual grinder takes longer for the same beans than it used to, and that’s often the first red flag. But before you start looking for a replacement, realize that 90% of the time, it’s a physics and hygiene issue, not a mechanical failure.
The Invisible Friction Slowing You Down
The most common culprit is something you can barely see: coffee oils. According to the Specialty Coffee Association (SCA), roasted coffee beans can contain up to 15% lipids. These oils are what give your coffee body and flavor, but they are also incredibly sticky. Over weeks of use, they coat the burrs and the axle, acting more like glue than a lubricant. I once ignored a deep clean for three months, and by the end, I was using the move that saves your grinder from unnecessary wear just to get through a single dose. It’s a slow creep—you don’t notice it until you’re practically wrestling with the thing. If you’ve been skipping the internal maintenance, you’re likely dealing with a buildup that even a high-torque handle can’t overcome easily. Have you noticed your grinder getting noticeably louder or stiffer lately? I’d love to hear if you’re experiencing a ‘catch’ at a specific point in the rotation or if it’s just a general heaviness. Let’s dive into the mess-free way to clean a conical burr grinder so we can clear out that gunk without losing your morning to a pile of dust.To get that effortless glide back, you have to treat your grinder like a precision instrument, not a kitchen mallet. Think of the coffee oils as maple syrup on a door hinge; over time, that sweetness turns into a bond that prevents the mechanism from swinging freely. When your grinder starts resisting, the first thing you need to do is a full teardown. I once spent twenty minutes fighting a batch of light-roast beans, only to realize my burrs were so clogged with fine dust and oils that there was no room for the beans to actually fall into the cutting zone. Using the mess-free way to clean a conical burr grinder is the only way to ensure you aren’t just pushing old gunk deeper into the bearings.#IMAGE_PLACE_HOLDER_B#
Scrub Away the Invisible Glue Holding You Back
After you’ve disassembled the unit, look at the edges of the burrs. If they look shiny or feel slick, those are the lipids working against you. Use a stiff-bristled brush to clear the channels. If you hear the reason your grinder makes a thumping noise during use, it’s often a sign that a large chunk of bean is wedged in the adjustment spring or that the axle is slightly out of true. Don’t force it. I remember trying to pry a stuck bean out with a screwdriver once—bad move. I ended up scratching the burr face and had to spend the next hour sanding down a burr.
How to Dial in the Perfect Alignment
Resistance often comes from the burrs not being centered. If one side of the burr is rubbing against the outer ring while the other side has a gap, you’re going to feel a ‘catch’ every rotation. This is where you need the trick to finding the true zero point on your grinder. By finding where the burrs actually touch and backing off from there, you ensure the internal shaft is stable. A wobbly shaft means the beans are being crushed unevenly, which requires more physical force from your arm.
Identify When Your Burrs Have Lost Their Edge
Sometimes, it isn’t the oil or the alignment—it’s the metal itself. Steel burrs are tough, but they aren’t immortal. If you’ve been grinding daily for two years, it might be time to learn how to tell if your espresso grinder burrs are dull. Dull burrs don’t slice; they mash. Mashing coffee takes significantly more energy than cutting it. When I replaced the burrs on my old travel grinder, the difference was like switching from cutting a steak with a butter knife to a scalpel.
Master the Physics of the Crank
Your body position matters more than you think. If you’re holding the grinder at chest height, you’re using your biceps. If you tuck it against your hip or hold it lower, you can use your lats and shoulders, which are much stronger. This is the move that saves your grinder from unnecessary wear because it keeps the pressure vertical rather than pulling the axle to the side. I used to stand over my counter and lean into the grind, which kept my wrists from straining during those tough light-roast sessions.Most enthusiasts believe that the moment they unbox a high-end grinder, they’ve achieved peak consistency. I’m here to tell you that’s a total myth. Brand new steel burrs actually have microscopic burrs and sharp edges that produce wildly inconsistent particle sizes until they’ve been ‘broken in.’ You need to learn how to properly season new steel burrs for better consistency before you can trust your dial-in. I’ve seen people return perfectly good equipment simply because they didn’t realize they needed to run a few pounds of ‘sacrifice’ beans through the system first to smooth out those factory edges. Let’s dig deeper into the physics of why your morning routine often feels like a moving target.
Why Does My Grind Setting Change Every Single Morning?
It’s the ultimate frustration: you find the sweet spot on Monday, but on Tuesday, the shot runs ten seconds faster. While many blame their gear, the culprit is often hygroscopy. Coffee beans are porous and absorb moisture from the air, changing how they shatter under the burrs. This is why your shot extraction time changes every single day regardless of how expensive your setup is. In a 2020 study published in the journal Matter, researcher Christopher Hendon found that inconsistent ‘fines’ production can create channels that ruin a shot, even when the average grind size seems correct. To combat this, precision is key, but so is understanding why the first shot of the day is always a throwaway—stale grinds sitting in the chute will always throw off your first extraction regardless of your grinder’s price tag. #IMAGE_PLACE_HOLDER_C#
Stop Killing Your Gaskets with Excessive Force
One of the biggest traps I see home baristas fall into—and I was guilty of this for years—is the ‘tighter is better’ philosophy with the portafilter. You think you’re preventing leaks, but you’re actually destroying the longevity of your machine. Understanding why your portafilter handle should never be tightened too far is crucial for maintaining the group gasket. Over-tightening compresses the rubber until it cracks, leading to those annoying leaks that spray hot water everywhere. Instead of using brute force, focus on the move for better temperature stability on budget machines by pre-heating your gear properly. This allows the metals to expand naturally, creating a better seal without the need for a workout. Have you ever fallen into this trap of cranking the handle as hard as you can? Let me know in the comments.While we often obsess over the geometry of burrs and the aesthetics of portafilter handles, the real silent killer of any high-end setup is something you can’t even see: mineral buildup. If you aren’t proactive, your shiny investment will eventually look like a limestone cave on the inside. I learned this the hard way after pulling apart a three-year-old boiler and finding a literal rock garden. This is why you absolutely must find the easy way to test your machines water hardness at home before you ever pull your first shot. It isn’t just about flavor; it’s about preventing that dreaded scale from clogging your internal flow. Jim Schulman, a legendary figure in the home barista community known for his exhaustive espresso technical guides, often emphasizes that water chemistry is the most overlooked variable in machine longevity. According to the SCA Water Quality Handbook, aiming for a total dissolved solids (TDS) count around 150 mg/L is the gold standard for protecting your heating elements while maximizing extraction. 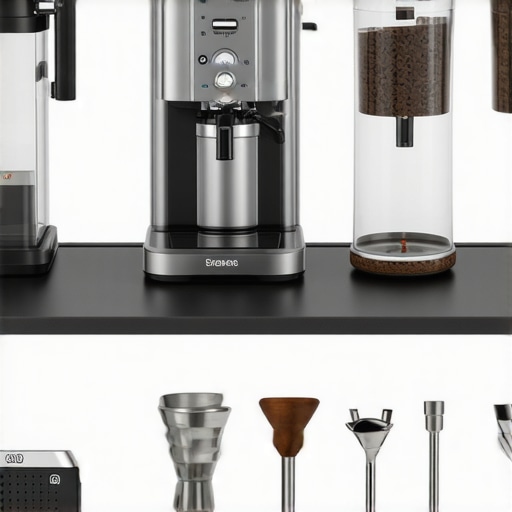
How can I make my espresso equipment last a decade?
It really comes down to establishing a rhythm rather than reacting to problems. You can’t just wait for the steam to sputter before you act. I swear by a specific maintenance cadence: a daily wipe-down, a mid-week group head scrub, and understanding why your machine needs a backflush every single week to keep the three-way solenoid valve from sticking. If you neglect that backflush, old coffee oils go rancid inside the group head, tainting every single shot you pull with a bitter, metallic aftertaste. For those of you with prosumer setups, you might even consider the best routine for a weekend deep clean to stay ahead of the hidden gunk.
The Boring Gear That Actually Changes the Game
I’ve spent a small fortune on gadgets over the years, but choosing the best barista gear for coffee enthusiasts often means investing in the ‘boring’ infrastructure—like a high-quality water filtration system. If you are tired of refilling a tiny tank every morning, it might be time to look into how to build a custom water reservoir for a plumbed-in machine. Looking toward the future, I predict we will soon see grinders with integrated acoustic sensors that can detect the specific frequency of burr wear in real-time, moving us away from the ‘guess-and-check’ method of maintenance. My challenge for you this week is to finally find the trick to finding the true zero point on your grinder. Calibrating your equipment to its absolute physical limit will give you a level of control over your shots that you’ve never experienced before.
Hard Truths I Learned While Fighting My Grinder
Many enthusiasts believe that a high-end grinder is a ‘set and forget’ tool, but the reality is that its performance degrades so slowly you won’t even notice it. One of the biggest lightbulb moments I had was realizing that silence is actually a warning sign. If your manual grinder suddenly feels quiet or smooth but produces very little output, it’s not working better; the burrs are likely packed with ‘fines’ and oils that prevent the beans from entering the cutting zone. Even as you are mastering the art of home espresso tips for beginners, you must learn to listen to the physical feedback of your gear. Another lesson? Don’t force the handle. If you feel a hard stop, backing up the rotation and shaking the unit is better than risking a snapped axle pin.
Tools That Make Maintenance Less of a Chore
Maintaining your setup shouldn’t feel like a deep-cleaning day at the car wash. When you are choosing the best barista gear for coffee enthusiasts, invest in a dedicated maintenance kit. I personally swear by a simple stiff-bristled nylon brush and a high-quality silicone surface. It is also vital to know how to pick a coffee mat that doesnt absorb odors to ensure your workspace stays fresh and free of rancid oil scents. Additionally, I recommend periodically learning how to get the old coffee smell out of your hopper, as those trapped scents can actually alter the perceived flavor profile of your most expensive specialty beans.
Start Loving Your Morning Grind Again
Your coffee journey is meant to be a rewarding ritual, not a physical struggle against stubborn machinery. By taking just five to ten minutes a week to inspect and clear your burrs, you ensure that every cup is as vibrant and clear as possible. Whether you are browsing top rated espresso machines for coffee lovers in 2025 or perfecting your technique on a vintage hand-crank, treating your coffee grinder with respect pays off in every single extraction. What is the most frustrating ‘stuck’ moment you have ever experienced with your coffee gear? Let me know in the comments below!