Why your portafilter handle should never be tightened too far
I used to think that brewing espresso was a feat of strength. Every morning, I’d lock in my portafilter with the intensity of a weightlifter going for a PR. I was convinced that if I didn’t tighten it until the handle pointed straight at the wall, hot water would come screaming out of the group head. I learned the hard way that this “gorilla grip” approach is the fastest way to ruin a perfectly good morning and an expensive piece of barista gear. One Tuesday, after months of over-tightening, I heard a sickening crunch. My group gasket hadn’t just worn out; it had practically fused into the metal. It was a mess that cost me two hours of scraping rubber bits out of my group head when I should have been enjoying a latte.
Stop Treating Your Espresso Machine Like a Lug Nut
Most of us start our home coffee journey with top-rated espresso machines and a healthy dose of anxiety. We worry about leaks, pressure, and whether our coffee grinder is dialed in. But that anxiety often manifests in our hands. We tighten things until they won’t budge, thinking we are “sealing” the system. In reality, you only need to tighten the handle until it makes a firm seal—usually around the 6 o’clock position. Pushing it further doesn’t actually make it more “sealed”; it just crushes the life out of the rubber. Experts at La Marzocco often point out that gaskets are consumables designed to create a seal with minimal compression, and excessive force actually deforms the group head’s internal components over time.
Will My Kitchen End Up Covered in Coffee if I Don’t Crank It?
This is the big fear, right? You imagine the portafilter flying off like a projectile. I’ve been there. When I was first mastering the art of home espresso, I was terrified of “portafilter sneeze.” But here is the secret: the pressure from the pump actually helps the gasket expand and seal against the basket. You don’t need to do all the work yourself. If you are worried about a mess, it is much better to learn how to check if your portafilter gasket is actually sealed through gentle testing rather than brute force. Have you ever felt like you needed a wrench just to get your coffee started in the morning? If so, you’re likely doing more damage than you realize. I’m going to show you how to find that “sweet spot” where your machine stays healthy and your shots stay clean.
Finding the Sweet Spot for Your Portafilter Seal
To get this right, you need to treat the group head like a delicate instrument rather than a rusty pipe. I recommend the “Two-Finger Rule” for all your daily brewing. When you slide your portafilter in, use only your index and middle finger to pull the handle toward the center. Once you feel it snug up against the rubber, stop immediately. On most top-rated espresso machines, this happens exactly at the 6 o’clock position—directly facing you. If you go past this point regularly, you are shortening the lifespan of your machine’s internals and causing premature wear on the metal ears of the portafilter itself. 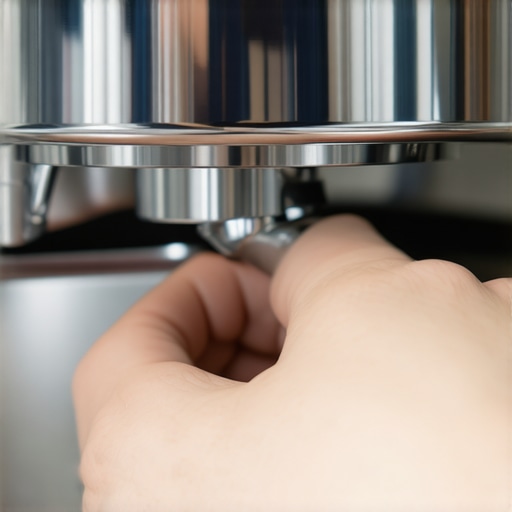
Stop Moving When You Feel the First Resistance
I remember a Saturday morning when I was rushing to make three cappuccinos for houseguests. I was so worried about a leak that I jammed the portafilter in past the 7 o’clock mark with every ounce of my weight. By the third drink, the metal group head had expanded from the heat, and that portafilter was effectively welded shut. My guests ended up drinking cold milk while I sat there with a bag of frozen peas pressed against the machine, trying to get the metal to shrink enough to release the handle. It was embarrassing, and it completely ruined the flow of my home espresso session. This taught me that the “seal” happens long before the handle stops moving.
How Physics Saves Your Gasket From Your Strength
Think of the gasket like a tubeless tire on a bicycle. It doesn’t need to be crushed into the rim to hold air; it just needs to be properly seated. When the pump engages—and if you notice your espresso machine pump runs non-stop or struggles, this is even more critical—the internal water pressure actually pushes the basket rim up into the rubber. This creates a dynamic, self-strengthening seal. If you’ve already crushed the gasket flat by over-tightening, the rubber loses its “memory” and elasticity, meaning it can’t expand or bounce back to meet the metal basket. You are actually making a leak more likely in the long run by trying to prevent one with brute force.
Clean the Rim Every Single Time
One reason people feel the need to over-tighten is because they hear a slight hiss or see a drip during the shot. Often, this isn’t a loose portafilter; it’s a dirty one. A single grain of coffee on the rim of the basket acts like a tiny pebble in a window seal, creating a microscopic gap. Instead of cranking the handle harder to crush that grain, get into the habit of wiping the rim with your palm or a dry cloth before locking it in. This small bit of barista gear maintenance prevents the “phantom leak” that leads to destructive over-tightening.
How to Spot a Gasket That Has Given Up the Ghost
If you find yourself needing to pull the handle further and further to the left just to stop a leak, your gasket is dead. It has likely become as hard as a hockey puck. This is when you need to learn how to check if your portafilter gasket is actually sealed versus just being jammed by friction. You should also keep an eye on whether your machine is discharging too much water into the drip tray, as internal seal failures often go hand-in-hand with group head gasket wear. Regular maintenance, like a backflush every single week, helps keep the rubber supple by removing caustic coffee oils. Also, don’t overlook the benefit of pre-warming your portafilter head; a warm gasket is a flexible gasket that seals with much less effort than a cold one.Now that you have mastered the ‘Two-Finger Rule’ for your portafilter, let’s dig deeper into the invisible forces that often ruin a morning brew. A common belief among home baristas is that if a shot is running too fast, you simply need to lean into your tamper with more weight. I used to think I could compensate for a budget coffee grinder by tamping like a heavyweight boxer. However, here is the contrarian truth: once the air is squeezed out of the puck—usually around 15 to 20 pounds of pressure—the coffee is as compressed as it is ever going to be. Research by the Specialty Coffee Association (SCA) has long suggested that consistency matters far more than the total weight applied. If you are still using a flimsy tool, you might find that your plastic tamper is making your espresso sour because it flexes during the press, creating an uneven surface that invites channeling regardless of how hard you push. 
Why Does My Shot Extraction Time Change Every Single Day?
This is the question that haunts every enthusiast who has just invested in top-rated espresso machines. You didn’t change the grind or the dose, yet today’s shot is five seconds faster than yesterday’s. Before you go tightening your portafilter until the gasket screams, realize that why your shot extraction time changes every single day often comes down to ambient humidity and bean degassing rather than your physical strength. Trying to ‘tighten’ your way out of a flow rate issue is a dangerous trap that leads to snapped handles and prematurely worn brass. Another nuance people miss is the ‘Distribution Trap.’ We see those spinning levelers everywhere in barista gear catalogs, but why your distribution tool might be ruining your extraction is a real concern. These tools often only level the very top layer, leaving a ‘cliff’ of uncompressed coffee underneath that high-pressure water will quickly exploit. It is a classic case of looking professional while actually sabotaging your internal puck structure.
The Hidden Bake That Kills Your Gaskets
Here is the ‘oops’ factor most people never consider: leaving your portafilter locked into the group head all day long while the machine is powered on. Yes, it keeps the metal warm, but it effectively ‘bakes’ your rubber gasket into a brittle, useless hockey puck. When you combine this with the danger of leaving old coffee oils in your portafilter spouts, you are creating a sticky, acidic environment that eats away at your seals. When you are done brewing for the morning, take the handle out, wipe it, and let the group head breathe. Have you ever fallen into the trap of thinking more force was the answer to a bad shot? Let me know in the comments; I’ve definitely been there. Often, checking how to tell if your espresso grinder burrs are dull is a much better use of your time than trying to muscle your way to better crema.Beyond just not cranking your handle too hard, there is a level of maintenance that separates the enthusiasts from the ‘once-a-year’ repair shop visitors. I used to be terrified of opening my machine, but once you realize that most top-rated espresso machines are just a collection of tubes, wires, and seals, the mystery fades. The biggest killer of these machines isn’t usage; it’s neglect. For instance, if you’ve noticed a drop in steam pressure, you really need to look into how to fix a steam wand that has lost its power before the internal scale buildup becomes permanent. I personally make it a habit to purge the wand for a full five seconds after every single latte, even if I’m using high-quality milk frothers that transform your coffee experience for my backup drinks.
Why Seasoning Your Burrs is the Secret to Consistency
If you just bought a new coffee grinder, do not expect it to perform perfectly on day one. Most professional baristas know that you need to learn how to properly season new steel burrs for better consistency by running several pounds of cheap beans through them. This dulls the ‘micro-teeth’ left over from the manufacturing process, which otherwise create too many fines and cause those frustratingly erratic shots. It is the move that saves your grinder from unnecessary wear and finally stops you from chasing your tail every morning trying to dial in the same bag of beans. 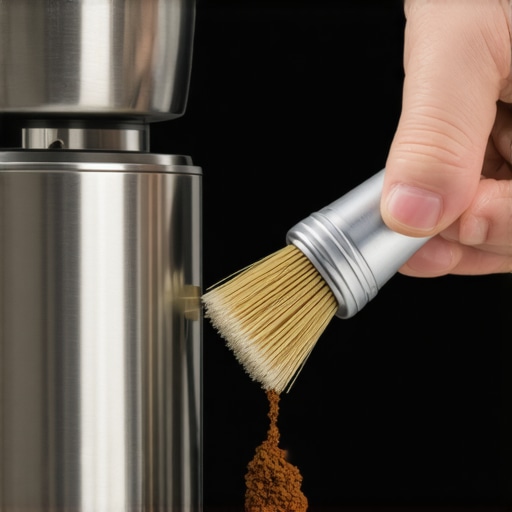
How Do I Keep My Espresso Setup Working Long Term?
The short answer is water quality. According to technical documentation from La Marzocco, over 70% of espresso machine repairs are directly related to scale damage from hard water. If you want your gear to last a decade, you must find the easy way to test your machines water hardness at home. Don’t wait for a failure to act. I have seen so many people deal with the nightmare of how to recover from a failed descaling process because they let the minerals get so thick that the chemicals couldn’t even penetrate the layers. Maintenance is about small, boring wins—like knowing how to clean the grinder chute without taking it apart to prevent rancid oil buildup from ruining your fresh home espresso.
The Future of High-End Home Brewing
Looking ahead, I predict that ‘smart’ maintenance will become the standard. We are already seeing machines that can detect gasket elasticity and mineral saturation in real-time. Until then, you are the sensor. The next time you sit down to upgrade your barista gear, prioritize a water filtration pitcher over a fancy new tamper. My challenge for you this week: perform a deep-clean on your grinder and test your tap water hardness. You might be surprised at how much ‘hidden’ flavor you’ve been missing.
The Hardest Lessons I Learned While Breaking My First Espresso Machine
After years of wrestling with group heads, I realized that the perfect shot doesn’t come from muscle—it comes from finesse. Here are a few lightbulb moments that changed my workflow forever:
- Heat changes the rules: Metal expands when it gets hot. If you lock your portafilter in tight while the machine is cold, it will be twice as hard to remove once the group head reaches brewing temperature.
- Gaskets have a memory: Once you crush a gasket by over-tightening, it stays crushed. A fresh seal should feel bouncy, not like you’re grinding metal on metal.
- The leaking truth: Most leaks are caused by a stray coffee ground on the rim, not a loose handle. I used to think the move for better espresso distribution without fancy tools was just about the flavor, but it also keeps your basket rim clean for a better seal.
My Personal Toolkit for a Long-Lasting Setup
Beyond the basics, I rely on a few specific resources to keep my gear in peak condition. First, I always keep a food-grade lubricant on hand to learn how to properly lubricate your e61 group head cam, which prevents that gritty feeling when you lift the lever. I also highly recommend the SCA Barista Manual; it is the absolute bible of coffee science that explains why pressure and seals behave the way they do. Finally, never underestimate a simple pack of test strips—preventing scale is the only way to avoid finding out why your espresso machine is tripping the breaker due to an internal leak or short. Even if you use milk frothers that transform your coffee experience for smaller drinks, the health of your main boiler depends on that water quality.
Stop Fighting Your Gear and Start Enjoying the Ritual
At the end of the day, your top-rated espresso machines are precision instruments, not lawnmowers. When you stop treating the portafilter like a lug nut, you will notice that your shots become more consistent and your maintenance routine becomes much less stressful. You will no longer have to worry about why your espresso shot tastes like paper or metal because you are not shaving off bits of the machine into your cup. Embrace the gentle touch, and your machine will reward you with decades of incredible coffee. Have you ever accidentally jammed your portafilter so tight it felt like it was part of the machine? Tell me your gorilla grip stories in the comments below!