Why Your Espresso Shot Tastes Like Plastic After a Long Storage
I stood there, bleary-eyed after a two-week business trip, listening to the familiar hum of my machine. I had been dreaming of this specific double shot since I landed. The crema looked perfect, but the first sip was a disaster. It didn’t taste like my favorite medium-roast Ethiopian; it tasted like a melted Lego set. That chemical, artificial tang was so overwhelming I had to spit it out. It was a classic case of storage-induced funk.
That Horrible Chemical Aftertaste Is More Common Than You Think
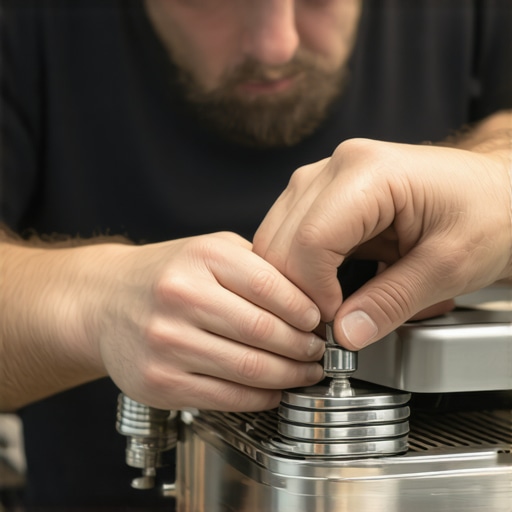
If you have ever left your top rated espresso machines sitting idle for more than a few days, you might have encountered this. Most of us assume that if we turn the power off, the machine is just ‘sleeping.’ But inside, things are happening. Water is sitting in plastic reservoirs, silicone tubing, and copper boilers. When I first started mastering the art of home espresso, I made the huge mistake of thinking a single flush would clear it out. I wasted a pound of expensive beans trying to ‘mask’ the flavor before realizing the problem was deeper than the roast. [image-placeholder] We are going to fix this today. I will show you how to purge your system properly and why your espresso tastes like burnt rubber or plastic after a long break. It isn’t just about ‘cleaning’—it’s about refreshing the entire internal ecosystem of your gear.
Is My Machine Leaching Harmful Chemicals Into My Coffee?
This is the big one that keeps people up at night. While most modern machines use food-grade plastics, stagnant water is an incredibly effective solvent. According to research published by the National Center for Biotechnology Information, temperature fluctuations can actually accelerate the leaching of compounds from plastic containers into water. When your machine sits in a hot kitchen for two weeks, that water is basically marinating in the plastic lines. It’s not just in your head; it’s science. Have you ever fired up your machine after a holiday and felt like you were drinking from a garden hose? I know I have, and honestly, it’s heartbreaking when you’ve spent so much time choosing the best barista gear. But don’t worry, your machine isn’t broken. You just need to know the right way to wake it up.
Dump that stagnant reservoir water immediately
The very first step is the most obvious, but often the most poorly executed. You cannot just ‘top off’ the tank. That water has been sitting in a plastic or acrylic container for days, absorbing every molecular bit of ‘new car smell’ the material has to offer. I remember when I first moved into my current house, I left my top rated espresso machines sitting for three weeks. I thought a quick rinse was enough. The resulting latte tasted like I was chewing on a pool noodle. Now, I empty the reservoir entirely and scrub the interior walls with a soft microfiber cloth. This breaks up any biofilm or slime that starts to form in the corners—stuff you can’t always see but can definitely taste. Fill it with fresh, filtered water only after the tank feels ‘squeaky’ clean to the touch.
Force a full cycle through the internal plumbing
Once your tank is fresh, you need to address the water trapped inside the machine’s ‘veins.’ If you are mastering the art of home espresso, you must realize that a single 2-ounce shot only clears the very tip of the system. To truly refresh the internals, you need to move a significant volume of water. Think of it like a garden hose that has been sitting in the sun; the first few gallons are hot and taste like rubber. You want to run the pump for at least 30 to 45 seconds continuously. If you have a machine with a large boiler, you should consult the easy way to check if your boiler is actually empty to ensure you are cycling enough volume to replace the old, flat water with fresh, oxygenated water. For those with more complex setups, the secret to getting consistent shots on a dual boiler often starts with ensuring both the brew and steam boilers have been fully cycled after a period of dormancy.
Blast the steam wand to clear trapped condensation
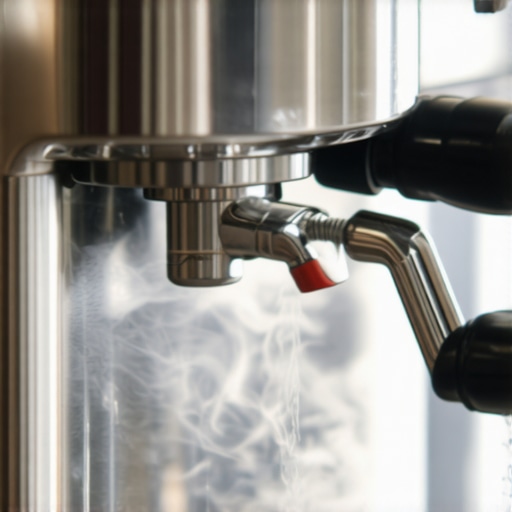
The steam wand is a notorious hiding spot for ‘funk.’ When a machine cools down, the steam inside the wand condenses back into liquid water. This water sits in the copper or stainless steel pipe, reacting with the metal and any microscopic milk residue. Before you even think about frothing, you need to open that valve wide. Use the best way to purge your steam wand without getting burned by pointing it into a driptray or a dedicated waste pitcher. Let it blast for a full 10 seconds until the ‘spitting’ stops and you see a dry, consistent plume of steam. If the smell of plastic persists, you might need to look into how to remove scale from a heat-exchanger without a teardown, as scale can trap those nasty odors deep within the machine’s thermal blocks.
Give the shower screen a deep scrub
Finally, the chemical taste isn’t always from the water; sometimes it is old, rancid coffee oils that have oxidized while you were away. These oils turn into a sticky, varnish-like substance on your shower screen. I once spent an hour flushing my boiler only to realize my espresso tastes like burnt rubber because of the gunk behind the screen. Take a group head brush and some hot water to scrub the screen vigorously. If the machine has been off for more than a week, I highly recommend using the best way to descale a boiler without using harsh vinegar to ensure the entire pathway from the tank to the cup is chemically neutral and ready for your best beans.
Stop blaming the beans for your grinder’s hidden mess
While most enthusiasts focus on the water in the boiler, they often forget that the grinder is the true gatekeeper of flavor. A common myth among home baristas is that if you pour fresh beans into the hopper, you are getting fresh grounds in the basket. In reality, why your coffee grinder retains more grounds than it should is often down to static and oils that trap several grams of ‘yesterday’s coffee’ in the chute. If your machine has been sitting for weeks, those trapped grounds are now rancid. When I first started how to select the perfect coffee grinder for your brew, I didn’t realize that the first two shots of the day were actually a blend of fresh beans and stale dust from the previous month. This is the ultimate ‘flavor ghost’ that no amount of boiler flushing can fix.
The dangerous rice cleaning myth
I have seen many people try to ‘scrub’ their burrs after a long break using dry rice. This is a massive mistake that can lead to permanent damage. The starch in rice is much harder than coffee beans and can put immense strain on the motor or even dull the burr edges. You should understand why you should never use rice to clean your high end grinder and instead opt for dedicated cleaning tablets that are designed to expand and absorb oils without taxing the internal mechanics. Have you ever fallen into this trap? Let me know in the comments.
Could your ultra-filtered water be killing your extraction?
There is a sophisticated trap that many choosing the best barista gear fall into: over-filtering. We are told that scale is the enemy, so we use Zero-Water or distilled water to protect our boilers. However, the Specialty Coffee Association (SCA) standards indicate that water needs a specific mineral content (around 150 mg/L) to actually pull flavor out of the bean. If your water is ‘too clean,’ it becomes aggressively hungry for minerals, leading to a flat, metallic-tasting shot. It is worth learning how to tell if your water is too soft for brewing because ‘pure’ water can actually cause more corrosion in copper boilers than water with a moderate mineral balance.
Don’t let the ‘clean’ look of your frother fool you
Finally, if you use standalone milk frothers that transform your coffee experience, be wary of the magnetic drive. After a period of dormancy, any microscopic milk proteins left under the whisk can act like a glue. This often results in a motor that hums but won’t turn. Before you assume it is broken, check how to fix a milk frother that wont spin by ensuring the mechanical path is completely free of dried residue. Bringing a machine back to life is about more than just electricity and water; it is about respecting the chemistry of the entire system.
Fix the hidden tilt in your grinder for better shots
I spent years chasing the ‘perfect’ grind setting, only to find out my burrs weren’t actually parallel. This is more common than you’d think, even in expensive gear. I personally use the tinfoil shim move for perfectly aligned grinders because it costs virtually nothing and fixes the micro-variations that cause bitter notes. When your burrs are misaligned, they produce a mix of fine dust and large chunks. The dust over-extracts, while the chunks under-extract. By aligning them, you ensure every particle is the same size, which is the real secret to that syrupy mouthfeel.
How can I keep my barista gear running like new for a decade?
Consistency in maintenance is the only answer. You shouldn’t wait for something to break; you should be listening for changes in the pump’s pitch or noticing why your espresso machine takes longer to heat up lately. I keep a log of my descale cycles. If you notice the heat-up time creeping from 15 minutes to 20, your heating element is likely fighting through a layer of rock. You need to learn how to tell if your machine boiler is accumulating lime scale before the scale blocks your solenoid valve entirely.
Your filter basket is likely sabotaging your extraction
Most people use the stock basket that came with their machine, but those are often made with wide tolerances. According to the VST Precision Filter Basket Technical Specification, even microscopic deviations in hole size can cause massive pressure imbalances. This is why I always suggest checking how to tell if your basket is too large for your dose. A precision basket ensures that the water flows through the puck at a uniform rate. If you find your shots are always sour on one side, it might not be your tamping—it might be the basket itself.
Clean your grinder without the teardown drama
I used to take my entire grinder apart every Saturday, which was a nightmare for keeping my settings. Now, I’ve found the best way to clean a grinder without taking it apart by using a vacuum and specific cleaning tablets. It saves my burr alignment and keeps the coffee tasting bright. I predict that in the next few years, we will see ‘self-calibrating’ grinders that use AI to detect burr wear and automatically adjust the zero-point. Until then, manual vigilance is our best tool. If you want to see an immediate improvement in your morning routine, I strongly encourage you to try the tinfoil alignment trick this weekend—it is the single most impactful ‘free’ upgrade you can give your palate.
Hard Lessons I Learned While Reviving My Dormant Setup
It took me years to realize that if I do not purge the system thoroughly after a break, I am essentially drinking ‘boiler soup.’ One painful discovery was that the dish soap mistake that ruined your group head seal is a real threat when you are in a rush to scrub away the funk; never use standard detergents on rubber components. I also learned the hard way that if you use a super-automatic, why you should never use oily beans in a super automatic becomes crystal clear after a vacation; those oils oxidize and turn into a sticky adhesive that ruins your first batch of coffee. Finally, pay attention to the flow after you turn the machine back on; if you notice how to fix the annoying drip after your espresso shot stops, it usually means your three-way solenoid valve is partially blocked by the very scale you tried to flush out.
My Go-To Kit for a Flawless Morning Brew
To keep my workflow smooth and my shots tasting like a professional cafe, I swear by a few specific tools. First, a precision scale is non-negotiable for mastering the art of home espresso because you cannot manage what you do not measure. Second, I keep Third Wave Water packets in my pantry to ensure my mineral balance is always at the SCA standard, preventing that flat, metallic taste. Third, I highly recommend a dedicated group head brush with stiff nylon bristles to reach the deep crevices of the gasket. [image-placeholder]
Your Path to Barista-Level Results Starts Now
Investing fifteen minutes into refreshing your gear after a long absence is not just maintenance; it is a ritual that honors the quality of your beans. Whether you are operating entry-level gear or the latest top rated espresso machines, the intentionality you bring to your setup will always be reflected in the clarity of the cup. Don’t be afraid to get your hands a little dirty and purge those lines thoroughly. The first sweet, syrupy shot you pull after a successful refresh will prove that the effort was worth every second. Have you ever found a strange chemical smell in your machine after a long vacation? Let me know what worked for you in the comments below!