The Best Angle for Tamping to Avoid Wrist Strain
I remember the morning my wrist finally gave out. It wasn’t a sudden snap, but a dull, throbbing ache that made even holding my favorite ceramic mug feel like a heavy chore. I’d been tamping with a straight arm and a locked wrist for months, thinking that brute force was the only way to get that rich, syrupy extraction I craved. I was wrong. I was actually just speedrunning a doctor’s appointment for repetitive strain injury. If you’ve felt that twinge in your joint after pulling a few shots for the family, you aren’t alone. We treat our top-rated espresso machines like royalty, yet we often treat our own bodies like an afterthought in the process. Today, I’m going to show you how a simple shift in your elbow and wrist alignment can save your barista career before it even really starts.
[IMAGE_PLACEHOLDER]
Your Wrist Should Not Be a Shock Absorber
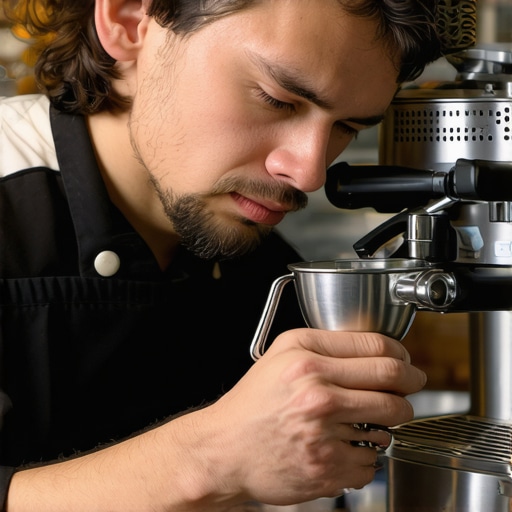
When I first started mastering the art of home espresso, I made the classic mistake of tamping with my elbow tucked into my side. I thought I was being stable. In reality, I was forcing my wrist to do all the heavy lifting at a weird, jagged angle. It’s a common blunder, especially when you’re still figuring out your barista gear. Most people don’t realize that the power should come from your shoulder and your core, not your thumb and forearm. According to the Chartered Institute of Ergonomics and Human Factors, repetitive motions performed with a bent wrist significantly increase the risk of carpal tunnel syndrome. It’s why the simple hack for a more ergonomic tamping position usually involves adjusting the height of your counter rather than just buying a new tamper. Have you ever noticed a sharp pain after a morning of back-to-back shots? Tell me about it in the comments, because I’ve likely been there too.
Is ergonomic tamping actually worth the hype?
You might be thinking that all this talk about angles is just another way for coffee snobs to overcomplicate a simple drink. I used to be a skeptic myself. I figured that as long as the puck was flat, the technique didn’t matter. But here’s the truth: your technique affects your consistency. If your wrist is hurting, you’re going to subconsciously rush the tamp or apply uneven pressure. That leads to the dreaded uneven extraction, where your espresso shot extracts from only the edges. Getting your elbow to a 90-degree angle isn’t just about comfort; it’s about making sure every shot you pull tastes as good as the last one without needing a physical therapy session afterward. By aligning your joints correctly, you distribute the 30 pounds of pressure required through your skeletal structure rather than relying on small, fragile ligaments.
Find the right height before you press
I learned the hard way that a standard 36-inch kitchen counter is actually a terrible place for tamping if you’re under six feet tall. When I first got into mastering the art of home espresso, I was constantly fighting my portafilter. I’d try to press down, but because the counter was too high, my elbow would flare out like a chicken wing. This forced my wrist into a sharp ‘U’ shape. I didn’t realize that the move for better espresso without buying a new machine is often as simple as finding a lower surface or using a tamping station that drops the height by an inch or two. If your elbow is higher than your shoulder when you’re tamping, you’re asking for a tendon flare-up. Think of it like trying to do a push-up with your hands near your ears—it’s inefficient and it hurts.
#IMAGE_PLACE_HOLDER_B#
Check your grip like you are opening a door
Stop gripping your tamper like a baseball bat. When you wrap your whole hand around the handle and squeeze, you lose all finesse. Instead, try the ‘door knob’ or ‘flashlight’ grip. Rest the handle in the palm of your hand and use your thumb and index finger to feel the rim of the basket. This sensory feedback is crucial. I once spent a week wondering why my shots were channeling until I realized I was tilting the tamper slightly to the left because I couldn’t feel the edges. Once you can feel the basket, you can ensure the puck is perfectly flat, which helps how to prevent channelling in a bottomless portafilter shot effectively. This grip also keeps your wrist in a neutral, straight line, much like how you’d hold a screwdriver to apply steady pressure.
Shift the weight from your wrist to your shoulder
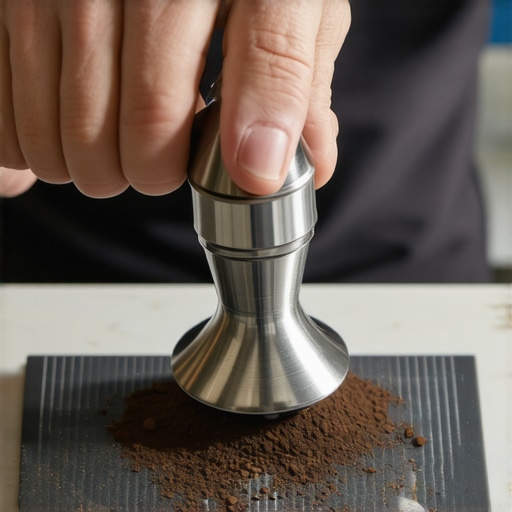
The most important mechanical change I made was treating my arm like a piston. Imagine your arm is a rigid, mechanical part of the machine. Your wrist and elbow should be locked in a straight vertical line from the tamper all the way up to your shoulder. Instead of using your muscles to push down, simply lean your body weight over the portafilter. When I started doing this, I stopped having to ‘muscle’ the tamp. This vertical alignment ensures that the pressure is even across the entire coffee bed. If you find that your portafilter won’t stay level on the counter, use a tamping mat to stabilize it. This prevents the basket from rocking, which is a leading cause of uneven density in the puck.
Match your tools to your physical needs
Not every tamper is built for every hand. When you are choosing the best barista gear, pay attention to the handle height. If you have large hands, a short ‘palm’ tamper might force your fingers into a cramped position. Conversely, if you have smaller hands, a tall handle can make it harder to keep your wrist straight. I remember switching from a cheap plastic included tamper to a weighted stainless steel one and the difference was night and day. It wasn’t just about the weight; it was about the ergonomics. You might even need to decide how to choose between a flat and a rippled tamper base to see which helps you feel the seal better. The goal is to make the tool an extension of your arm, not a foreign object you’re fighting against every morning.
The most persistent myth I see in the home coffee community is the obsession with hitting exactly 30 pounds of pressure. We’ve been told for decades that this is the magic number for the perfect shot. But here’s the contrarian truth: once you’ve reached the point of maximum density—where the air is pushed out and the grounds are fully compressed—any extra force is just a waste of energy and a recipe for a sore shoulder. According to research published by the Specialty Coffee Association (SCA), coffee grounds reach full compression relatively quickly under vertical load. Pushing harder doesn’t make the puck tighter; it just strains your ligaments and increases the risk of repetitive motion injuries. I used to practically stand on my tamper, thinking I was getting a better shot, but I was actually just making it harder for my water to flow evenly by stressing my own body. Have you ever fallen into this trap? Let me know in the comments.
Does a rippled base actually improve your extraction?
When you are choosing the best barista gear, you’ll eventually face the debate over tamper bases. Many pros swear by a flat base for simplicity, but there is a nuanced argument for ripples. You might be trying to decide how to choose between a flat and a rippled tamper base to solve your persistent channeling issues. The theory is that the ripples increase the surface area of the puck, which can theoretically help with water distribution. However, if your technique is flawed, a fancy base won’t save you. In my experience, the biggest ‘oops’ moment happens not during the press, but during the removal. If you pull your tamper out too quickly, you create a suction effect. This is why learning how to stop your tamper from vacuum-sealing the coffee puck is a game-changer. That tiny suction can lift the edges of the coffee bed, creating a path for water to bypass the coffee entirely.
Fix the clumps before you reach for the tamper
No amount of ergonomic perfection can overcome poor distribution. I spent months perfecting my elbow angle only to realize my shots were still spraying because I was tamping down on uneven mounds. If you see why your coffee grounds are clumping like little rocks, you need to address that before the tamper even touches the basket. Those clumps create pockets of different densities within the basket. When you apply pressure, the tamper creates a seemingly flat surface, but the ‘insides’ of the puck remain inconsistent. This is a primary reason for how to prevent channelling in a bottomless portafilter shot effectively—you have to stir or ‘WDT’ those grounds first. Think of tamping as the final seal on a well-prepared bed, rather than a way to fix a mess. By shifting your focus from brute force to even preparation, you’ll find that your wrist pain disappears and your shots become remarkably sweeter and more consistent.
Stop letting old coffee oils ruin your fresh beans
I used to think my grinder was broken every time my flavor profile shifted for no reason. It turns out, I was just being negligent. Even if you have the top-rated espresso machines and the world’s most expensive beans, they will taste like ash if you are grinding through months of rancid buildup. I finally learned that the best way to clean a grinder without losing your settings is to use a dedicated vacuum and a stiff brush weekly. It prevents that stale, oily residue from tainting your morning cup and keeps the motor running smoothly. If you have ever noticed that the reason your grinder adjustment ring feels gritty or stuck is usually fine dust migrating into the threads, you will understand why deep cleaning is not just for aesthetics—it is for the longevity of your investment.
How do I maintain my home espresso setup over time?
Consistency is not just about the beans; it is about the environment inside your machine. I did not realize how much my local tap water was sabotaging my shots until I learned how to tell if your water is too soft for brewing. Too soft, and the espresso lacks body; too hard, and you are looking at a dead heating element within a year. According to Dr. Christopher H. Hendon, a computational chemist at the University of Oregon, the specific mineral composition of your water—specifically the magnesium and calcium levels—dictates which flavor molecules are pulled from the bean. Without a solid filtration routine, you will eventually need to know how to tell if your machine boiler is accumulating lime scale before your thermal stability drops. I now treat my descaling schedule like a sacred ritual because once those internal copper lines are choked, your machine is on borrowed time.
The future of espresso is smarter, not harder
I predict that we are moving toward a world where ‘dialing in’ is handled by real-time sensors rather than trial and error. We are already seeing grinders that weigh the dose to the tenth of a gram, and soon, AI-integrated apps will suggest grind adjustments based on humidity sensors. For now, we still have to use our brains and hands. A simple trick I swear by is managing static; if you understand why your coffee beans are sticking to the sides of the hopper, you can use the Ross Droplet Technique to keep your workspace clean. Don’t wait until your machine starts making weird noises to care for it. Go ahead and learn how to clean your grinder’s discharge chute with a pipe cleaner tonight. Your taste buds—and your wallet—will thank you for the extra five minutes of effort.
Hard Truths I Discovered by Pulling 10,000 Shots
Looking back at my early days of mastering the art of home espresso, I realize that most of my frustrations weren’t caused by my beans, but by my ego. I thought I could out-muscle physics. First, the ‘first shot of the day’ is often a lie told by your equipment. If you don’t account for why your coffee grinder retains more grounds than it should, you are tamping stale coffee before you even begin. Second, your mental state matters. When I’m rushed, my elbow flares out, and I lose that 90-degree alignment. Slow down. Third, expensive top-rated espresso machines can’t compensate for a lumpy puck. If you don’t understand why your coffee grounds are clumping together, your tamping pressure will never be even, no matter how perfect your posture is.
The Gear That Actually Saved My Wrists
If you want to protect your joints while chasing the perfect extraction, you need to curate your barista gear with intent. I personally recommend investing in a weighted stainless steel tamper with an ergonomically shaped handle—wood feels warmer and offers a better grip than cold plastic. To keep your work surface stable, a thick silicone tamping mat is non-negotiable; it’s the only way to figure out how to fix a portafilter that wont stay level during the press. Finally, I suggest using a small mirror to watch your bottomless portafilter. Seeing the results in real-time is the best feedback loop for learning how to prevent channelling in a bottomless portafilter shot without straining your neck to look under the group head.
Don’t Let the Learning Curve Steal Your Joy
It is easy to get bogged down in the technicalities of degrees and pounds of pressure, but remember why you started this journey. You wanted a better cup of coffee and a moment of peace in your morning. Mastering the art of home espresso is a marathon, not a sprint. Every sore wrist is just a signal to adjust your stance, and every channeled shot is a lesson in distribution. Be patient with yourself and your equipment. As you refine your movement, the process will become second nature, leaving you with nothing but the aroma of a perfectly pulled shot. What’s the one part of your morning routine that still feels a bit ‘clunky’? Let’s troubleshoot it together in the comments below!