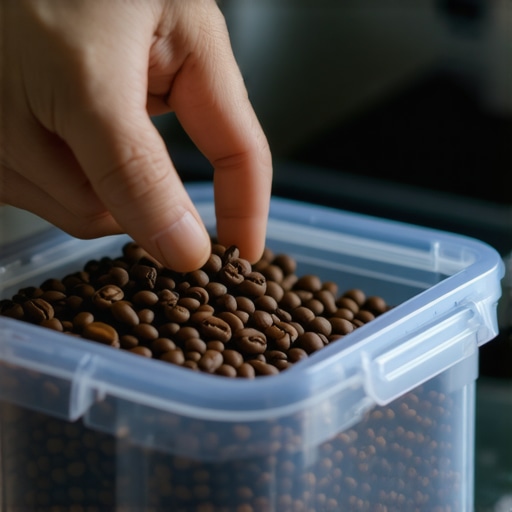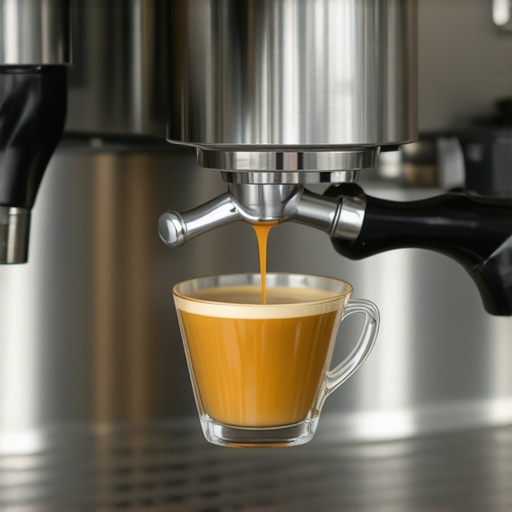
The Reality of Using Pre-Ground Coffee in a Pro Machine
It was a morning like any other. I had my trusted espresso machine, a freshly ground batch of beans, and plans for a perfect shot. But as I pulled the lever, I was met with a disappointing sputter, a lackluster crema, and that familiar, frustrating feeling—”Why isn’t this working right?” That lightbulb moment hit me hard: I had skipped one crucial step in my coffee ritual—using freshly ground beans instead of pre-ground coffee.
Why Convenience Might be Costing Your Espresso Quality
For years, I believed that grabbing pre-ground coffee from the store was a time-saver. After all, who has the time to grind beans every morning? But the truth is, relying on pre-ground coffee often leads to inconsistent extraction, lost flavor nuances, and a taste that just doesn’t match the vibrant profile of freshly ground beans. The **oxidation process** begins as soon as beans are ground, and this exposure to air significantly diminishes freshness—sometimes within minutes, according to expert advice.
Here’s the kicker: Many home baristas make the mistake of thinking that pre-ground coffee is just as good as freshly ground. Spoiler alert: It isn’t. The grind size consistency, aroma, and freshness all suffer, which directly impacts the quality of your shot. And if you’re like me, you might have spent hundreds on a high-end machine, only to sabotage your efforts with a bag of pre-ground that doesn’t match your grinder or extraction goals. For more insights on optimizing your setup, check out these beginner-friendly tips.
So, why does this matter right now? Because more than ever, home baristas are invested in achieving café-quality espresso. But without understanding the *why* behind fresh grounds, you’ll keep battling inconsistent results. Trust me, I’ve been there, and I’ve learned that the tiny details—like using pre-ground coffee—can make or break your brew. Ready to discover how to fix this common mistake and elevate your espresso game? Let’s dive into what you need to know to turn pre-ground frustration into fresh, flavorful success.
Is Pre-Ground Coffee Actually Worth the Hype? The Skeptic’s Question
When I first started, I was skeptical too. I wondered if the convenience truly justified sacrificing freshness. The real answer? Not really. The subtle, complex flavors of quality beans diminish rapidly once ground. An early mistake I made was assuming that all coffee grounds are created equal—that a quick pre-ground bag could replace fresh grinding. It not only compromised my shots but also taught me a vital lesson about respecting the craft of coffee making. For better results, I eventually started investing in a good grinder and learned to **maximize the potential** of my beans. If you’re curious about choosing the right grinder, I recommend visiting this guide.
Choosing the Right Grinder for Consistent Grounds
Start with your grinder—it’s the cornerstone of great espresso. I once struggled for months with inconsistent shots until I invested in a burr grinder. I remember a morning when I forgot to adjust the grind size; the shot was under-extracted, bitter, and almost undrinkable. I learned that selecting a conical burr grinder with stepless adjustment helps maintain precise grind size. For guidance, explore this detailed guide. Set your grinder to a fine, even consistency, similar to table salt, for optimal extraction.
Mastering the Tamping Technique
An often-overlooked step, tamping applies pressure to pack the coffee evenly. I once pressed too hard—making the puck compact and causing channelling. The key is consistent pressure—about 30 pounds—applied with a tamper that fits your portafilter. Think of tamping like evenly pressing a pancake: too much force ruins the texture. Practice with a bathroom scale if needed, to calibrate your pressure, ensuring uniformity. This consistency results in even water flow and balanced extraction, which you can improve by watching this tutorial.
Dialing In Water Temperature and Pressure
Water temperature profoundly impacts flavor. Too hot, and your shot can taste burnt; too cold, sour or weak. Use a thermometer to verify your machine is hitting around 200°F (93°C). When I noticed a bitter aftertaste in my first attempts, I realized my machine’s temp was off. Adjustments might involve tweaking your machine’s boiler settings or using a PID controller for precision. Also, pressure matters—aim for around 9 bars during extraction. An espresso shot that pulls too quickly or slowly indicates pressure issues, which are fixable with proper calibration. For detailed calibration techniques, consult this article. Regularly cleaning your machine’s components ensures consistent temps and pressure, preventing common issues.
Implementing Proper Extraction Timing
Extraction time influences flavor extraction. Aim for a shot pulling between 25-30 seconds. I once rushed my shot, pulling under 20 seconds; the result was sour and underdeveloped. Using a timer helps monitor this process. Adjust your grind size or tamping pressure if the shot is too fast or slow. For instance, if your shot takes longer than 30 seconds, try a coarser grind—think of it as giving the water an easier path. Conversely, if it’s under 20 seconds, dial the grind finer. Practice with a scale to optimize dose weight for consistency. For more precise timing, revisit this guide. Consistent extraction yields a balanced, flavorful espresso every time.
Optimizing Milk Frothing for Creamy Microfoam
Although not part of the core espresso process, mastering milk frothing adds the finishing touch. The goal is to create silky, fine bubbles—microfoam—that enhances flavor and presentation. I learned to position the steam wand just below the surface of the milk and tilt my pitcher to control whirlpool motion. For oat milk or alternative options, proper steaming prevents separation and ensures smooth texture—see this technique. Practice small steams, and always clean your wand after each use to avoid buildup that ruins the microfoam quality. Achieving consistency here multiplies the pleasure of your homemade espresso drinks.
Regular Maintenance Keeps Your Equipment in Top Shape
A clean machine is crucial. I schedule weekly backflushing and descaling with mild solutions to prevent clogs and scale buildup. A clogged shower screen causes uneven water flow and weak extraction, so periodically check and replace it per this guide. Dull grinder burrs or worn seals can compromise flavor; replace or service components before issues cascade. Proper maintenance not only prolongs your equipment’s life but also ensures the best possible espresso shot with each brew.
By integrating these precise steps into your routine, you can significantly improve your home espresso quality—making each cup a delightful ritual rather than a morning gamble. Focus on the details, and over time, you’ll see consistent, barista-level results emerge from your kitchen.
Many home baristas operate under a series of assumptions that can hinder their coffee quality. While beginners often focus on picking the right machine or grinder, they might unknowingly fall into trapsof common misconceptions. One prevalent myth is that the latest espresso machine guarantees professional results. In reality, even high-end machines require precise calibration and technique to truly shine. According to expert baristas highlighted in this guide, machine quality alone doesn’t compensate for skillful operation.
Another nuance many miss involves the milk frothing process. A frequent mistake is relying solely on automatic systems without understanding the importance of manipulating steam pressure and positioning—factors that significantly influence microfoam texture. Specialized frothers are powerful tools, but mastering manual control yields consistently better results. Push past the perceived convenience, and you’ll unlock richer textures and flavors.
When it comes to coffee grinders, some believe that the most expensive model guarantees perfection. However, grinder calibration and maintenance matters more than price alone. Dull burrs or misaligned settings can produce uneven grounds, causing inconsistent extraction. Remember, a well-maintained grinder tailored to your espresso preferences is the true cornerstone of quality brews.
Why Does Machine Calibration Matter More Than Scratch-Resistant Finish?
Advanced enthusiasts often overlook that temperature stability and pressure calibration are critical. An espresso shot may taste burnt or sour depending on subtle deviations in temperature and pressure, which are not always obvious visually. A comprehensive study by industry experts confirms that small adjustments in these parameters can dramatically enhance flavor profile and consistency. Investing in a PID controller or regularly verifying your machine’s calibration can make a noticeable difference—and save money in the long run.
In essence, achieving a truly excellent home espresso involves more than just getting the gear right. It demands understanding and fine-tuning nuanced variables—like grind size, water temperature, tamping pressure, and maintenance routines—that many overlook. Stepping into this deeper level of knowledge transforms your routine into an art form. Have you ever fallen into this trap? Let me know in the comments and share your experiences!
Keeping Your Equipment in Prime Condition
Investing in high-quality espresso machines and accessories is just the first step; routine maintenance is essential to ensure consistent performance and longevity. I personally swear by using a dedicated barista gear maintenance kit that includes soft brushes, descaling solutions, and silicone lubricants. Regularly flushing your machine with descaling agents, such as Vesuvius or Saeco, removes mineral deposits that can affect temperature stability and pressure, thus preserving flavor quality over time.
For example, I schedule descale sessions every 2-3 months, especially in hard water regions. Having a schedule prevents scale buildup that could lead to costly repairs or inconsistent shots. Checking seals and gaskets monthly—like the group head leak—keeps your machine sealed tight and ensures optimal water flow. Remember, even minor leaks or blockages can dramatically impact your brew’s flavor and extraction time.
How do I maintain my grinder for peak performance?
Grinding is the foundation of good espresso, so a well-maintained grinder is non-negotiable. I clean my burrs weekly using a specialized burr cleaning brush and run grinder-cleaning pellets every few months. This removes static and fine coffee dust that can alter grind consistency. Dull burrs, which you can identify with this test, produce uneven grounds, leading to channeling and inconsistent extraction. Replacing burrs before they become too dull ensures even particle size, crucial for crema quality.
Tools That Empower You for Consistent Shots
Beyond basic equipment, having the right tools elevates your espresso game. For instance, I use a precision tamper that fits snugly into my basket—this helps achieve uniform tamping pressure, which I always calibrate to 30 pounds. A digital scale ensures accurate dosing, preventing over- or under-extraction.
For water quality, I rely on a dedicated water filter to minimize mineral deposits and flavor impurities. This preventative step protects both my machine and the flavor integrity of my espresso. Upgrading to a professional-grade portafilter enhances stability and durability, supporting consistent tamping and extraction.
Where Trend Is Heading
Looking forward, I believe automation and smart monitoring tools will become standard for home baristas. Devices that measure water temperature, pressure, and even flow rate in real-time—integrated via app—will help identify issues before they affect flavor. For example, future espresso machines might incorporate smart sensors to automatically adjust pressure profiles during the shot, mimicking professional calibration. Embracing these advancements now will prepare you for an increasingly tech-enabled brewing experience.
How do I maintain my espresso setup over time?
The key to long-term success is consistency. Set a weekly checklist that includes descaling your machine, cleaning grinder burrs, checking seals, and calibrating your scale. Don’t forget to clean your milk frother—the technique for cleaning ensures smooth operation and prevents bacterial buildup. Additionally, periodically reviewing your gear’s calibration, replaced parts, and overall setup helps you stay in control of your brew quality. Start implementing these maintenance routines today and notice the difference in every cup.
Lessons That Changed My Home Espresso Journey
- Embracing Imperfection: I realized that perfection isn’t the goal—consistency is. Small adjustments and patience turned my sporadic shots into predictable delights.
- The Power of Routine Maintenance: Regular cleaning and calibration might seem tedious, but they are the secret sauce behind breathtaking espresso every time.
- Learning from Failures: Every off shot taught me something new. Embracing these mishaps made me a better barista at home.
- The Value of Deep Tuning: Fine-tuning grind size, temperature, and pressure has the biggest impact. It’s like tuning a musical instrument—small tweaks yield harmony.
- Patience Over Speed: Rushing through steps sabotages quality. Slowing down to perfect each detail elevated my espresso game remarkably.
Curated Arsenal for Espresso Enthusiasts
My absolute go-to resource is this comprehensive gear guide. It helps me choose equipment that truly fits my routines and goals, avoiding costly mistakes. I also rely heavily on this detailed grinder review — it’s the backbone of my consistent shots. Finally, I keep this beginner-friendly guide bookmarked. It’s packed with insights that remind me how to refine my technique as I progress.
Your Turn to Elevate
Building a home espresso setup is a rewarding journey that never really ends. Each tweak, each lesson learned, gets you closer to that perfect shot. Don’t hesitate to experiment, ask questions, and share your progress. Remember, every barista was once a beginner—what’s holding you back from becoming an espresso artist? Keep pushing boundaries, and you’ll see your skills flourish over time.
What’s the next small improvement you’re planning to try in your espresso routine? Share below and let’s grow together!
,