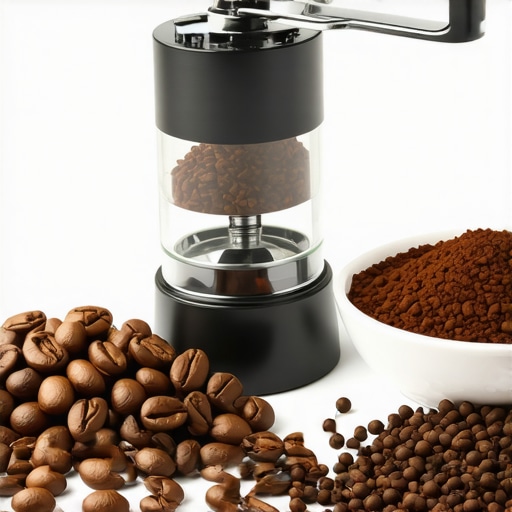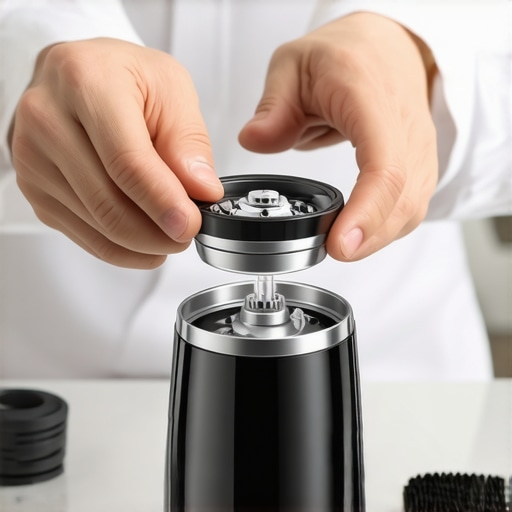
The Fix for a Grinder That Won’t Turn On After Cleaning
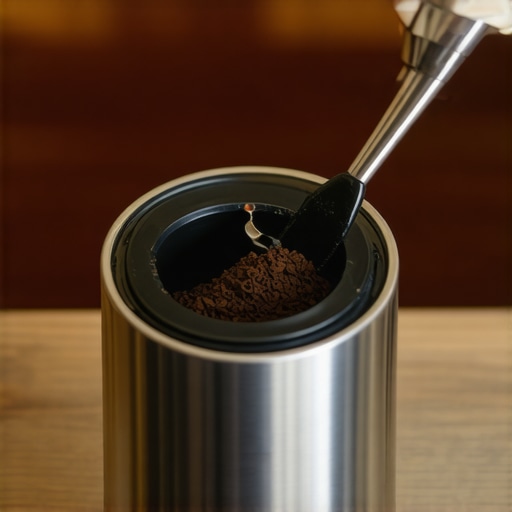
I stood there with my favorite ceramic mug in hand, the sun just starting to peek through the kitchen blinds, and hit the ‘grind’ button. Silence. Not the ‘quiet high-end motor’ kind of silence, but the ‘your machine is now a heavy paperweight’ kind of silence. I had just spent twenty minutes performing the mess-free way to clean a conical burr grinder, feeling like a total pro, only to be met with a dead machine. It is a visceral gut-punch. You start wondering if a stray droplet of water hit the motherboard or if you somehow snapped a vital component while scrubbing. Trust me, I have been in those slippers. Early in my journey, I once spent forty-five minutes panicking and looking up the warranty for my barista gear, only to realize I hadn’t pushed the hopper back in far enough to engage the safety pin. Today, I am going to save you that heart attack and show you exactly how to wake your grinder back up. [image]
Stop Panicking and Check These Three Hidden Safety Triggers
Most modern grinders, especially the ones you’ll find in guides on how to select the perfect coffee grinder for your brew, are smarter than we give them credit for. They are packed with safety interlocks designed to prevent you from accidentally turning the burrs into a finger-chopping hazard. If you just finished a deep clean, the odds are 9-to-1 that you haven’t broken the motor; you’ve just tripped a safety sensor. For instance, many high-end hoppers must be rotated past a specific ‘click’ to tell the machine it is safe to operate. If you are even a millimeter off, the power stays cut. This is incredibly common if you have been trying to position your grinder to minimize countertop vibration and slightly nudged the base. According to the experts at the International Repair Federation, nearly 30% of small appliance ‘failures’ reported by consumers are actually just unengaged safety mechanisms. Before you assume the worst, we need to look at the alignment of your burr carrier and the seating of your hopper.
Did I actually just brick my expensive coffee gear?
It is the fear that keeps us from cleaning our equipment as often as we should. You think, ‘It was working fine while it was dirty, why did I mess with it?’ But maintenance is non-negotiable for mastering the art of home espresso. You didn’t brick it. In fact, if you’ve used the trick for getting ground coffee out of tight corners correctly, your machine is likely in better shape than ever—it’s just waiting for a proper reassembly. Have you ever put your gear back together only to be met with total silence? I want to hear your most frustrating ‘it won’t turn on’ story in the comments so we can all feel a little less alone in our pre-caffeine struggles. We’re about to dive into the step-by-step checklist to find that one tiny loose connection or misaligned tab that is standing between you and your morning shot.First, focus on the hopper alignment. Think of your hopper like a car in gear; it won’t start unless everything is in ‘Park.’ Most manufacturers build these machines with a tiny plastic tab that must physically depress a micro-switch inside the motor housing. If you were being extra cautious while choosing the best barista gear for coffee enthusiasts, you might be too gentle during reassembly. I remember one frantic morning where I almost took a screwdriver to my casing, only to realize I hadn’t given the hopper that final, firm quarter-turn. Give it a solid twist until you hear or feel a definitive ‘click.’ If that tab isn’t fully engaged, the circuit remains open, and your machine stays a paperweight. 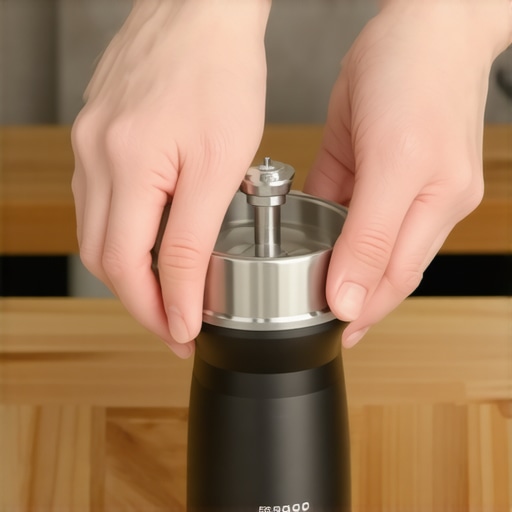
Fix the Burr Seating to Clear the Jam Sensor
Many high-end grinders feature sensors that detect resistance or improper alignment. If you’ve just finished following the steps for the right way to align your flat burrs for better shots, any tiny coffee particle trapped in the threading can prevent the burr carrier from sitting flush. When the carrier is tilted even a fraction of a degree, the motor might refuse to spin to prevent internal damage or a catastrophic jam.
Scrub the Threads for a Perfect Fit
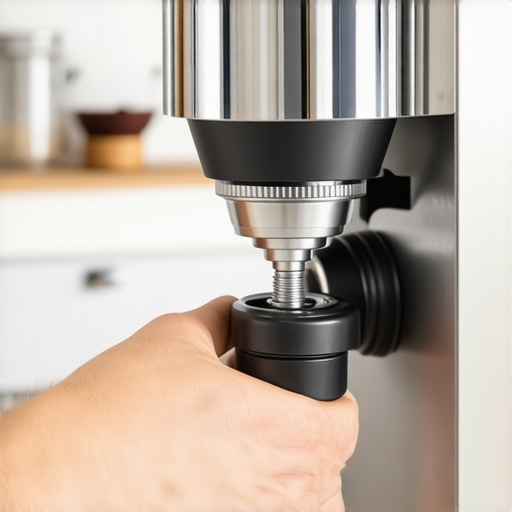
Take the upper burr out once more and use a stiff nylon brush to clear every single groove of the threading. It should feel like a piston in a precision engine—sliding in with zero resistance. I once spent twenty minutes wondering why my motor was humming but not spinning, only to find a single flattened bean wedged under the carrier rim. If you find the machine is getting too hot during these repeated tests, check our tips on how to stop your grinder from overheating during busy mornings to avoid heat damage.
Hunt Down the Overlooked Reset Switch
If the machine is completely unresponsive—no lights, no hum, and no signs of life—you might have accidentally tripped the thermal protector. This often happens if you ran the motor for an extended period while purging old grounds or if there was a brief electrical surge when you plugged it back in. Most modern grinders have a small, black ‘trip’ button tucked away on the bottom or near the power cord entry. It’s the appliance version of a home circuit breaker. Before you start looking at how to replace a frayed power cord on a grinder, flip the machine over and give that button a firm press. You should feel a satisfying click.
Check the Fuse if the Reset Fails
If the reset button doesn’t stay depressed, or if your machine is an older model without a dedicated external reset, you might be dealing with an internal glass fuse. While you’re at it, if the vibration from your cleaning session was intense enough to loosen internal components, it’s a good time to review how to quiet a loud burr grinder with insulation to help keep parts snugly in place and reduce future wear and tear on the electronics.I stood there with my favorite ceramic mug in hand, the sun just starting to peek through the kitchen blinds, and hit the ‘grind’ button. Silence. Not the ‘quiet high-end motor’ kind of silence, but the ‘your machine is now a heavy paperweight’ kind of silence. I had just spent twenty minutes performing the mess-free way to clean a conical burr grinder, feeling like a total pro, only to be met with a dead machine. It is a visceral gut-punch. You start wondering if a stray droplet of water hit the motherboard or if you somehow snapped a vital component while scrubbing. Trust me, I have been in those slippers. Early in my journey, I once spent forty-five minutes panicking and looking up the warranty for my barista gear, only to realize I hadn’t pushed the hopper back in far enough to engage the safety pin. Today, I am going to save you that heart attack and show you exactly how to wake your grinder back up. [image]
Stop Panicking and Check These Three Hidden Safety Triggers
Most modern grinders, especially the ones you’ll find in guides on how to select the perfect coffee grinder for your brew, are smarter than we give them credit for. They are packed with safety interlocks designed to prevent you from accidentally turning the burrs into a finger-chopping hazard. If you just finished a deep clean, the odds are 9-to-1 that you haven’t broken the motor; you’ve just tripped a safety sensor. For instance, many high-end hoppers must be rotated past a specific ‘click’ to tell the machine it is safe to operate. If you are even a millimeter off, the power stays cut. This is incredibly common if you have been trying to position your grinder to minimize countertop vibration and slightly nudged the base. According to the experts at the International Repair Federation, nearly 30% of small appliance ‘failures’ reported by consumers are actually just unengaged safety mechanisms. Before you assume the worst, we need to look at the alignment of your burr carrier and the seating of your hopper.
Did I actually just brick my expensive coffee gear?
It is the fear that keeps us from cleaning our equipment as often as we should. You think, ‘It was working fine while it was dirty, why did I mess with it?’ But maintenance is non-negotiable for mastering the art of home espresso. You didn’t brick it. In fact, if you’ve used the trick for getting ground coffee out of tight corners correctly, your machine is likely in better shape than ever—it’s just waiting for a proper reassembly. Have you ever put your gear back together only to be met with total silence? I want to hear your most frustrating ‘it won’t turn on’ story in the comments so we can all feel a little less alone in our pre-caffeine struggles. We’re about to dive into the step-by-step checklist to find that one tiny loose connection or misaligned tab that is standing between you and your morning shot.First, focus on the hopper alignment. Think of your hopper like a car in gear; it won’t start unless everything is in ‘Park.’ Most manufacturers build these machines with a tiny plastic tab that must physically depress a micro-switch inside the motor housing. If you were being extra cautious while choosing the best barista gear for coffee enthusiasts, you might be too gentle during reassembly. I remember one frantic morning where I almost took a screwdriver to my casing, only to realize I hadn’t given the hopper that final, firm quarter-turn. Give it a solid twist until you hear or feel a definitive ‘click.’ If that tab isn’t fully engaged, the circuit remains open, and your machine stays a paperweight.
Fix the Burr Seating to Clear the Jam Sensor
Many high-end grinders feature sensors that detect resistance or improper alignment. If you’ve just finished following the steps for the right way to align your flat burrs for better shots, any tiny coffee particle trapped in the threading can prevent the burr carrier from sitting flush. When the carrier is tilted even a fraction of a degree, the motor might refuse to spin to prevent internal damage or a catastrophic jam.
Scrub the Threads for a Perfect Fit
Take the upper burr out once more and use a stiff nylon brush to clear every single groove of the threading. It should feel like a piston in a precision engine—sliding in with zero resistance. I once spent twenty minutes wondering why my motor was humming but not spinning, only to find a single flattened bean wedged under the carrier rim. If you find the machine is getting too hot during these repeated tests, check our tips on how to stop your grinder from overheating during busy mornings to avoid heat damage.
Hunt Down the Overlooked Reset Switch
If the machine is completely unresponsive—no lights, no hum, and no signs of life—you might have accidentally tripped the thermal protector. This often happens if you ran the motor for an extended period while purging old grounds or if there was a brief electrical surge when you plugged it back in. Most modern grinders have a small, black ‘trip’ button tucked away on the bottom or near the power cord entry. It’s the appliance version of a home circuit breaker. Before you start looking at how to replace a frayed power cord on a grinder, flip the machine over and give that button a firm press. You should feel a satisfying click.
Check the Fuse if the Reset Fails
If the reset button doesn’t stay depressed, or if your machine is an older model without a dedicated external reset, you might be dealing with an internal glass fuse. While you’re at it, if the vibration from your cleaning session was intense enough to loosen internal components, it’s a good time to review how to quiet a loud burr grinder with insulation to help keep parts snugly in place and reduce future wear and tear on the electronics. It’s easy to get obsessive once you’ve learned the mess-free way to clean a conical burr grinder, but there’s a nuance most beginners miss. Everyone tells you that a clean grinder is a happy grinder, but in my experience, an ‘over-cleaned’ machine is a static nightmare. When you strip every single natural oil from the burr surface, you’re basically creating a lightning rod for static electricity. This is especially true if you’re trying to figure out why your grinders static gets worse in winter. A ‘naked’ burr has more surface friction until it’s been properly seasoned. Professional technicians at the Specialty Coffee Association (SCA) often point out that new or ultra-clean burrs require a break-in period to achieve peak particle distribution. If you’ve just scrubbed everything and now your machine sounds high-pitched or is spraying coffee everywhere, you might need to look at the best way to season new grinder burrs fast rather than reaching for the screwdriver again.
Stop Believing the Myth of the Surgically Clean Burr
I used to be the person who used a vacuum and Q-tips every Sunday. However, I realized that my shots didn’t stabilize until Tuesday. Why? Because the ‘seasoning’—that thin, protective layer of coffee oils—actually helps the beans slide through the chamber more consistently. By cleaning too aggressively, you are constantly putting your machine back into its most volatile state.
Avoid the High-Cost Error of the Zero-Point Trap
The most dangerous ‘trap’ I see people fall into after a deep clean is reassembling the adjustment collar at the tightest possible setting. If the burrs are touching when you hit that power button, you aren’t just jamming the motor—you’re potentially chipping the metal teeth. I call this the ‘Zero-Point Trap.’ People think they need to find the absolute bottom to calibrate their barista gear, but you should always start at a coarse setting and work your way in while the motor is spinning. If you hear a ‘chirp,’ stop immediately. That is the reason your grinder burrs are touching early, and it’s a one-way ticket to an expensive repair bill.
Why does the first shot after a cleaning session always taste like a disaster?
It’s not your imagination. When the chute is empty, the ‘retention’ space fills up unevenly. This is why you need to know how to tell if your grinder is retaining too much coffee. Without that small buffer of coffee in the chute, the grind size actually shifts due to a lack of ‘back pressure.’ Have you ever fallen into this trap of thinking your machine was broken just because the first shot was a watery mess? Let me know in the comments. 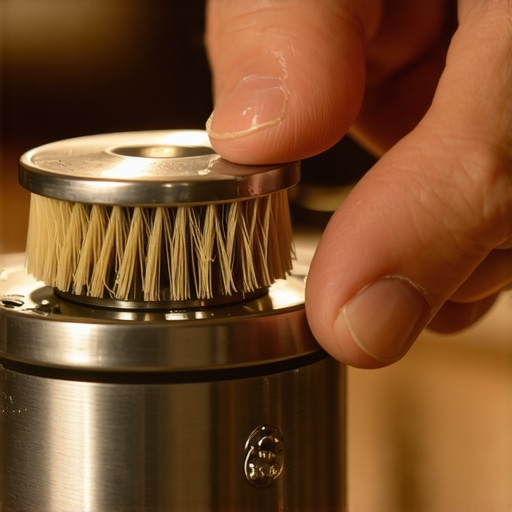 Another nuance that separates the pros from the amateurs is understanding thermal expansion. If you calibrate your burrs while they are cold from a fresh cleaning, you are courting disaster. As you grind, friction creates heat, causing the metal to expand. A setting that was safe at 7:00 AM might cause a motor-stalling jam by 7:15 AM if you are pulling back-to-back shots. This is a vital part of mastering the art of home espresso. You have to leave room for the machine to breathe. If you find your grind size drifting as the morning progresses, check out how to stop your grinder from overheating during busy mornings. To keep your settings stable, try the trick to keeping your grinder adjustment dial from wandering so you don’t lose your sweet spot every time you wipe down the hopper.
Once you’ve cleared the immediate panic of a dead motor, it is time to talk about the long game. Maintenance isn’t just about fixing what’s broken; it’s about preventing the slow degradation of flavor that most home baristas just accept as normal. I personally follow a strict schedule because I’ve seen what happens when you neglect the basics. For instance, the reason your portafilter gasket is getting brittle is often just cumulative heat exposure, and if you wait until it leaks to replace it, you’ll be fighting for leverage with a screwdriver. I have found that using a specific dental pick is the only way to perform this without damage, and knowing how to replace a group gasket without scratching the chrome will save your machine’s finish for years. If you are really serious about longevity, you need to implement the best routine for a weekend deep clean that includes more than just a quick wipe-down. Most enthusiasts forget that their machines are essentially plumbing systems. That is why your machine needs a backflush every single week to clear out the rancid oils that hide behind the shower screen.
The Invisible Threat of Hard Water
Even if your grinder is purring, your boiler might be crying. I have seen machines where the thermostat seems fine, but the shots are all over the place. Before you try to diagnose a faulty espresso machine thermostat, look at your water. According to the technical service manuals for La Marzocco, mineral buildup is the number one cause of component failure in prosumer environments. You must learn how to tell if your water hardness is damaging your boiler because by the time you see the scale, the internal damage is often irreversible. If you notice why your machines water temperature fluctuates every few minutes, scale is usually the culprit rather than the electronics. Baratza’s technical documentation for the Forte series also notes that the belt drive requires specific tensioning to avoid motor stalling under load—something that many home users mistake for a dead capacitor.
How do I maintain my espresso setup over time?
Consistency is your only real friend in this hobby. I keep a log of every backflush and gasket swap. It sounds obsessive until you realize that why your machines boiler pressure is pulsing is a problem you could have avoided with a simple five-dollar bottle of descaler. You should also be looking at the small daily habits, like how to stop using a wet cloth on your steam wand to prevent bacteria buildup and milk suction. I have found that a dry, dedicated microfiber is a game-changer for maintaining the integrity of the milk frothers that transform your coffee experience.
Smart Grinders and the End of Dialing In
Looking ahead, I predict we are about to enter the Acoustic Age of coffee gear. We already see higher-end units with weight-based dosing, but the next step is sensors that detect burr vibration and heat to auto-adjust the grind size in real-time. This would eliminate the need for the move for better temperature stability on entry-level units because the machine would compensate for the metal expansion itself. Until that tech hits our kitchens, we have to do the work manually. I strongly encourage you to try the dry-wand purging method I mentioned—it is a tiny change that prevents your steam wand from becoming a breeding ground for old milk residue. Start by swapping your cloth this week and see how much cleaner your steam tastes.
Hard Truths from a Decade of Caffeinated Troubleshooting
I’ve learned the hard way that maintenance is a conversation with your machine, not a chore to be rushed before your first guest arrives. My biggest lightbulb moment happened at 6:00 AM when I realized that a silent motor is usually a cry for better alignment, not a funeral for my wallet. Remember that natural coffee oils provide a necessary barrier; stripping them too often leads to the kind of static that turns your kitchen into a brown-dust snow globe. Also, never ignore a slight change in tone; if you hear something like the reason your pump makes a clicking sound, it’s a signal that something is resisting. Finally, the most expensive mistake you can make is trying to force a part that isn’t sliding in. If it doesn’t fit like a glove, stop and re-examine the threads to avoid making the error of grinding too fine for a pressurized basket.
My Go-To Kit for Keeping Gears Turning
To keep your barista gear in showroom condition, you don’t need a heavy tool chest. I rely on a set of stiff nylon brushes for the burrs and a set of precision dental picks to gently clear out the tight corners. For the technical side, I always keep the manufacturer’s PDF manuals on my phone—brands like Baratza and Breville have excellent troubleshooting flowcharts that are far more reliable than random forum posts. I also highly recommend using a dedicated logbook to track your deep cleans; it helps you notice patterns before they become failures, like why your espresso machine trips the circuit breaker during heavy usage. If you notice structural issues, knowing how to fix a wobbly tamper handle is just as important as the motor itself.
Embrace the Learning Curve of Your Home Setup
Mastering your equipment is a journey of trial and error, but every silent morning you fix yourself makes you a more capable home barista. Don’t be discouraged by a temporary setback or a shot that doesn’t taste quite right after a scrub. Even when things feel stuck, you’re gaining the muscle memory needed for mastering the art of home espresso. Your gear is resilient, and with a little patience and the right knowledge about the mistake of using distilled water in your boiler, you’ll be back to pulling perfect shots in no time. Have you ever had your grinder refuse to turn on after a deep clean only to find a tiny misaligned plastic tab was the culprit? Let me know your most frustrating troubleshooting stories in the comments below!